Step-by-Step: Einem Kurs einen Aufgabenbaustein hinzufuegen und konfigurieren
Das Makro [layout] ist ein eigenständiges Makro und kann nicht inline verwendet werden. Klicke auf diese Nachricht, um Details zu erfahren.
{{/sv-translation}}
To integrate a course element into your course, proceed as follows:
1 | Open the course you want to edit. Use the pencil icon at the top of the page to open the editing mode. |
|
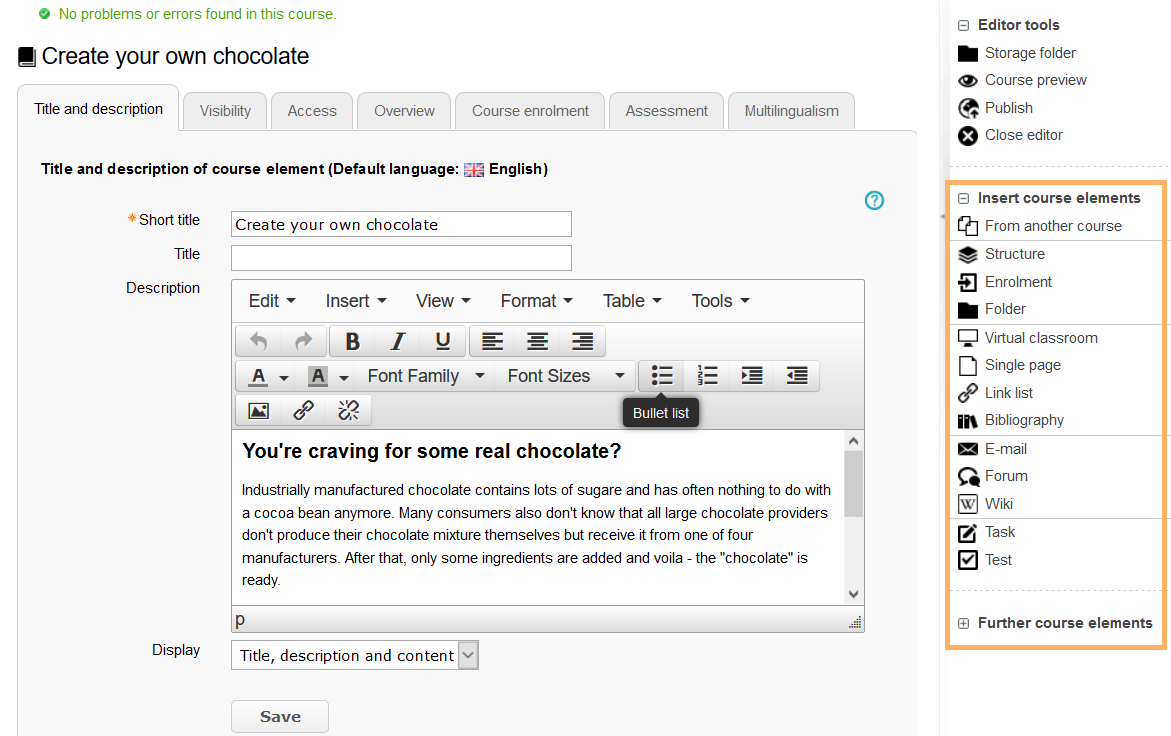
2 | Select a course element from the menu on the right. |
|
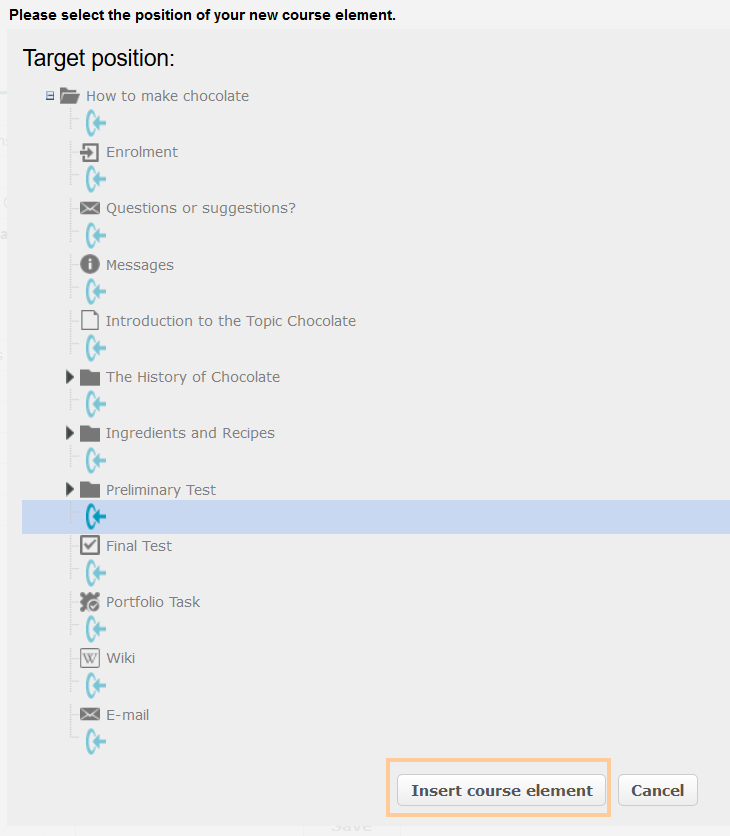
3 | In the new window, you can define the position of the new course element within your course structure (left navigation pane). The available positions are marked with an insert icon. To insert the new course element into an existing substructure, you need to open the substructure by clicking on the small triangle symbol next to its title. The area will open and you will again see insert icons at the positions which are available. Click on the insert icon at the desired position within the structure. The selected area will be highlighted. Confirm your choice with Insert course element. |
|
4 | The element will be inserted into the course structure at the selected position. Depending on the course element, you have to make additional configurations or add content in order to complete the configuration. For these changes to take effect, you must publish the course. The course element will then also become available in the course view. |
|
{{/sv-translation}}


