Warnung: Aus Sicherheitsgründen wird das Dokument in einem eingeschränkten Modus angezeigt, da es sich nicht um die aktuelle Version handelt. Dadurch kann es zu Abweichungen und Fehlern kommen.
Das Makro [layout] ist ein eigenständiges Makro und kann nicht inline verwendet werden. Klicke auf diese Nachricht, um Details zu erfahren.
Dieses Makro generiert eigenständige Inhalte. Als Konsequenz müssen Sie sicherstellen, dass Sie eine Syntax verwenden, die Ihr Makro von dem Inhalt davor und danach trennt, sodass es in einer eigenen Zeile steht. Zum Beispiel bedeutet dies in XWiki Syntax 2.0+, dass Sie 2 Zeilenumbrüche haben, die Ihr Makro von dem Inhalt davor und danach trennen.
Erweiterte Berechtigungen
The course element Bibliography provides you with a collection of literature. With one click, you can export all important information, such as the title, author, and year in BibTeX format (.bib). In addition, there are several general table functions available to you in the table head, such as the configuration of the displayed columns or the function for downloading the entire table. | |
As a user, you have access to the following functions in a course element of the type Bibliography :
| | With this option, you can save the data of selected entries as a .bib file to your computer. If there is a link included in the entry, you will be able to navigate directly to the referenced location of the resource.
How to do that?
- Open the course element Bibliography .
- Activate the checkbox in front of all entries you want to export.
- Then click on Export .
- The export of the directory will start automatically.
| |
|
| | InformationManueller Fortschritt Wurde für einen Kurs die Fortschrittsanzeige aktiviert, kann dieser Bausteintyp mit der Bestätigung durch Klick auf den Button Erledigt als abgeschlossen gekennzeichnet werden. Er erhält dann eine entsprechende Farbmarkierung im Kursmenü und im Detailbereich vor dem Titel des Bausteins. |
InformationYou can be assigned extended rights by a course supervisor. These rights will make additional functions, such as creating and editing entries, available to you. For further information about these functions, refer to the help section Functions in the course view.
The following functions are available to you in the course editor:
|
Click to open instructions on how to add a course element ...
Um einen Kursbaustein in Ihren Kurs einzubinden, gehen Sie wie folgt vor: | Öffnen Sie den Kurs, den Sie bearbeiten möchten. Nutzen Sie das Stift-Symbol im oberen Bereich des Kurses, um in die Editor-Ansicht zu gelangen. | | | Wählen Sie aus den angebotenen Kursbausteinen im Menü auf der rechten Seite mit einem Klick den gewünschten aus. | | | Im neuen Fenster bestimmen Sie die Position des neuen Kursbausteins in der Kursstruktur (linkes Navigationsfeld). Alle möglichen Einfügepositionen sind dabei mit einem Einfügesymbol gekennzeichnet. Damit der neue Baustein in eine bestehende Unterstruktur eingefügt werden kann, muss diese zuvor geöffnet werden. Klicken Sie dazu auf das Dreiecksymbol vor dem Titel. Der Bereich wird geöffnet und Sie sehen auch dort das Einfügesymbole an den verfügbaren Stellen. Klicken Sie an der gewünschten Position für den neuen Baustein auf das Einfügesymbol. Der gewählte Bereich wird farbig hinterlegt. Bestätigen Sie Ihre Wahl mit Klick auf die Schaltfläche Kursbaustein einfügen. | | | Der Baustein wird an die ausgewählte Stelle in die Kursstruktur im linken Bereich eingefügt. Je nach Kursbaustein müssen Sie weitere Konfigurationen vornehmen oder Inhalte des Kursbausteins angeben, um die Konfiguration vollständig abzuschließen. Damit die Änderungen wirksam werden und der Kursbaustein in der Kursansicht für die Teilnehmer verfügbar ist, müssen Sie den Kurs publizieren. | |
|
| In the course editor, you will find the following configuration tabs: |
Configuration options in the tab title and description ...

| |
|---|
| Sie müssen dem Kursbaustein einen Titel geben. Dieser darf maximal 100 Zeichen enthalten. Alle Sonderzeichen und Ziffern sind erlaubt. Der Titel erscheint im Navigationsmenü des Kurses sowie als Überschrift im Inhaltsbereich.
Änderungen zum Titel des ersten Kurselements, dem sogenannten Kurshauptknoten ......
Ändern Sie den Titel des ersten Kurselements, wird der neue Inhalt nur für den Kurshauptknoten übernommen und anschließend im geöffneten Kurs angezeigt. Wollen Sie stattdessen den Kurstitel selbst oder die Kursbeschreibung anpassen, ändern Sie dies über den Bereich Weitere Einstellungen zum Kurs. | | Sie können dem Kursbaustein einen Untertitel mit maximal 255 Zeichen geben. Alle Sonderzeichen und Ziffern sind erlaubt. Der Titel erscheint als Tooltip im Navigationsmenü sowie - wenn ausgewählt und entsprechend konfiguriert - als Untertitel im Inhaltsbereich. | | Sie können hier den Kursbaustein näher beschreiben. Die Beschreibung erscheint unter dem Titel im Inhaltsbereich. InformationDieser Zusatztext wird beim Öffnen des Kursbausteins abhängig von der Einstellung im Element Anzeige beim Nutzer dargestellt. Sieht der Nutzer den Zusatztext kann er ihn selbst auf- und zuklappen und damit direkt sehen oder ausblenden. | | Wählen Sie welche Informationen zum Kursbaustein in der Kursansicht angezeigt werden sollen: nur der Inhalt oder zum Beispiel auch der Titel und die Beschreibung. Alle Kursbausteine sind mit einer sinnvollen Voreinstellung belegt, meist mit der Einstellung Titel, Beschreibung und Inhalt. Diese können Sie entsprechend der Auswahlmöglichkeiten zu jedem Kursbaustein anpassen. | Link auf diesen Kursbaustein setzen | Jeder Kursbaustein ist über feste Link-Adressen erreichbar. Dazu wird jedem Kursbaustein jeweils eine interne sowie eine externe URL zugeordnet. Diese Direktlinks zu konkreten Bausteinen können Sie innerhalb von Kursen verwenden oder beispielsweise an Lernende weitergeben. Die URLs befinden sich unterhalb von Titel und Beschreibung des Bausteins und erscheinen, wenn Sie Link auf dieses Kursbaustein setzen wählen. - Externer Link: Um von einem anderen Kurs oder von außerhalb der Lernplattform auf diesen Kursbaustein zu verlinken, können Sie den externen Link verwenden und beispielsweise als href-Attribut in der gewünschten HTML-Seite einsetzen.
- Interner Link: Um von einem Kursbaustein innerhalb eines Kurses auf einen anderen zu verlinken, können Sie den internen Link als href-Attribut in der gewünschten HTML-Seite einsetzen.
| | Die ID-Nummer des Kursbausteins (unten rechts) benötigen Sie z. B. wenn Sie den Expertenmodus im Tab Sichtbarkeit oder Zugang nutzen möchten. |
|
|---|
| Visibility | If necessary, restrict the visibility of the course element here. For more information, see the Visibility help page. |
|---|
| Access | If necessary, restrict the visibility of the course element here. For more information, see the Access help page. |
|---|
| Here you can add, import, or export entries to and from the bibliography. Detailed instructions are given in the following section. InformationAs an author, you can also use all of these functions directly in the course view. |
|---|
| In this tab, different translations can be added to individual course element areas. |
|---|
|
| To add a bibliographical reference, two options are available: | This option allows you to import files in BibTeX format. You can upload files from your computer or access data stored in your personal folder.
Start import ...
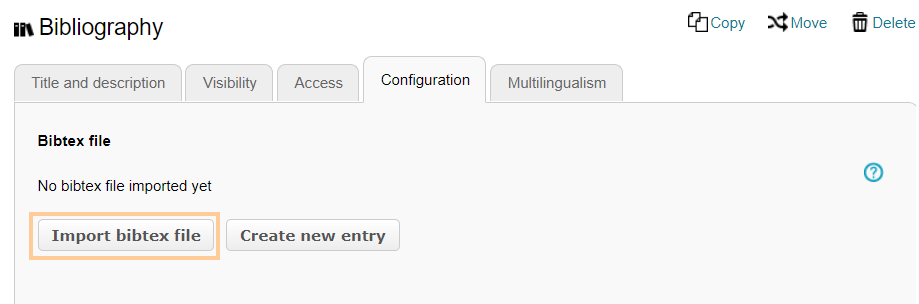
- Open the course editor of the course element Bibliography and go to the tab Configuration .
- Click on the button Import bibtex file .
| | 3. Now you have the following options: - Select folder (option 1) to import a BibTeX file from your personal folder or
- Upload file (option 2) to upload a BibTeX file from your computer
| | Option 1: - To use a BibTeX file from the personal folder, click the Select folder button.
- Then click on Select file and navigate to the desired resource.
- Confirm your choice with Select .
| | Option 2: - To upload a BibTeX file from your computer, click the Select file button.
- Navigate to the location of the desired file and select it.
- Confirm your choice with Upload .
| |
|
|---|
| With this button, new bibliography entries can be created in BibTeX format.
How to do that?
- Open the course editor of the course element Bibliography and go to the tab Configuration .
- Click on Create new entry .
| | 3. A window opens in which you can enter all necessary data (title, author, publisher, ISBN, year of publication, and website). 4. Confirm your entries with Save . | |
|
|---|
InformationWhen you create and import entries, the system automatically checks whether there are similar existing entries. If they have: - a similar name,
- a similar ISBN, or
- a similar DOI,
you can either replace the existing file or keep it and create a second entry. |
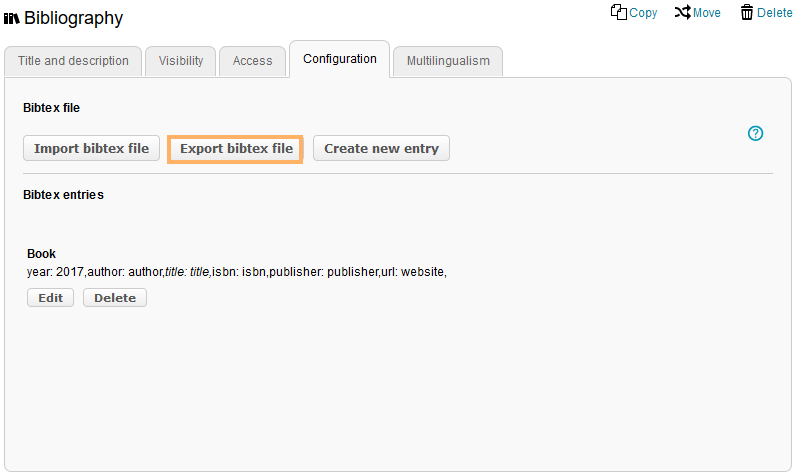
| | With this option, you can export all entries which have already been collected in this course element to a BibTeX file.
How to do that?
- Open the course editor of the course element Bibliography and go to the tab Configuration .
- Click on the button Export bibtex file . Then the usual download process will start.
| |
|
|---|
| Bibliography entries can be edited or deleted at any time.
Edit entry ...
- Open the course editor of the course element Bibliography and go to the tab Configuration .
- Select the entry you want to edit and click on Edit below the entry.
| | 3. Make your desired changes. 4. Click on Save to complete the editing process. | |
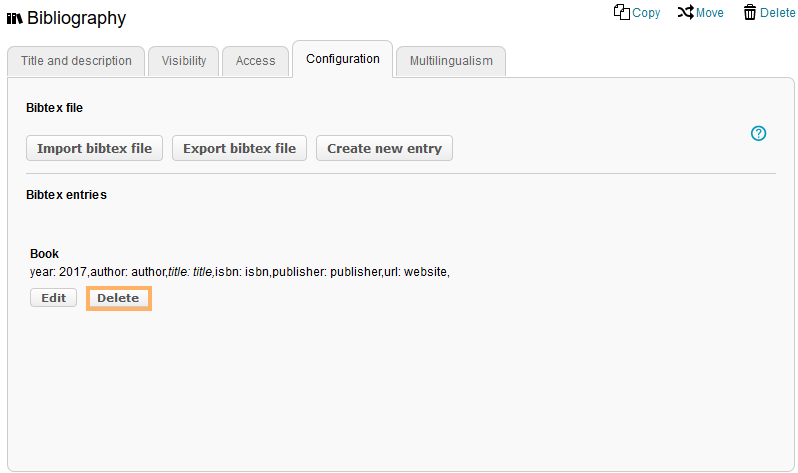
Delete entry ...
- Open the course editor of the course element Bibliography and go to the tab Configuration .
- Select the entry you want to delete and click on Delete below the entry.
| | 3. Confirm the deletion process with Yes . | |
|
|---|
|
The following functions are available to authors in the course view:
| | To create a new bibliography entry, click the New entry button. In the new window, fill in all the necessary data for the resource (ID, type, title, author). InformationWhen filling in the Other field, be sure to follow BibTeX's syntax. You will not be able to enter plain text in the field, but must insert your content in the form tag: value, e.g. publication: 1. edition. If you want to add multiple entries, you can separate them by a line break, comma, or semicolon. Click on Save to publish your entry in the course. It will then appear in the summary table. | |
|---|
| | To import entries, click the Import bibtex button. Select the desired file(s) and click on Import . InformationThe imported entries will be displayed in BibTeX format. This format determines, among other things, that all content in the columns Type and Other is displayed in lowercase. | |
|---|
| | Select the entry you want to delete by activating its checkbox. Then click the delete icon and confirm the deletion process with Delete . | |
|---|
| | To edit an existing entry, click on the pencil icon at the end of the table entry in the Actions column. Make your desired changes and click on Save to complete the editing process. | |
|---|
Erweiterte Berechtigungen