Warnung: Aus Sicherheitsgründen wird das Dokument in einem eingeschränkten Modus angezeigt, da es sich nicht um die aktuelle Version handelt. Dadurch kann es zu Abweichungen und Fehlern kommen.
Im Kursbaustein Themenvergabe werden alle vorhandenen Themen in einer tabellarischen Übersicht aufgelistet. Die Tabelle enthält je nach Konfiguration weitere zusätzliche Informationen. Beispielsweise können Titel des Themas, Verantwortliche, Termin der Abgabe sowie Anzahl der verfügbaren Plätze angezeigt werden. | |
Verfügbare Funktionen für Nutzer
Als Nutzer haben Sie in einem Kursbaustein Themenvergabe in der Themenübersicht folgende Möglichkeiten:
| In der Themenliste können Sie sich über ein Thema informieren und sich in das Thema einschreiben. Vorausgesetzt die Anzahl der maximalen Plätze wurde noch nicht erreicht und der Verantwortliche hat die Einschreibung freigeschaltet.
Wie geht das?
| Öffnen Sie den Kursbaustein Themenvergabe. Sie sehen eine Liste verfügbarer Themen.
| | | Mit Klick auf den Titel eines Themas öffnet sich die Detailansicht des Themas mit weiteren Einzelheiten. Hier können Sie beispielsweise den Zeitraum der Einschreibung und Abgabe zum Thema sehen oder zusätzliche Dokumente zum Thema finden. Klicken Sie auf den Button Auswählen, um sich für das Thema einzuschreiben. Alternativ finden Sie den gleichen Button auch in der Themenübersichtsliste. InformationDer Kursautor kann konfigurieren, ob Ihre Einschreibung in ein Thema erst durch einen Themenverantwortlichen bestätigt werden muss. In diesem Fall können Sie sich nur provisorisch einschreiben. Zusätzlich kann er festlegen, in wieviele Themen Sie sich einschreiben können. | | | Ein Icon in der Themenübersicht zeigt den aktuellen Status Ihrer Einschreibung in das Thema an: : Sie wurden für das Thema vorgemerkt. Der Themenverantwortliche muss Ihre Themenwahl noch bestätigen.
: Ihre Themenwahl wurde akzeptiert.
| |
|
| Sie können ein bereits ausgewähltes Thema wieder abwählen. Wurde das Thema jedoch bereits von einem Verantwortlichen akzeptiert, kann nur er die Nutzerwahl aufheben.
Wie geht das?
- Öffnen Sie den Kursbaustein Themenvergabe.
- Wählen Sie das Thema, welches Sie abwählen möchten aus. Wenn Sie die Schaltfläche Abwählen sehen, können Sie Ihre Auswahl rückgängig machen. Klicken Sie dazu einfach auf die Schaltfläche Abwählen.
| |
|
Mit Klick auf den Titel eines Themas öffnet sich in der Kursansicht der Detailbereich des gewählten Themas. Je nach Konfiguration durch den Kursverantwortlichen haben Sie hier folgende Möglichkeiten:
| In diesem Bereich können Sie Ihre Lösung zu Ihrem Thema abgeben. Je nach Konfiguration können Sie Dateien hochladen oder auch direkt in der Kursansicht neu erstellen.
Wie geht das?
Öffnen Sie den Kursbaustein Terminvergabe. Klicken Sie auf den Namen des Themas, für welches Sie eine Lösung abgeben wollen. | | Konfigurationsabhängig haben Sie folgende Optionen: - Eine Lösungsdatei in der Kursansicht erstellen (Option 1)
- Eine Lösungsdatei hochladen (Option 2)
Entscheiden Sie sich nun für eine der Optionen.
| | Option 1: - Klicken Sie auf die Schaltfläche Erstellen .
- Geben Sie nun einen Dateinamen und den Inhalt in die entsprechenden Textfelder ein.
- Fügen Sie optional eine Lizenz hinzu.
- Klicken Sie auf den Button Erstellen , um den Erstellvorgang abzuschließen.
- Das erstellte Dokument wird anschließend im Bereich Lösung abgeben aufgeführt.
| | Option 2: - Klicken Sie auf die Schaltfläche Upload.
- Laden Sie nun eine Datei hoch, indem Sie auf die Schaltfläche Datei auswählen klicken.
- Fügen Sie optional eine Lizenz hinzu.
- Bestätigen Sie den Vorgang, indem Sie auf den Button Upload klicken.
- Das hochgeladene Dokument wird anschließend im Bereich Lösung abgeben aufgeführt.
| |
|
| Ob Sie eine bereits abgegebene Lösung selbst löschen können ist vom Kursverantwortlichen konfigurierbar. Eine bereits abgegebene Datei können Sie löschen, wenn Sie am Ende des Eintrags das Papierkorbsymbol sehen. Wählen Sie diesen Button und bestätigen Sie die Sicherheitsnachfrage. |
| Unbekanntes Makro: includeplus. Klicke auf diese Nachricht, um Details zu erfahren. Das Makro [includeplus] befindet sich nicht in der Liste der registrierten Makros. Überprüfen Sie die Schreibweise oder wenden Sie sich an Ihren Administrator. |
| Mit diesem Bereich können Sie Dokumente öffnen und ansehen, die ein Themenverantwortlicher Ihnen bereitgestellt hat.
Wie geht das?
| Öffnen Sie den Kursbaustein Themenvergabe. | | | Klicken Sie auf den Namen Ihres Themas. | | Sobald der Kursautor Ihnen ein Dokument zurückgegeben hat, erscheint dieses im Bereich Zurückgegebene Dokumente.
| |
|
Im Kurseditor stehen Ihnen folgende Optionen zur Verfügung:
Erläuterung zum Hinzufügen eines Kursbausteins aufklappen ...
Unbekanntes Makro: includeplus. Klicke auf diese Nachricht, um Details zu erfahren.
Das Makro [includeplus] befindet sich nicht in der Liste der registrierten Makros. Überprüfen Sie die Schreibweise oder wenden Sie sich an Ihren Administrator.
Im Kurseditor sehen Sie zu diesem Kursbausteintyp folgende Konfigurationstabs:
|
Konfigurationsoptionen im Tab Titel und Beschreibung aufklappen ...
Unbekanntes Makro: includeplus. Klicke auf diese Nachricht, um Details zu erfahren. Das Makro [includeplus] befindet sich nicht in der Liste der registrierten Makros. Überprüfen Sie die Schreibweise oder wenden Sie sich an Ihren Administrator.
|
---|
| Im Tab Konfiguration können Sie allgemeine Grundeinstellungen für alle Themen fest, wie beispielsweise die Anzahl der Themen pro Teilnehmer festlegen. Alle vorhandenen Optionen werden im Abschnitt Tab Konfiguration KB Themenveragbe Tab Konfigurationerläutert. |
---|
| An dieser Stelle kann der Kursautor Themenverantwortliche benennen. Diese können in der Kursansicht Themen erstellen und die Teilnehmer dieser Themen verwalten, deren abgegebene Lösungen einsehen und ihnen Dokumente zurückgeben. Weitere Informationen beinhaltet der Abschnitt zum Tab VerantwortlicheKB Themenvergabe Tab Verantwortliche. |
---|
| |
---|
| An dieser Stelle können Einstellungen zur Abgabe der Dokumente vorgenommen werden. Dies wird ausführlich im Abschnitt Tab Abgabe KB Themenvergabe Tab Abgabeerläutert. |
---|
| Zu einzelnen Kursbausteinbereichen können in diesem Tab verschiedene Übersetzungen hinterlegt werden. |
---|
Publizieren Sie Ihren Kurs, um die Konfiguation abzuschließen und die Ressource für die Teilnehmer verfügbar zu machen.
In der Kursansicht sehen Sie die Themenübersicht. Mit Kick auf den Titel eines Themas öffnet sich der Detailbereich eines Themas in dem weitere Funktionen verfügbar sind.
Funktionen in der Themenübersicht:
| | Mit diesem Button haben Sie die Möglichkeit, ein neues Thema zu erstellen. Dieses wird dann in der Themenübersicht angezeigt. Weitere Informationen enthält der Abschnitt Ein neues Thema erstellen oder importieren. |
| | |
| | Diese Funktion dient dazu, bereits bestehende Themen zu kopieren.
|
| | Ein bereits erstelltes Thema kann zu jedem Zeitpunkt wieder gelöscht werden.
|
| | Unbekanntes Makro: includeplus. Klicke auf diese Nachricht, um Details zu erfahren. Das Makro [includeplus] befindet sich nicht in der Liste der registrierten Makros. Überprüfen Sie die Schreibweise oder wenden Sie sich an Ihren Administrator. |
| | Unbekanntes Makro: includeplus. Klicke auf diese Nachricht, um Details zu erfahren. Das Makro [includeplus] befindet sich nicht in der Liste der registrierten Makros. Überprüfen Sie die Schreibweise oder wenden Sie sich an Ihren Administrator. |
Funktionen im Detailbereich eines Themas
Der Name eines Themas in der Themenübersichtstabelle ist ein Link. Durch Klick auf diesen Link öffnet sich der Detailbereich des Themas. Dieser Bereich ist für Autoren in drei Reiter eingeteilt. Nutzer sehen an dieser Stelle nur den Inhalt des ersten Reiters.

| |
---|
| In diesem Bereich können Sie das geöffnete Thema bearbeiten und den Status des Themas setzen. Mehr dazu finden Sie im Abschnitt Ein Thema editieren. |
| An dieser Stelle sehen Sie, welche Nutzer bereits eine Lösung zum Thema abgegeben haben und können diese einsehen bzw. dem Nutzer Dokumente zurückgeben. InformationDie Funktionen Lösungen abgeben und Dokumente zurückgeben sind nur möglich, wenn die Teilbausteine Abgabe- und Rückgabeordner konfiguriert wurden. Weitere Hinweise finden Sie im Abschnitt Nutzerloesungen zu einem Thema ansehen. |
| Dieser Bereich dient der Verwaltung aller Teilnehmer und Verantwortlichen eines Themas. Fügen Sie hier weitere Verantwortliche einem Thema hinzu, schreiben Sie Nutzer direkt in Themen ein oder akzeptieren Sie die Einschreibung von Nutzern in ein Thema. Mehr Informationen enthält der Abschnitt Teilnehmer und Verantwortliche verwalten. |
Unbekanntes Makro: includeplus. Klicke auf diese Nachricht, um Details zu erfahren.
Das Makro [includeplus] befindet sich nicht in der Liste der registrierten Makros. Überprüfen Sie die Schreibweise oder wenden Sie sich an Ihren Administrator.
The course element Topic Assignment lists all topics in a tabular overview. The table may also contain additional information depending on the configuration. For example, the topic name, supervisor, appointment or submission date, and the number of available places can be displayed. | |
As a user, you have access to the following functions in a course element of the type Topic Assignment:
| The list of topics provides you with detailed information about all topics and allows you to enrol in those of your choice. However, enrolment is only possible if the supervisor has enabled it and the maximum number of places has not yet been reached.
How to do that?
- Open the course element Topic Assignment.
- You will see a list of available topics.
| | 3. Clicking on the title of a topic opens the detailed view, which includes further details. Here you can, for example, view the enrolment and submission period or access additional documents related to the topic. 4. Click on Select to enrol in the topic. Alternatively, you will find the same button in the list of topics. InformationThe course author can configure whether your enrolment in a topic must first be confirmed by a supervisor. In this case, you only have the option to enrol provisionally. The author may also restrict the number of topics in which you can enrol. | | 5. An icon in the topic overview shows the current status of your enrolment: : You have been scheduled for the topic. The topic selection still has to be confirmed by the supervisor.
: Your topic selection has been confirmed.
| |
|
| You can deselect an already selected topic. However, if the topic has already been confirmed by a supervisor, only they can deselect the user's choice.
How to do that?
- Open the course element Topic Assignment .
- Select the topic you want to deselect. If you can see the Deselect button, this means you can undo your selection by clicking on it.
| |
|
Clicking on the title of a topic opens the detailed view of the selected topic in the course view. Depending on the configuration of the course supervisor, you will have the following options:
| In this area, you can submit a solution to your topic. Depending on the configuration, you can either upload files or create them directly in the course view.
How to do that?
- Open the course element Topic Assignment.
- Click on the name of the topic for which you want to submit a solution.
| | 3. Depending on the configuration, you have the following options: - Create a solution file in the course view (option 1)
- Upload a solution file (option 2)
Decide on one of the two options. | | Option 1: - Click on Create.
- Enter a file name and content in the appropriate text fields.
- Optionally, add a licence.
- Click on Create to complete the creation process.
- The created document will then be listed under Submit solution.
| | Option 2: - Click on Upload.
- Upload the desired file by clicking the Select files button.
- Optionally, add a licence.
- Confirm the process with Upload.
- The uploaded document will then be listed under Submit solution .
| |
|
| Whether you can delete an already submitted solution depends on the configuration of the course supervisor. You can delete an already submitted file if there is a recycle bin icon at the end of the entry. Select this button and confirm the dialogue. |
| Unbekanntes Makro: includeplus. Klicke auf diese Nachricht, um Details zu erfahren. Das Makro [includeplus] befindet sich nicht in der Liste der registrierten Makros. Überprüfen Sie die Schreibweise oder wenden Sie sich an Ihren Administrator. |
| This area allows you to open and view documents that have been shared with you by a supervisor.
How to do that?
- Open the course element Topic Assignment.
- Click on the name of your topic.
| | 3. Once the course author has returned a document, it will appear in the Return documents section.
| |
|
The following functions are available to you in the course editor:
|
Click to open instructions on how to add a course element ...
Unbekanntes Makro: includeplus. Klicke auf diese Nachricht, um Details zu erfahren. Das Makro [includeplus] befindet sich nicht in der Liste der registrierten Makros. Überprüfen Sie die Schreibweise oder wenden Sie sich an Ihren Administrator.
|
| In the course editor, you will find the following configuration tabs: |
Configuration options in the tab title and description ...
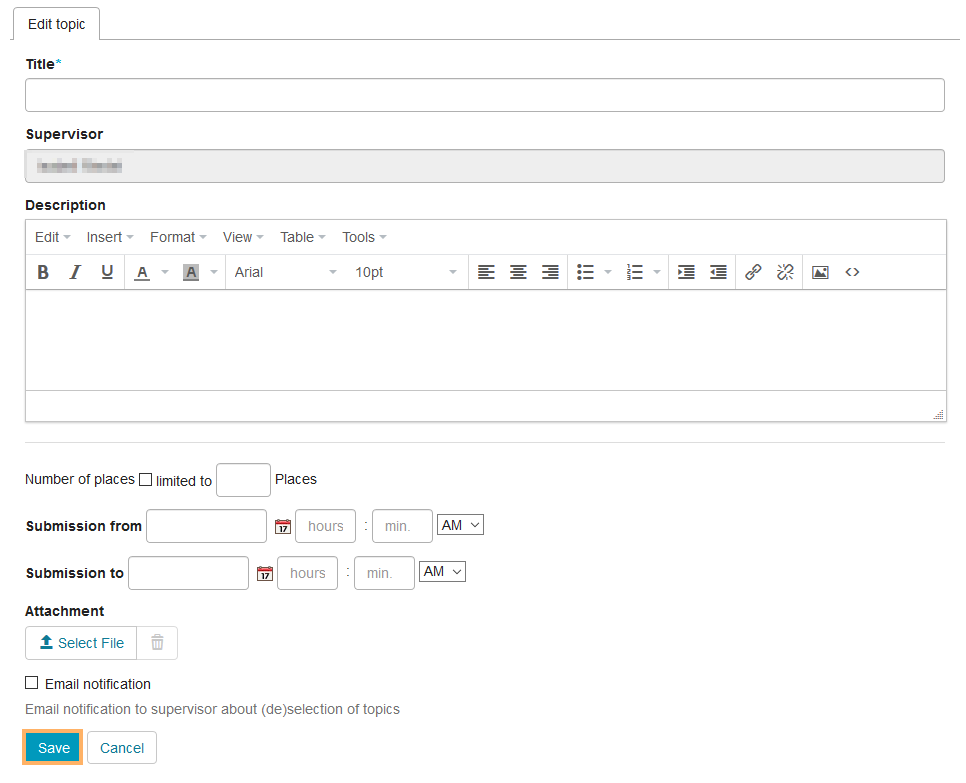
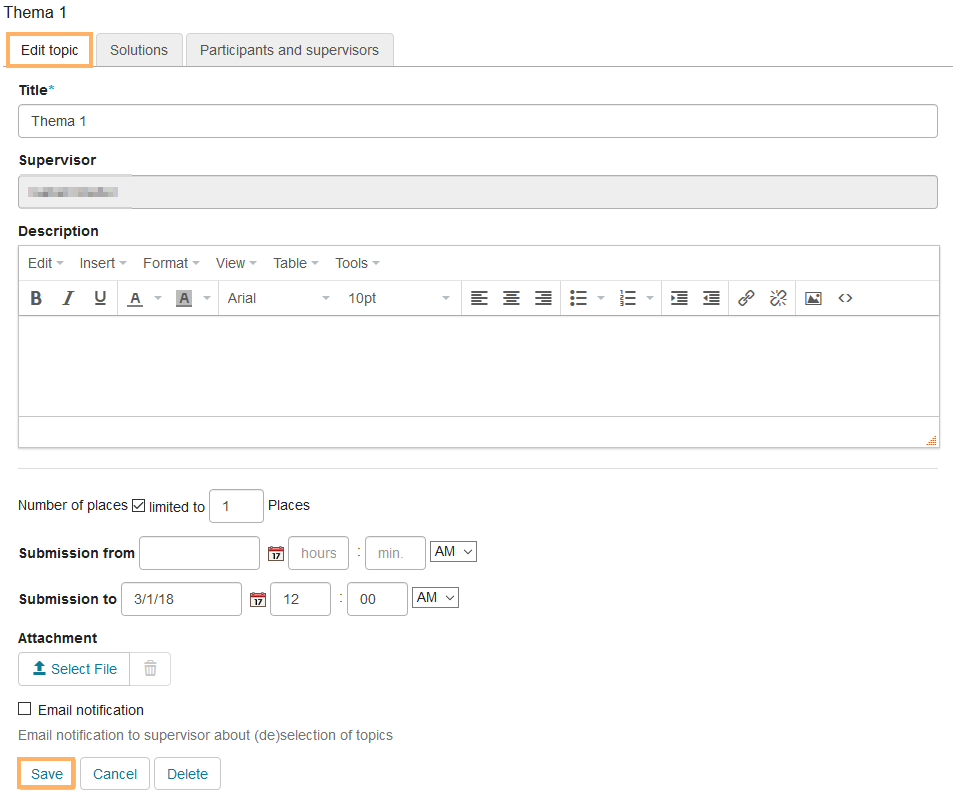
Unbekanntes Makro: includeplus. Klicke auf diese Nachricht, um Details zu erfahren. Das Makro [includeplus] befindet sich nicht in der Liste der registrierten Makros. Überprüfen Sie die Schreibweise oder wenden Sie sich an Ihren Administrator.
|
---|
|
Configuration options in the tab visibility and access ...
Unbekanntes Makro: includeplus. Klicke auf diese Nachricht, um Details zu erfahren. Das Makro [includeplus] befindet sich nicht in der Liste der registrierten Makros. Überprüfen Sie die Schreibweise oder wenden Sie sich an Ihren Administrator.
|
---|
|
---|
| In the tab Configuration, you can customise general settings such as the number of topics per participant. All available options are explained in the section Tab Configuration. |
---|
| This tab allows you to configure the settings for topic authors. Detailed instructions are given in the section Tab Persons in charge. |
---|
| Here you can select partial elements for the topic assignment. Detailed instructions are given in the section Tab Partial elements. |
---|
| The tab Due date allows you to configure the settings for the submission of documents. Detailed instructions are given in the section Tab Due date. |
---|
| In this tab, different translations can be added to individual course element areas. |
---|
|
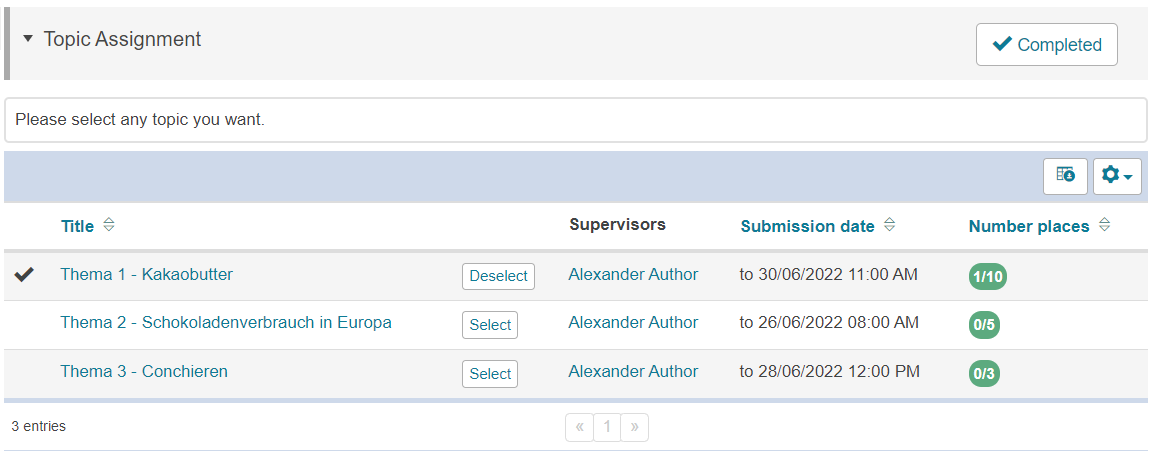
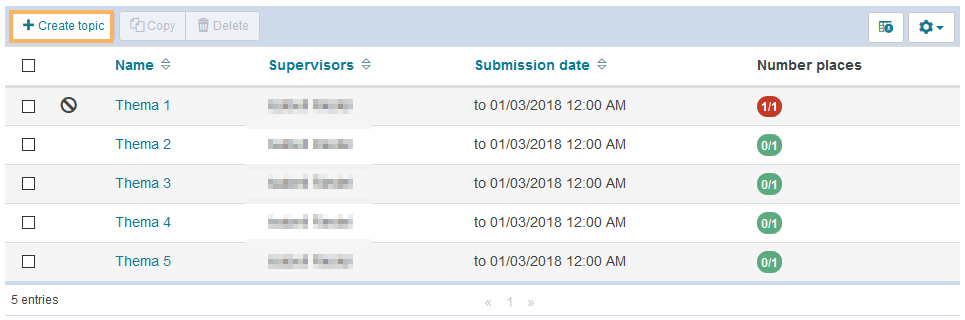
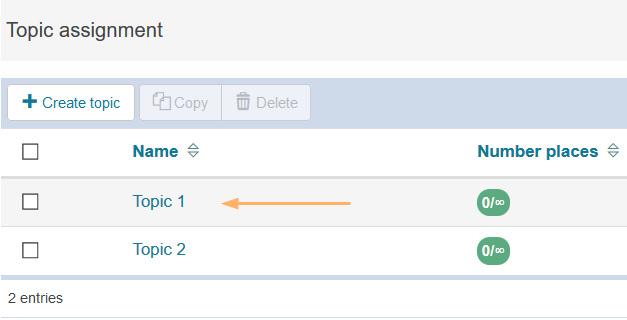
| Here you can specify the basic settings for all topics. The creation of topics is done in the course view. - Open the course editor of the course element Topic Assignment and go to the tab Configuration.
- Configure the following options:
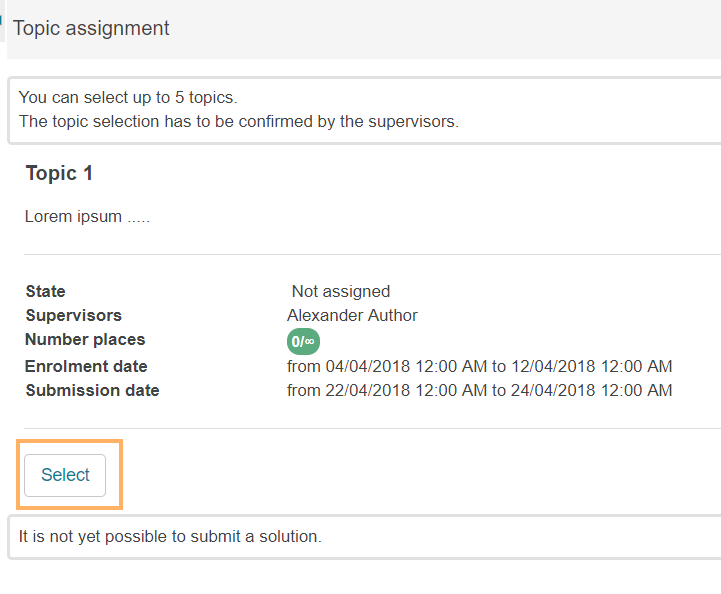
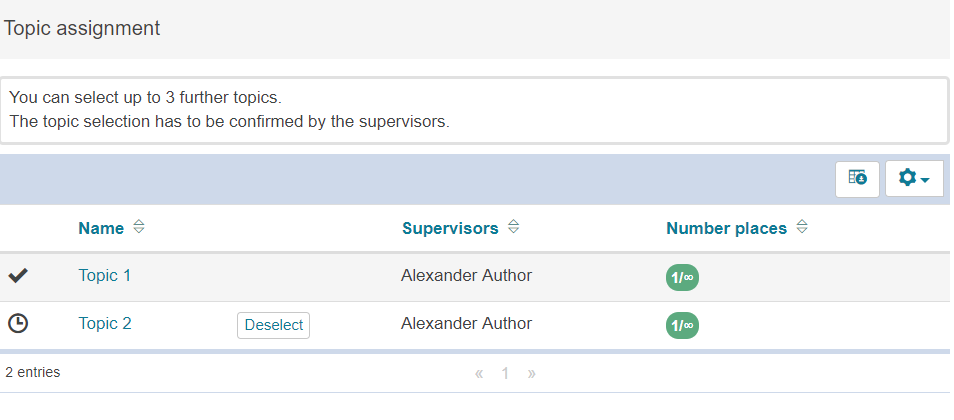
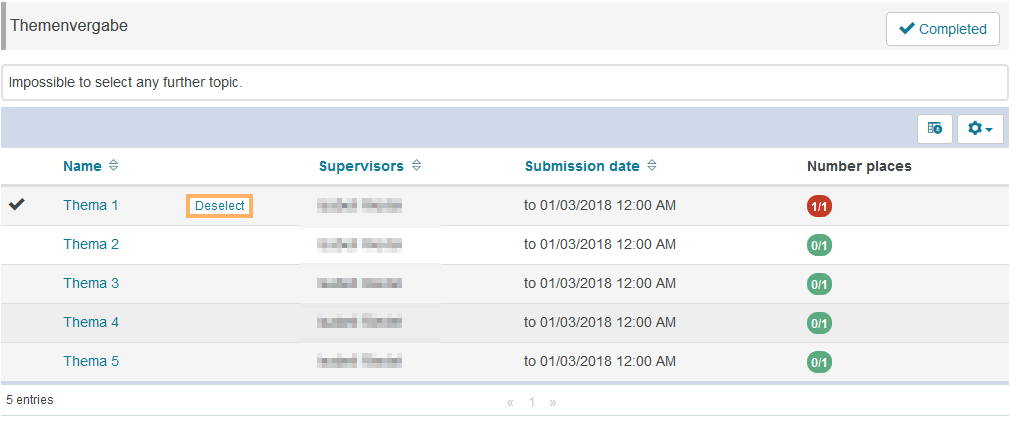
- Do you want to limit the number of topics per participant: Enable this option to specify the maximum number of topics a participant may select. If you leave this option disabled, participants can select any number of topics.
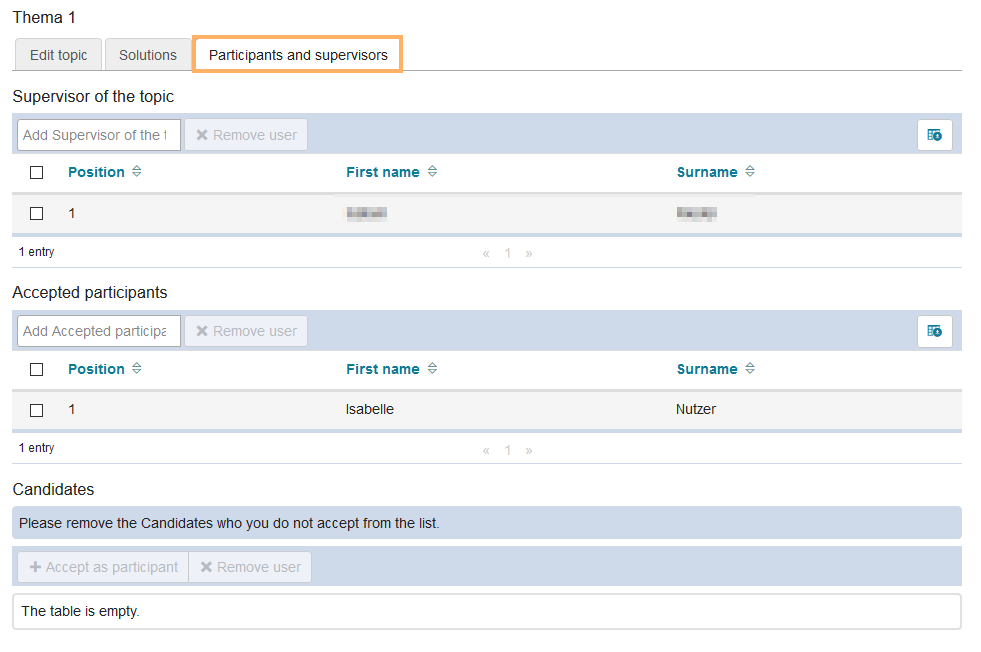
- Topic authors have to accept participants: If you enable this option, an author must first confirm the topic request of a participant before they can start working on it. Therefore, participants will only be able to enrol provisionally for a topic.
If this option is enabled, the checkbox Only one topic allowed opens. If you select this checkbox, accepted participants will be automatically removed from all other topics in which they have enrolled.
Click on Save to confirm the configuration. | | - Additional fields: Here you can specify a maximum of five additional fields for the creation of topics. These fields can be configured as free text or drop-down fields. To create a free text field, enter only a title and leave the value field blank. To create a drop-down field, enter the options to be selected in the input field Value. Separate the different choices with a semicolon, e.g. Faculty of Medicine; Faculty of Theology.
In the course view, topic creators will then have the possibility to select an option from the drop-down field and/or enter free text in the free text field when creating or editing a topic. If an additional field should be displayed as a column in the topic overview, check the option Appears in table below the respective text field.
Click on Save to confirm the configuration. | | Dates: The author has the option to activate a registration deadline and/or due date for the topics. If the dates are also to appear as a column in the topic assignment overview, select the option Appears in table.
Click on Save to confirm the configuration.
| |
|
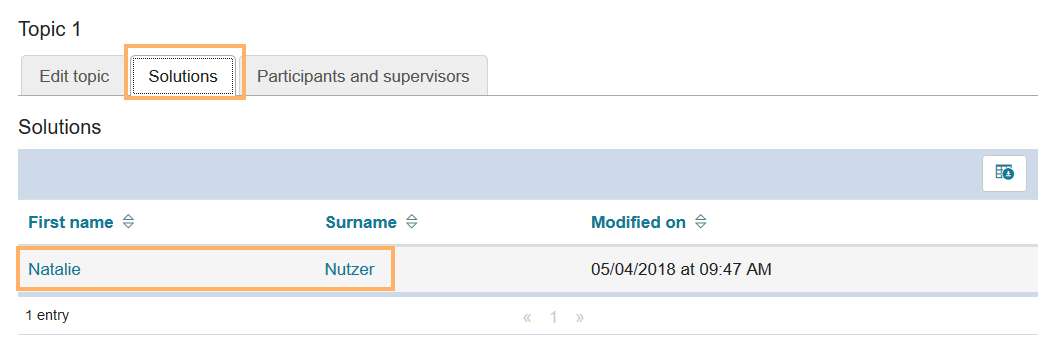
| This tab allows the course author to name topic authors. Topic authors can create topics in the course view, manage the topics' participants, view their submitted solutions, and return documents to them.
Administer topic authors ...
| With this option, you can save the list of enrolled topic authors as an Excel spreadsheet to your computer.
How to do that?
- Open the course editor of the course element Topic Assignment and go to the tab Persons in charge.
- Click on Export user list.
| | 3. Select the checkbox Open with or Save file and click on OK. | |
| | Use this function to register several users as topic authors. A wizard opens to guide you through the process. | | This button allows you to search for users to add as topic authors.
How to do that?
Open the course editor of the course element Topic Assignment and go to the tab Persons in charge .
| | 3. Enter the first name, last name, email address, and institution in the appropriate text fields. Then click on Search. | | 4. Select the checkbox in front of the user you want to add and click on Choose. | |
| | Users, who are added, can be removed at any time.
How to do that?
Open the course editor of the course element Topic Assignment and go to the tab Persons in charge. Select the user you want to remove by ticking the checkbox next to them. - Then click on Remove.
| | 4. Decide whether the user should receive a notification email. 5. Then click on Next. 6. Confirm the dialogue with Yes. The user will be removed from the list of topic authors. | |
|
|
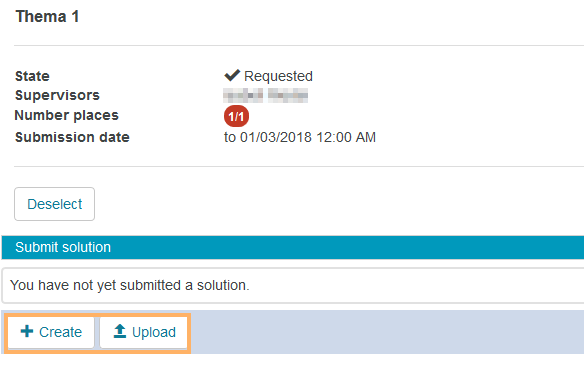
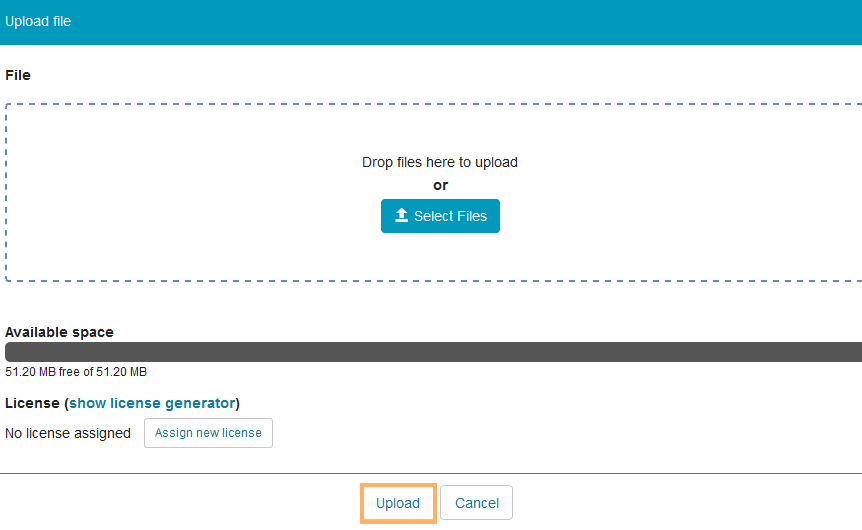
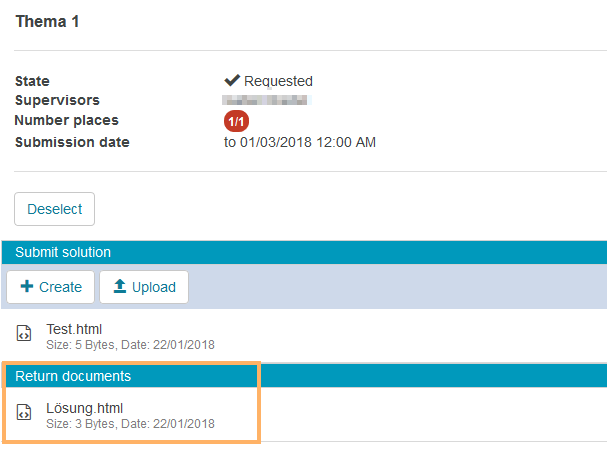
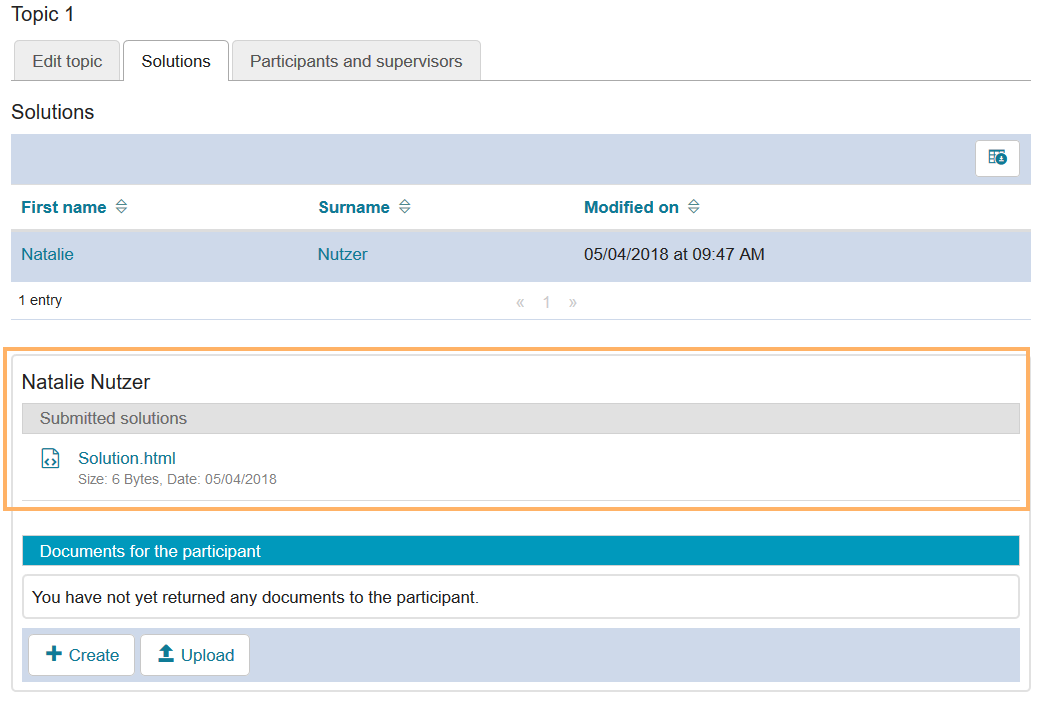
| This tab allows you to provide a drop box and/or return box. - Using the drop box, participants can submit solution files.
- Using the return folder, topic authors can individually return files to the participants of a topic.
If you do not make any changes, both partial elements will be active. | |
|
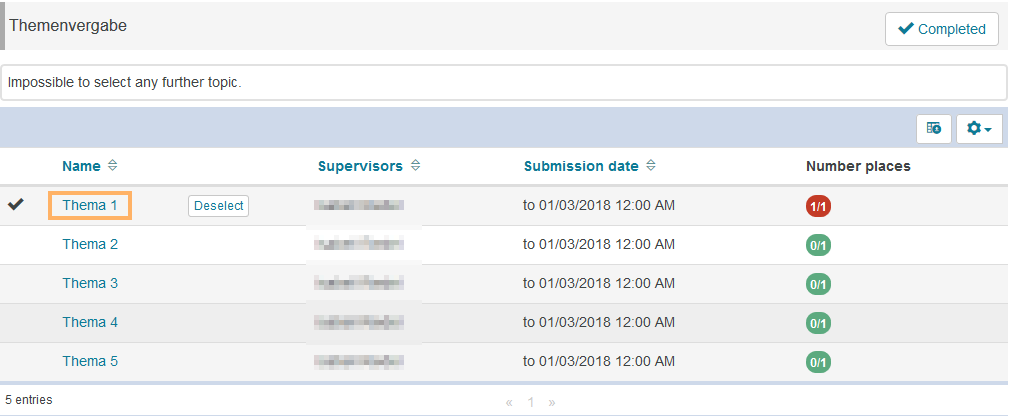
| In the tab Due date, you have the following configuration options: - Trainees are only allowed to upload documents: If you select this checkbox, users can only upload documents to the storage folder. Therefore, the creation of new documents directly in the course view will be prevented, and users will only see the Upload button in the area Submit solution in the detailed view of their topic.
- Send hand in confirmation via email: If you enable this option, the user will be sent an email after the successful submission of their file with the confirmation text you provided under Text after handing in. The placeholders are individually filled with the information of the user or the course data. If necessary, you can further customise this text.
Click on Save to confirm the configuration. | |
|
In course view, course and topic authors can create and manage topics, view participant solutions, and return documents.
| | This button allows you to create a new topic, which will then be displayed in the topic overview.
Create a new topic ...
- Open the course element Topic Assignment.
- Click on Create topic in the header area of the list of topics.
| | 3. Enter the title of the new topic in the appropriate text field and provide further information on the topic: - Optionally, add a description of the topic.
- Specify the number of places available.
- If necessary, determine a submission period.
- You can also upload file as an attachment to the topic using the button Select file.
- In addition, you have the option to send an email notification. If this checkbox is selected, an email will be sent to all topic authors as participants select or deselect this topic or submit a solution.
4. Click on Save to complete the creation process. The newly created topic will then appear in the list of the topic overview. | |
|
| | This function allows you to copy existing topics.
How to do that?
- Open the course element Topic Assignment.
- Select the topic you want to copy by ticking the checkbox next to it.
- Then click on Copy in the table header.
| | 4. The copied topic will be displayed in the topic overview. | |
|
| | Topics can be deleted at any time.
How to do that?
- Open the course element Topic Assignment.
Select the topic you want to delete by ticking the checkbox next to it. Then click on Delete in the table header.
| | 4. Confirm the deletion process with Delete topics . | |
|
| | Unbekanntes Makro: includeplus. Klicke auf diese Nachricht, um Details zu erfahren. Das Makro [includeplus] befindet sich nicht in der Liste der registrierten Makros. Überprüfen Sie die Schreibweise oder wenden Sie sich an Ihren Administrator. |
| | Unbekanntes Makro: includeplus. Klicke auf diese Nachricht, um Details zu erfahren. Das Makro [includeplus] befindet sich nicht in der Liste der registrierten Makros. Überprüfen Sie die Schreibweise oder wenden Sie sich an Ihren Administrator. |
Click on a topic name in the topic overview to open the detailed view of the topic. For authors, the detailed view consists of three tabs. Users can only see the content of the first tab.
| |
---|
| In this area, you can edit the opened topic and set its status.
Edit topic ...
- Open the course element Topic Assignment.
- Click on the name of the topic you want to edit.
| | 3. Make your desired changes in the tab Edit topic and confirm your changes with Save. | |
|
| In this tab, you can see which users have already submitted a solution to the topic, view the solution, and return documents to the user. InformationThe functions submit solutions and return documents are only possible if the partial elements drop box and return box have been configured.
View solutions and return documents ...
View submitted solutions and return documents- Open the course element Topic Assignment.
- Click on the name of the topic for which you want to view the submitted solutions.
| | 3. Switch to the tab Solutions and click on the name of the user whose solutions you would like to view. | | 4. Under Submitted solutions, an overview of all existing solution documents uploaded or created by the user appears. 5. If a return box has been configured, you will also see the area Documents for the participant where you can create or upload documents to the user's return box. To do this, use the appropriate button (Create or Upload). | |
|
Participants and supervisors | This area allows for the management of all participants and supervisors of a topic. This includes adding supervisors to a topic, enrolling users directly in topics, and accepting user enrolments.
Manage participants and supervisors ...
Manage participants and supervisors of a topic- Open the course element Topic Assignment.
Click on the name of the topic.
| | 3. Switch to the tab Participants and supervisors. Now you have the following options: - Remove user: Select the checkbox next to the participant you want to remove and click on Remove user.
- Accept as participant: Select the checkbox next to the user you want to add and click on Accept as participant. Note that this function is only available in the Candidates table if you have enabled the option Topic authors have to accept participants in the course editor.
- Add users directly as participants or topic authors: Use this field to add individual users of your institution to a topic. Enter at least three letters for the first or last name of the person in the text field. You can add all users displayed within the pop-up selection list, based on your user rights. Click on the desired name and the user will be added to the list.
| |
|