Step-by-Step: Kursvorlage importieren
Kursvorlage importieren
Um die Vorlage zu allen drei Szenarien zu importieren, gehen Sie wie folgt vor:
1 | Laden Sie sich folgende Datei auf Ihren Rechner herunter: | |
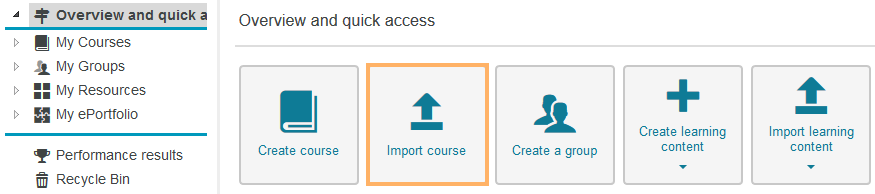
2 | Öffnen Sie nach dem Login in der Lernplattform den Tab Lehren & Lernen. Klicken Sie im linken Navigationsbereich auf den Eintrag Überblick. Hier finden Sie die Funktionsbox Kurs importieren.
|
|
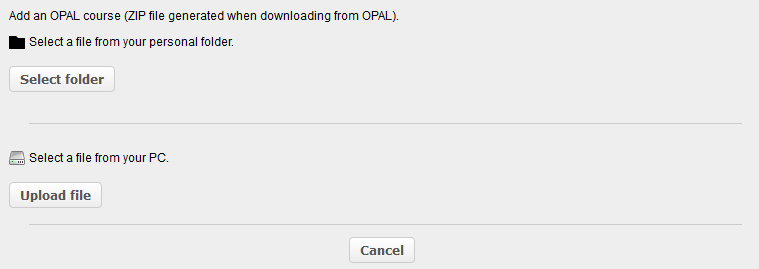
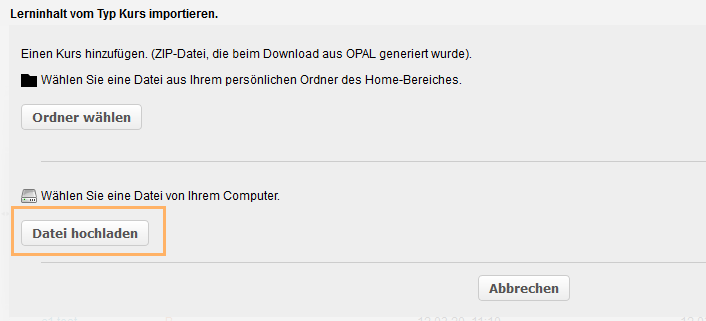
3 | Wählen Sie im Dialog die Option Datei hochladen.
|
|
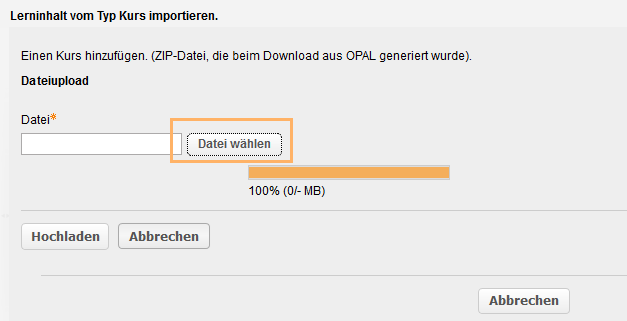
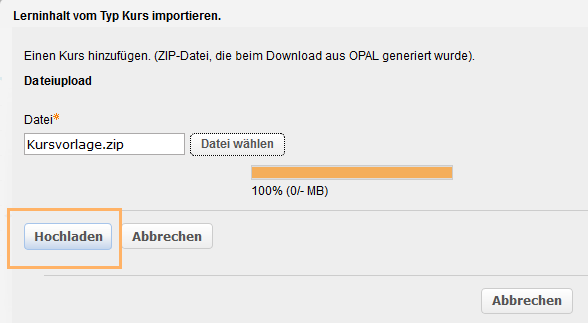
4 | Im nächsten Fenster können Sie über Datei wählen, um die im Schritt 1 heruntergeladene Kursvorlage.zip von Ihrem Rechner auswählen. |
|
5 | Klicken Sie anschließend auf Hochladen. |
|
6 | Ändern Sie im nächsten Schritt den Kurstitel und bestätigen Sie dies mit Klick auf den Button Speichern und anschließend auf dem Button Weiter. |
|
7 | Danach erfolgt eine Abfrage, ob Sie den Editor zum Bearbeiten starten wollen. Bestätigen Sie bitte mit Klick auf die Option Ja. |
|


Create course
To create a course, proceed as follows:
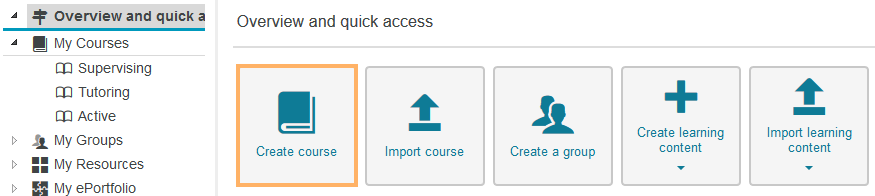
1 | Open the tab Teach & Learn. In the left navigation area, click on the entry Overview and quick access. Here you will find the function box Create course. |
|
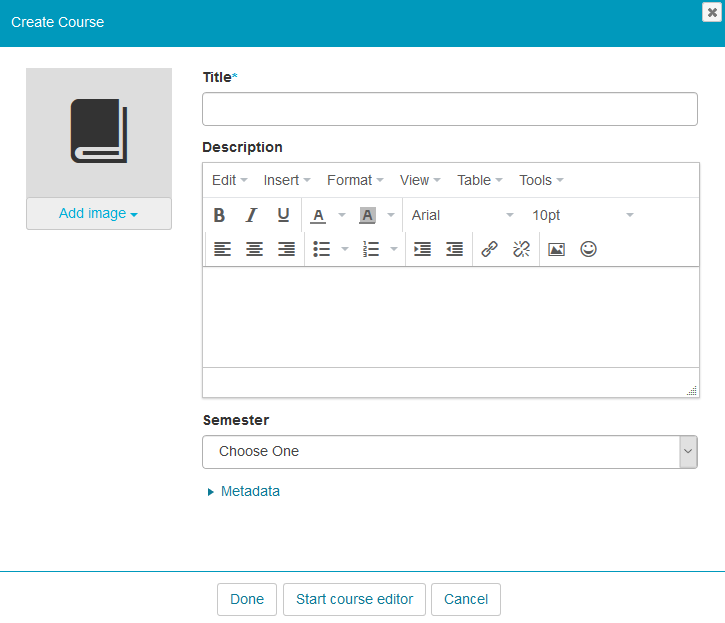
2 | In the Create course dialogue, you can now enter a title and description for your course. Optionally, you can also add an image and assign metadata or a semester. |
|
3 | To complete the course creation, choose between the following options:
|

Create courses in the old user interface
To create a course in the old user interface, proceed as follows:
Create a new (plain) course ...
1 | Open the tab Teach & Learn. In the left navigation area, click on the entry Overview and quick access. Here you will find the function box Create course. |
| |||||
2 | In the Create course dialogue, you can now enter a title and description for your course. Optionally, you can also add an image and assign metadata or a semester. |
| |||||
3 | Click on Save and then on Finish to continue. |
| |||||
4 | Choose one of the three options:
|

Create a course with a wizard ...
Select the option Create a plain course with a wizard (for beginners). |
|
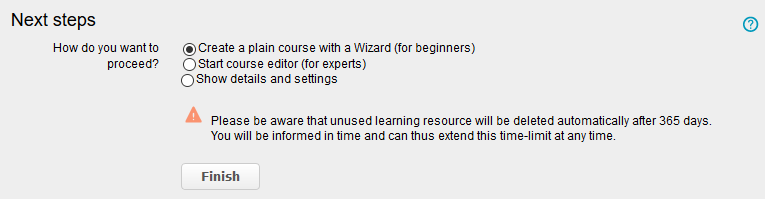
In the first step of the wizard, you can choose between the following three options:
Create a new course: You will create a completely new course without using a template.
Next steps ...
- Select the course elements you wish to include in your course. Later, you can still add more content to your course via the course editor.
- Then click on Finish. Your course will now open in view mode.


Copy course template: You will create a completely new course based on a template.
Next steps ...
- Select a course template from the list and click on Finish.
- Your course will now open in view mode.

Copy an existing course: You will copy one of your existing courses.
Next steps ...
- Select one of your courses from the list.
Then click on Finish to have your course copied and displayed.

Select one of the options and continue with the next steps.
Import course
To import a course, proceed as follows:
1 | Open the tab Teach & Learn and click on Import course. |
|
2 | In the dialogue, you have the option to select a file from your Personal folder or to upload a course from your PC. |
|