Step-by-Step Einen Kurs publizieren
Wo befinden Sie sich gerade?
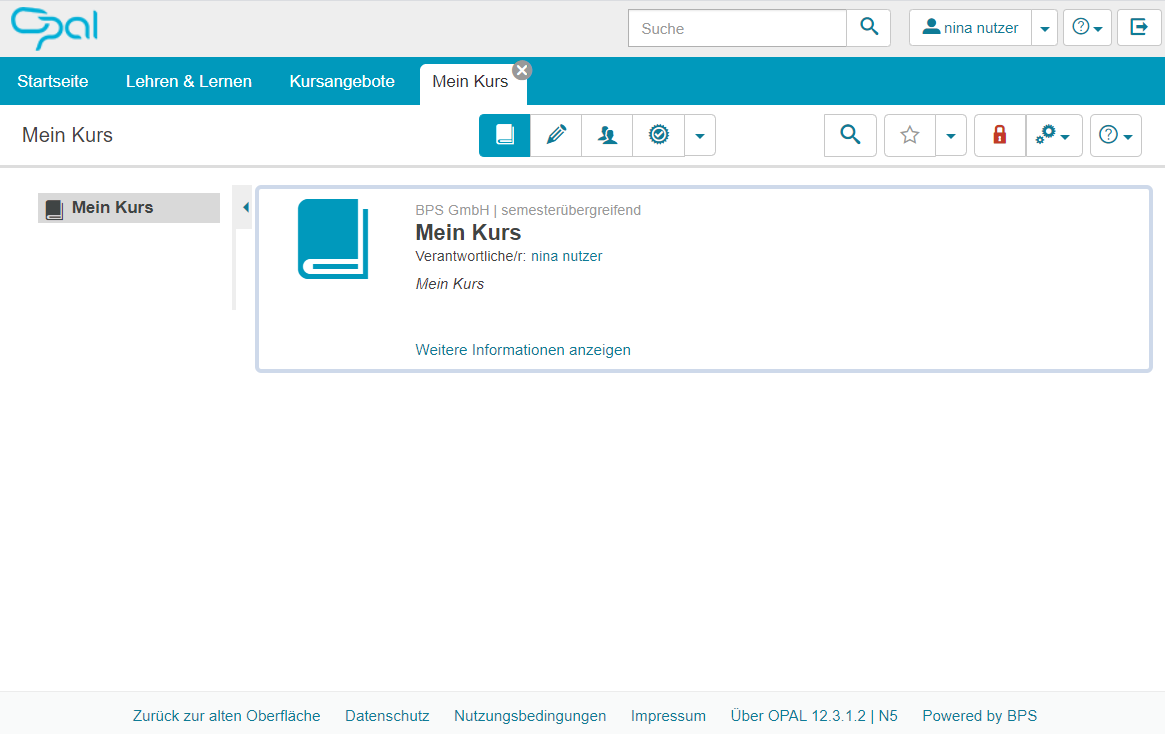
In der Kursansicht (Kursrun) ...
Publizieren in der Kursansicht
Um den Kurs für Lernende sichbar zu machen führen Sie bitte folgende Schritte durch:
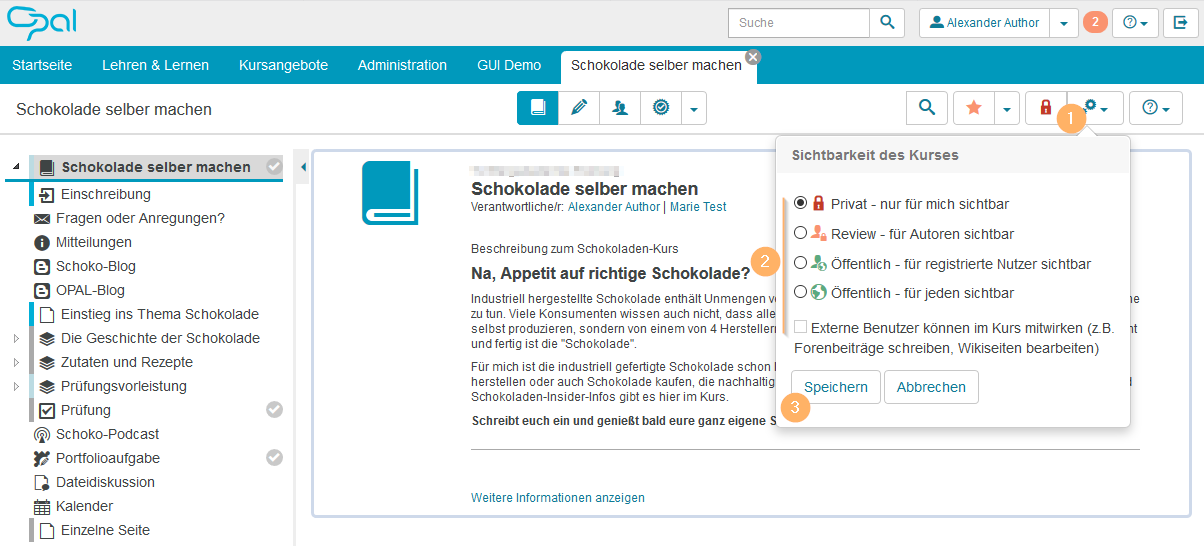
1 | Klicken Sie auf das Icon zur Sichtbarkeit. Ein neuer, noch nie publizierter Kurs zeigt das rote Schloss-Icon und ist damit für andere Autoren oder Lernende nicht sichtbar. Weitere Icons finden Sie im unteren Abschnitt |
|
2 | Wählen Sie die Option Öffentlich - für registierte Nutzer sichtbar aus. | |
3 | Bestätigen Sie Ihre Wahl mit Klick auf die Schaltfläche Speichern. | |
4 | Der Kurs ist nun für alle Nutzer mit einem Nutzerkonto auf dieser Instanz sichtbar und in der Suche auffindbar. Sie können diese Sichtbarkeit jederzeit wieder beschränken oder auch den Zugang individuell einschränken. Ausführliche Informationen bietet der Abschnitt Freigabe von Kursen und Kursinhalten. |
Unbekanntes Makro: includeplus. Klicke auf diese Nachricht, um Details zu erfahren.
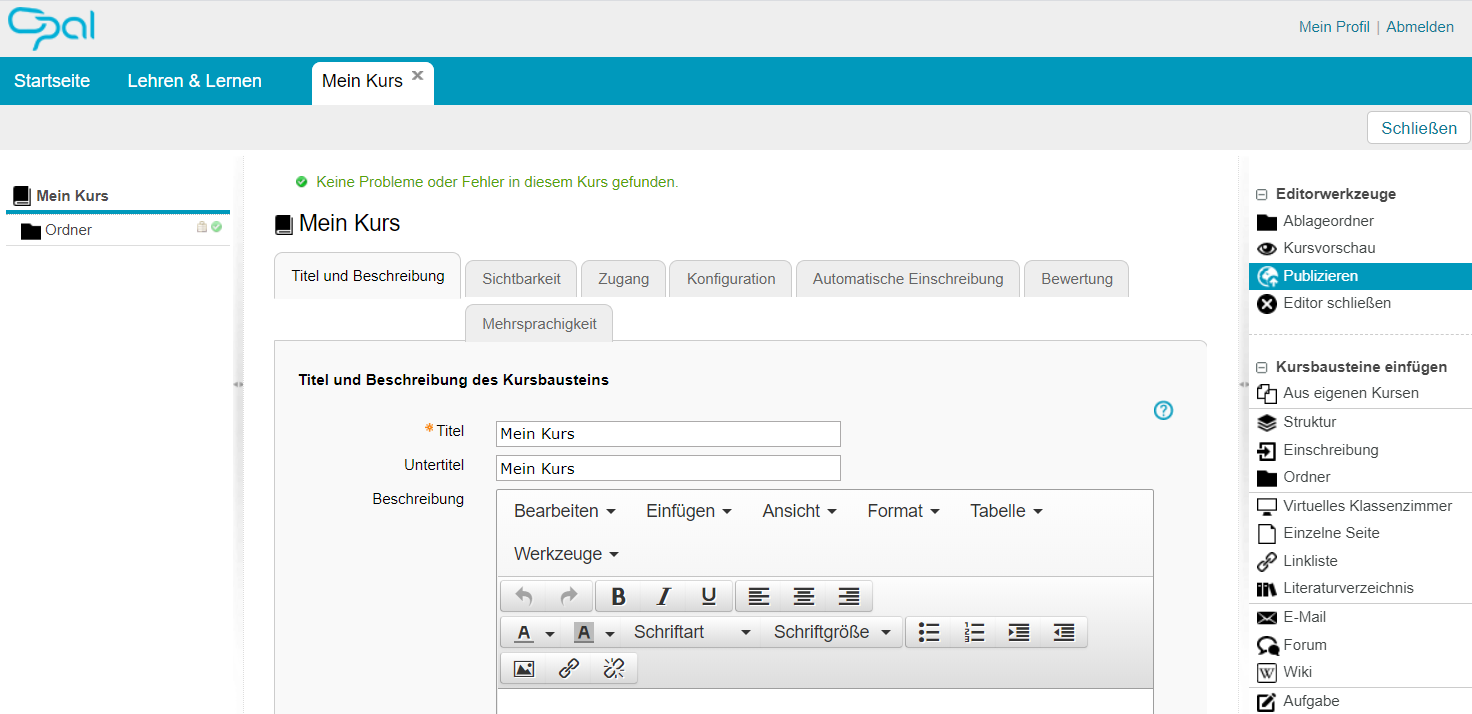
In der Bearbeitungsansicht des Kurses (Kurseditor) ...
Publizieren im Kurseditor
Um den Kurs für Lernende sichtbar zu machen, führen Sie bitte folgende Schritte durch:
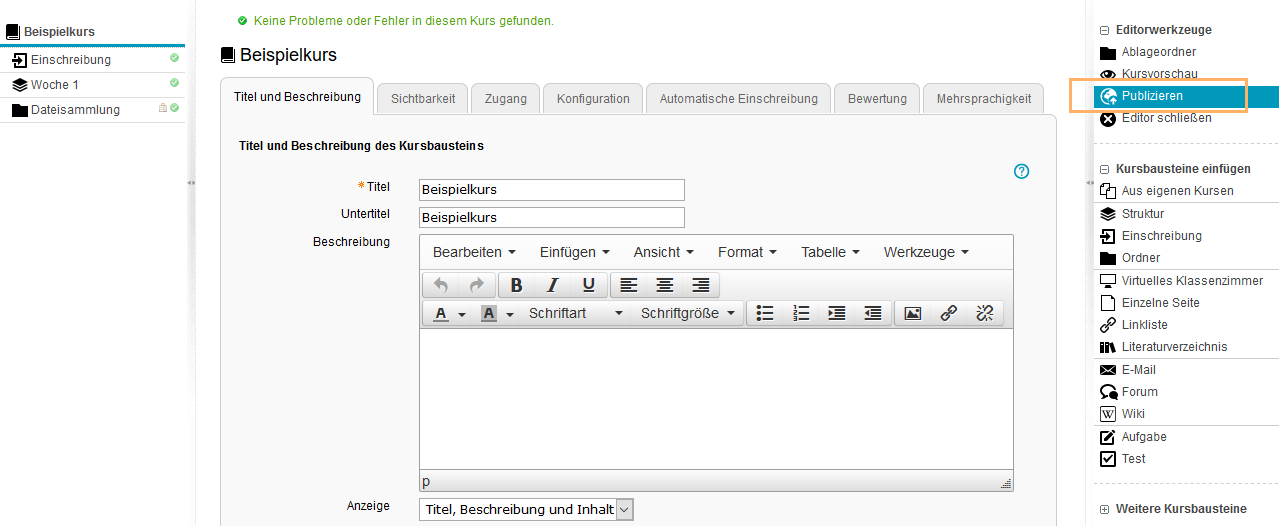
1 | Mit Klick auf den Eintrag Publizieren im Menü Editorwerkzeuge starten Sie den Assistenten.
|
|
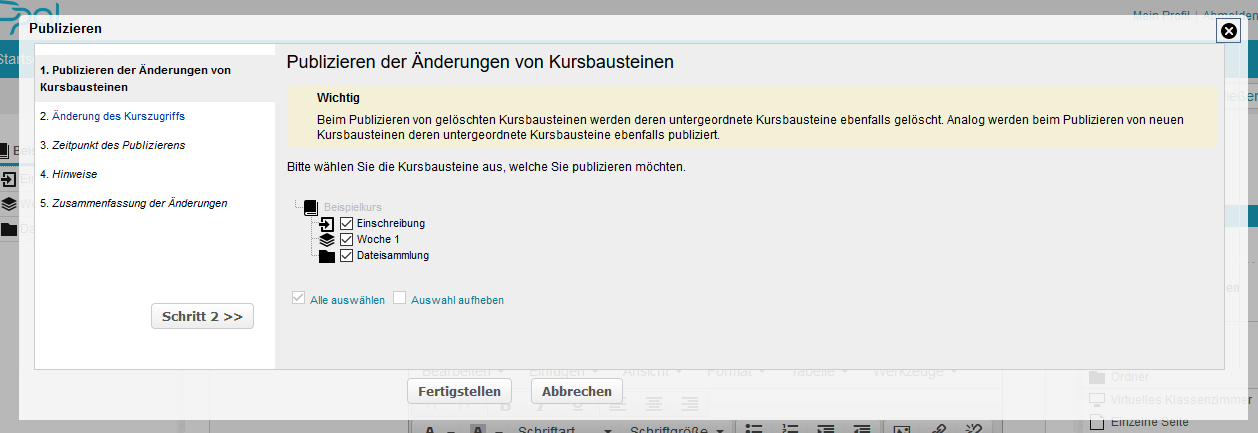
2 | Der 1. Schritt zeigt eine Übersicht der enthaltenen Kurselemente. Neue oder geänderte Kurselemente sind automatisch mit einem Häkchen markiert und werden in den weiteren Schritten publiziert. Wollen Sie einzelne Kurselemente noch nicht veröffentlichen, so entfernen Sie die Markierung in der entsprechenden Checkbox. Setzen Sie den Assistenten mit Klick auf den Button Schritt 2 >>> fort. |
|
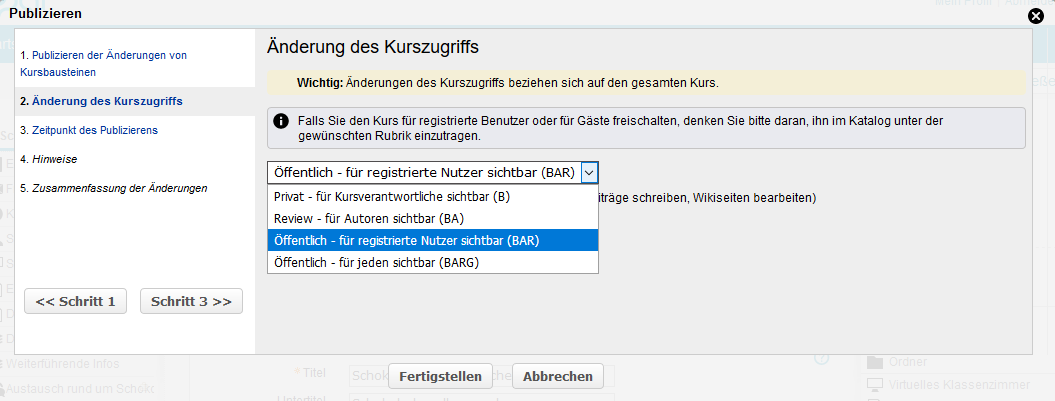
3 | Im 2. Schritt wählen Sie die Option Öffentlich - für registrierte Nutzer sichtbar aus. |
|
4 | Folgen Sie den weiteren Schritten des Assistenten und schließen Sie Ihre Einstellungen mit Klick auf den Button Fertigstellen ab. |
|
Weitere und ausführlicherer Informationen Zur Publikation bietet der Abschnitt Freigabe von Kursen und Kursinhalten.
Ich weiß nicht welche Ansicht ich gerade offen habe ...
Entscheiden Sie anhand dieser Beispielansichten:
Kursansicht (Kursrun) | Bearbeitungsansicht (Kurseditor) |
|---|---|
|
|
Publication assistant in the course editor
Access to courses can be changed directly when publishing a course. Use the assistant in the course editor to guide you through the process:
1 | Open the course you wish to publish in the course view. Use the pencil icon at the top of the page to open the editing mode. |
|
2 | The following should be considered in advance:
|
|
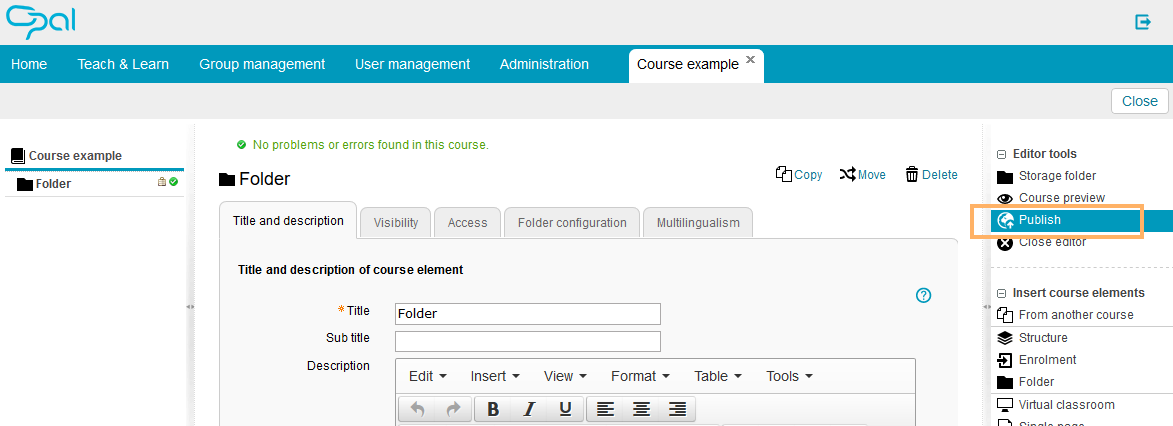
3 | Start the assistant by selecting Publish from the Editor tools menu. |
|
4 | Step 1 gives an overview of the included course elements. New or edited course elements will be automatically marked with a tick and published in the next steps. If you do not wish to publish individual course elements yet, remove the tick from the corresponding checkbox. Click on Step 2 >>> to continue. |
|
5 | In Step 2, you can make more changes and, if necessary, specify a particular time for these changes to be implemented in Step 3. |
|
6 | Follow the remaining steps of the assistant and complete your settings with Finish . |
|


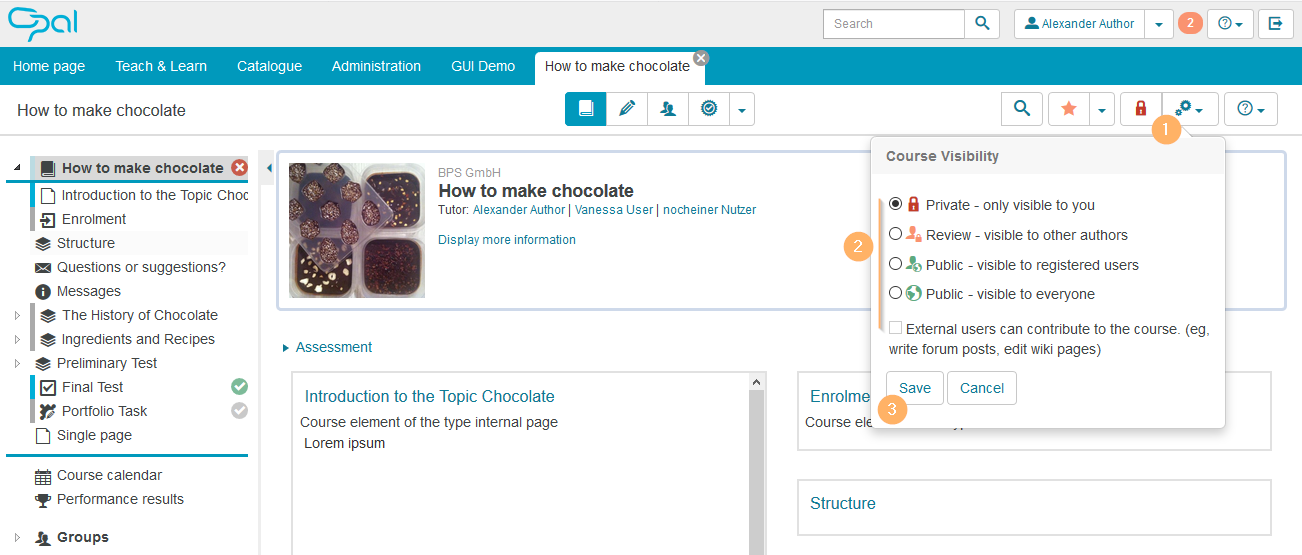
Change publication status from within the course view
To change the publication status of a course in the course view, proceed as follows:
1 | Open the course or learning resource and click on the gear icon. |
|
2 | Select the desired option. | |
3 | Confirm your choice with Save . |
Change publication status from with the detailed view of the old user interface
If this area is not yet available for your system in the new user interface, you can also perform the changes in the detailed view of the old user interface.
Change the publication status via the detailed view of the old user interface ...
Proceed as follows:
1 | Open a course and select the entry Details and settings from the menu. |
|
2 | Then select Change properties from the menu on the right. |
|
3 | Switch to the Access tab to change the access rights. |
|
4 | Complete your changes with Save . |


Reference course in the catalogue
Published content should be displayed in a meaningful catalogue structure to allow learners to perform a thematic search for available learning resources in addition to the global search. The learning platform provides a separate area called catalogue in which these resources can be referenced. Instructions on how to include your course in the catalogue can be found in the help section Add course to the catalogue.