Nutzerprofil anlegen
Nutzer anlegen
Um ein neues Nutzerprofil im Administrationsbereich anzulegen, gehen Sie wie folgt vor:
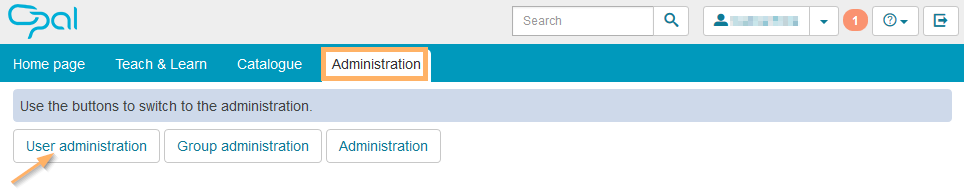
1 | Wählen Sie im Hauptmenü den Tab Administration und gehen Sie anschließend auf die Schaltfläche Benutzerverwaltung. |
|
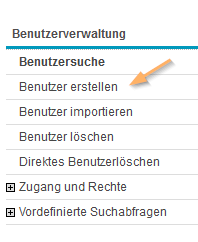
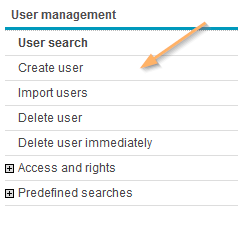
2 | Klicken Sie im linken Menü auf den Eintrag Benutzer erstellen. |
|
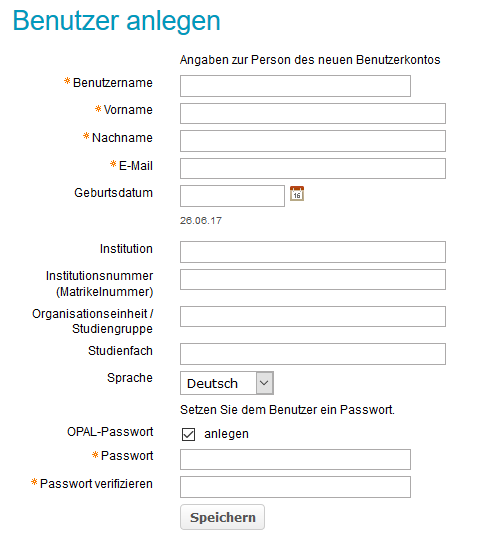
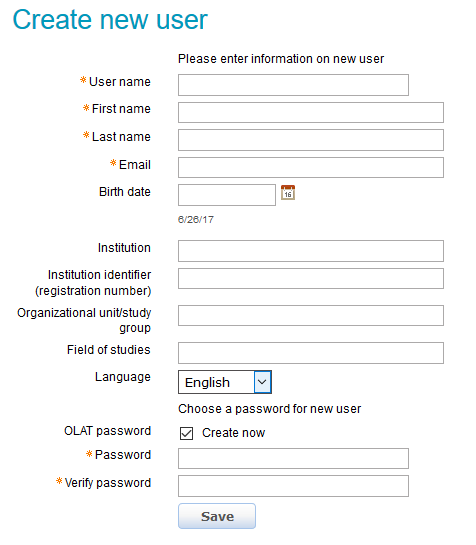
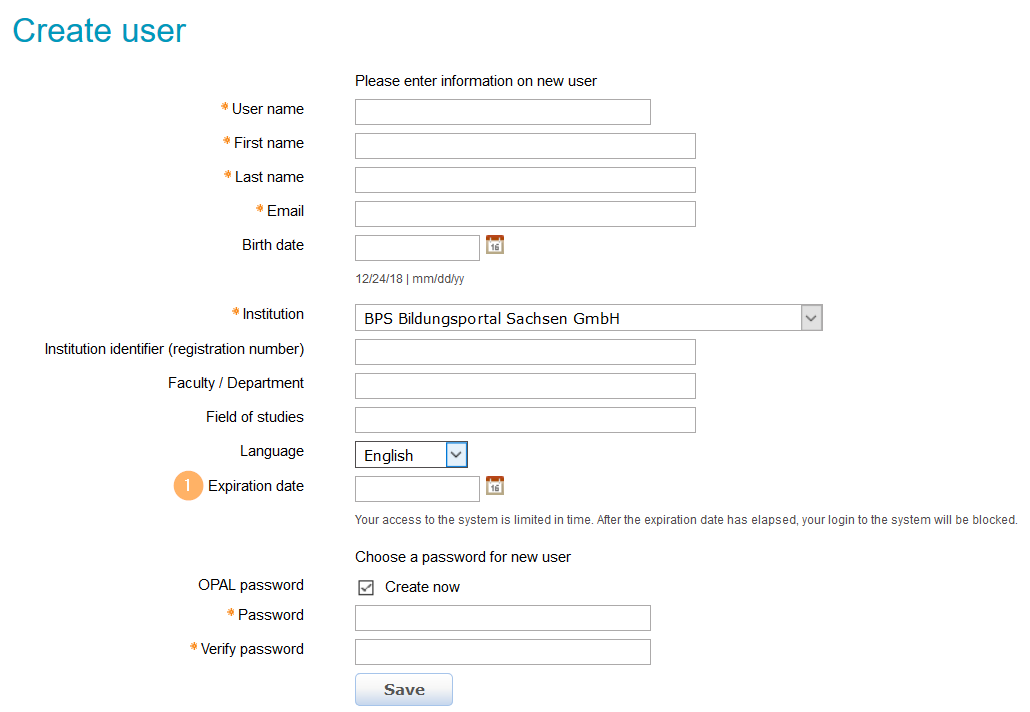
3 | Es öffnet sich ein Formular, in dem Angaben zum neuen Benutzerkonto gemacht werden können. Je nach Konfiguration der Plattform enthält das Formular unterschiedliche institutions- oder unternehmensspezifische Felder. Füllen Sie mindestens alle mit einem Stern gekennzeichneten Pflichtfelder aus. Im Beispiel sind dies Benutzername, Vorname, Nachname, E-Mail und Passwort. Alle anderen Angaben sind optional.
|
|
4 | Speichern Sie Ihre Eingaben.
|

Nutzerkonto mit Ablaufdatum anlegen
Dies ist eine konfigurierbare Zusatzfunktion. Sie eignet sich für zeitlich begrenzte Nutzerkonten, beispielsweise im Rahmen von Projekten.
Ablaufdatum festlegen
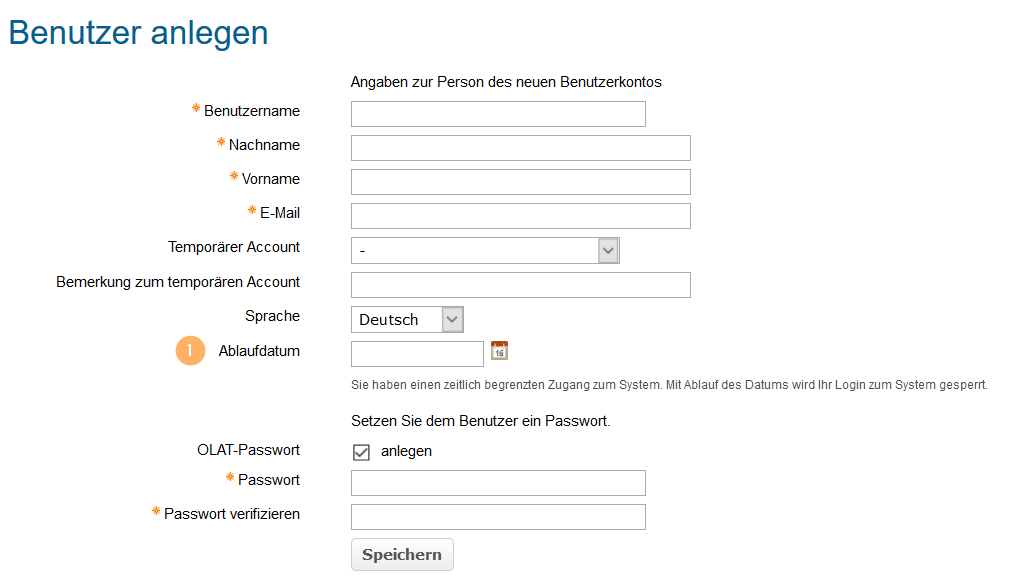
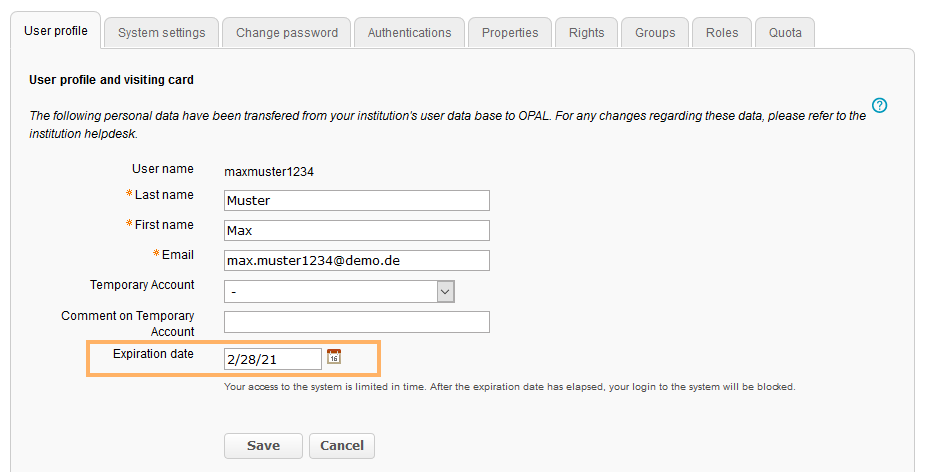
Tragen Sie beim Erstellen des Nutzerkontos im Feld Ablaufdatum den Zeitpunkt ein, ab dem der Nutzer keinen Zugriff mehr auf das System erhalten soll. Mit Erreichen des Ablaufdatums wird der Login des Nutzers gesperrt. Der Nutzer kann sich ab diesem Zeitpunkt nicht mehr im System anmelden. Alle Daten und Ressourcen des Nutzers bleiben jedoch im System erhalten und werden erst mit endgültigem Löschen des Nutzerprofils entfernt. |
|
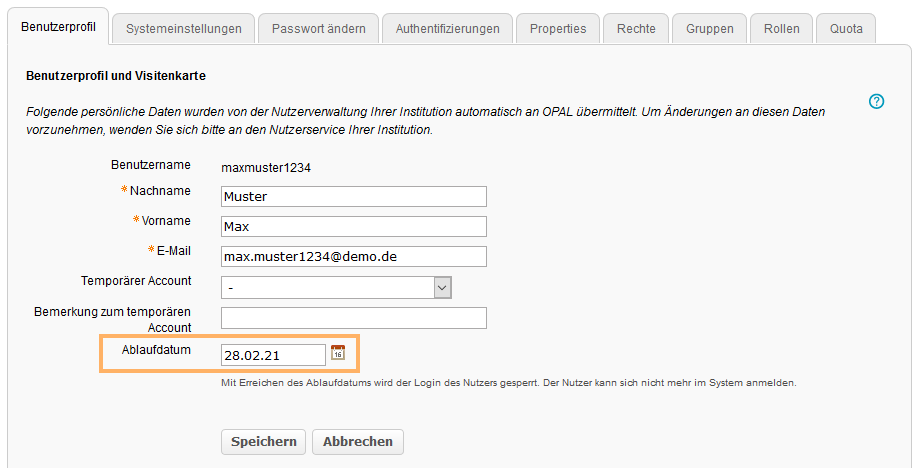
Bei bereits bestehenden Nutzerkonten können Sie ebenfalls ein Ablaufdatum festlegen. Öffnen Sie dazu in der Benutzerverwaltung das Benutzerprofil des Nutzers und tragen Sie hier ein Ablaufdatum ein. |
|
Ablaufdatum verlängern
Ein bestehendes Ablaufdatum kann von einem Benutzerverwalter jederzeit verlängert werden. Öffnen Sie dazu in der Benutzerverwaltung das Nutzerprofil des Nutzers und tragen Sie hier das neue Ablaufdatum ein. |
|
Create user
To create a new user profile in the administration area, proceed as follows:
1 | Switch to the Administration tab in the main menu and click on User administration . |
|
2 | Select the entry Create user from the menu on the left. |
|
3 | A form will open in which you can complete the details for the new user account. Depending on the configuration of the learning platform, some labels (institution, company) might vary from the sample image. Fill in the mandatory fields (here user name, first name, last name, email, and password), which are marked with an asterisk. All other information is optional. |
|
4 | Save your entries. |
Create user account with expiration date
This is a configurable additional function. It can be used for temporary user accounts - for example, in the context of projects.
Set expiration date
When creating the user account, enter the date from which the user should no longer have access to the system in the field Expiration date . When the expiration date is reached, the user's login will be blocked, i.e. they will no longer be able to log into the system. However, all the user's data and resources will be retained by the system and only be removed when the user's account is permanently deleted. The user will be sent a reminder email in good time before the expiration date (by default, 30 days before the user account expires, unless configured otherwise). |
|
For existing user accounts, you can also set an expiration date. To do this, open the user profile of the respective user in the user administration and enter an expiration date here. |
|
Extend expiration date
An existing expiration date may be extended by a user administrator at any time. To do this, open the user profile of the respective user in the user administration and enter the new expiration date here. |
|