Flashcard Set
![]()
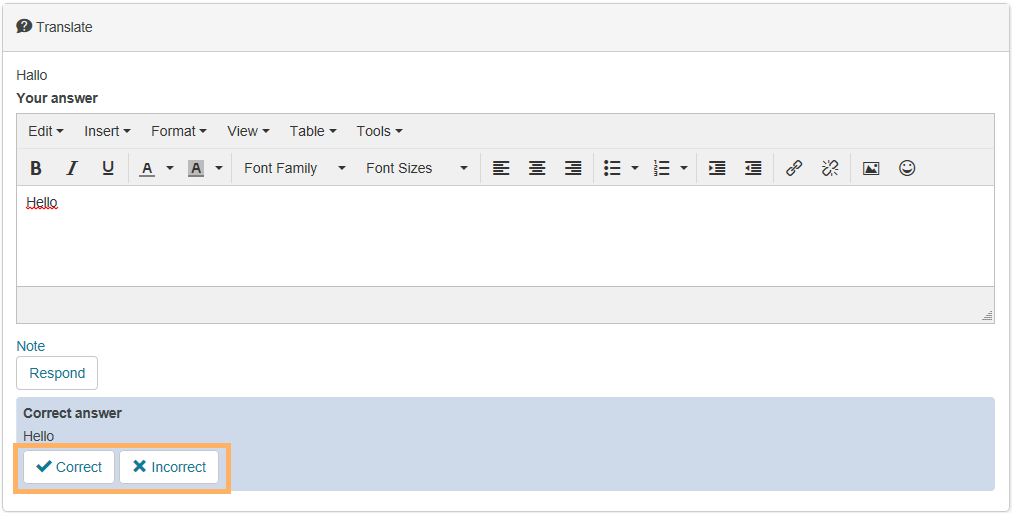
Depending on the correctness of the answer, the card will be moved a stack forward or backwards - until all cards have been worked through. For a selection of specific flashcards, filters will be available.
Usage: Learners' View
Overview
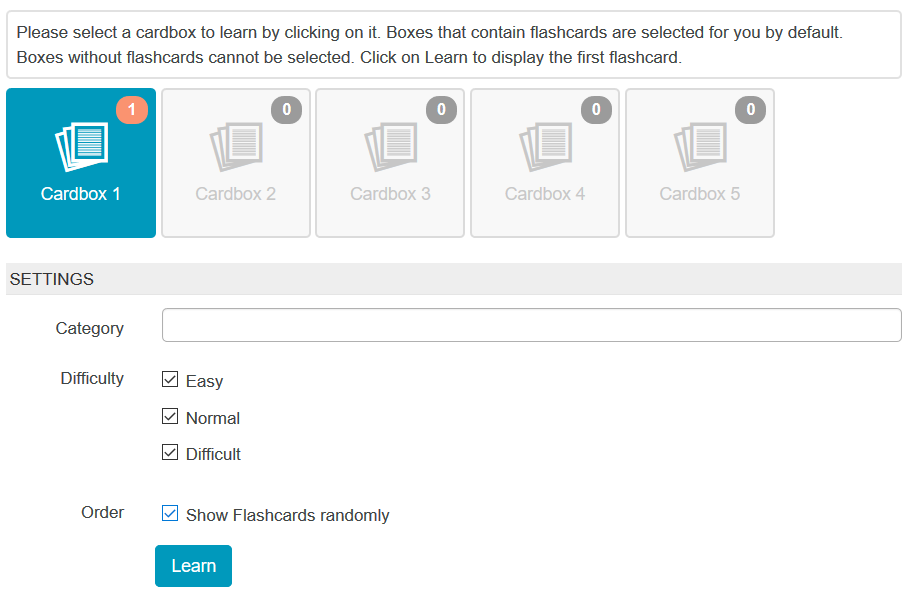
In the upper area of the course element, you will find the various Cardboxes of the flashcard set. The number of boxes is determined by the creator of the flashcard set. The number in the right corner represents the total number of flashcards in the cardbox. Below the cardboxes, it is possible to configure settings for learning with the flashcard set. For example, you can choose a category, set a level of difficulty, or determine the order of the flashcards. |
|
Functions for users
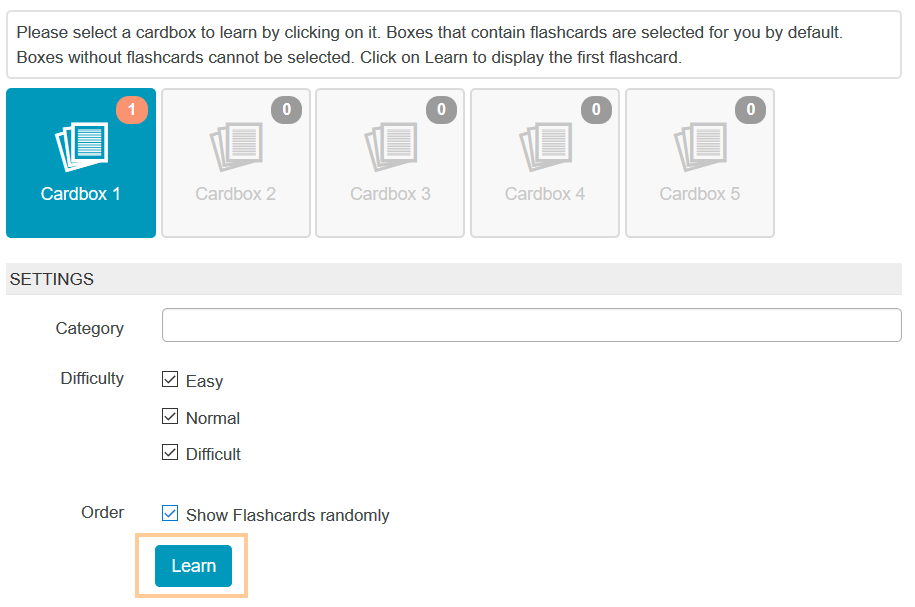
Learning with flashcard sets | To learn with a flashcard set, proceed as follows: How to do that?
| ||||||||||
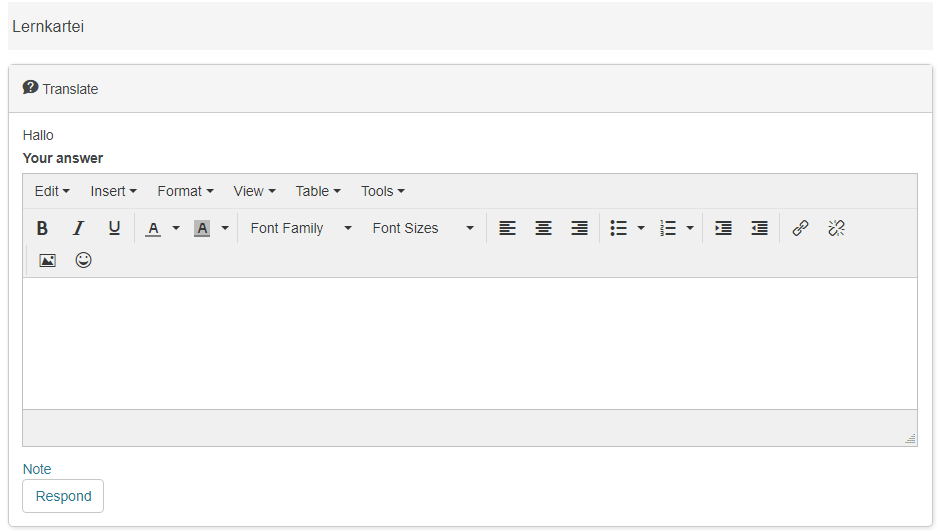
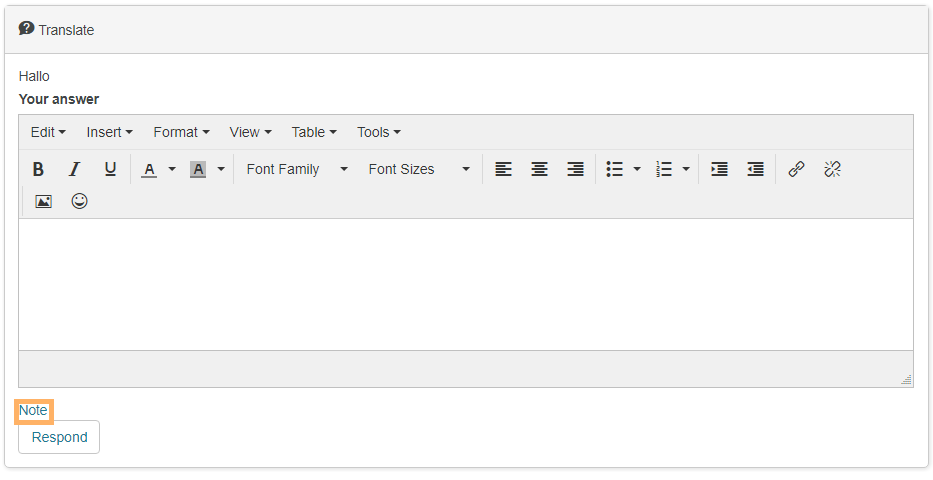
Add notes | To add a note to your flashcard, proceed as follows: How to do that?
|


Configuration: Authors' View
In the course editor
The following functions are available in the course editor:
Add a course element flashcard set | Click to open instructions on how to add a course element ...To integrate a course element into your course, proceed as follows:
| |||||||||||||||||||||||
General configuration settings | In the course editor, you will find the following configuration tabs:
| |||||||||||||||||||||||
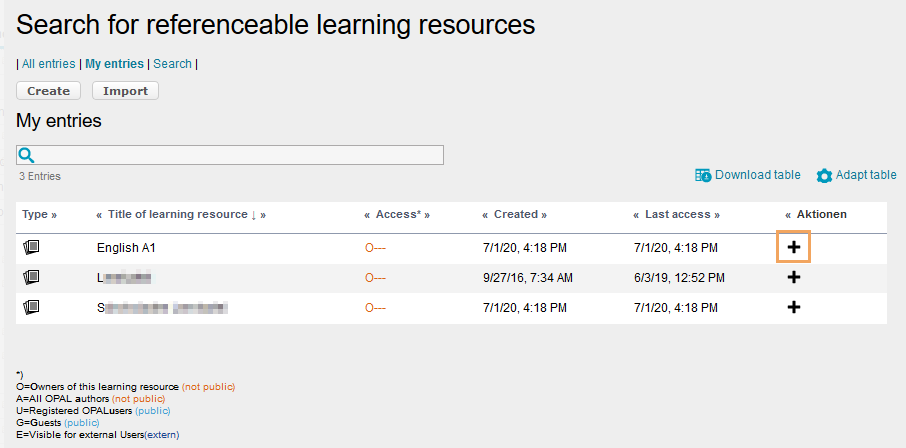
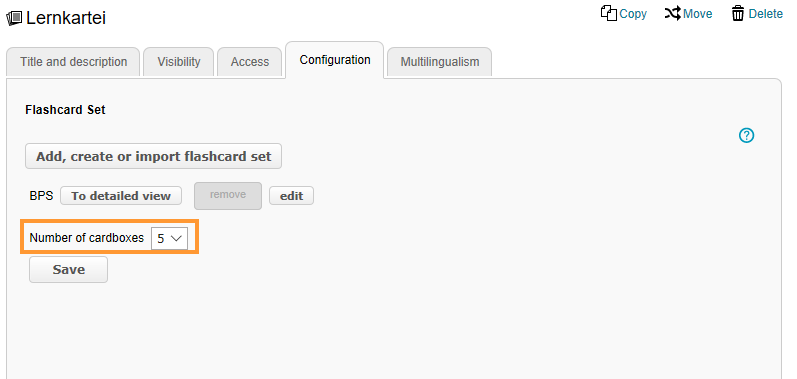
Special configuration settings | In the tab Configuration, you can assign one or more flashcard set resource(s) to your course element. Choose one of the three options:
Start the configuration for all three variants as follows:
| |||||||||||||||||||||||
Functions after adding a flashcard set resource |
|


In the course view
In the course view of a course element Flashcard set, you have access to all Functions available to users.