Bibliography

Last modified by Carina Enke on 17.01.2024

Usage: Learners' View

Overview

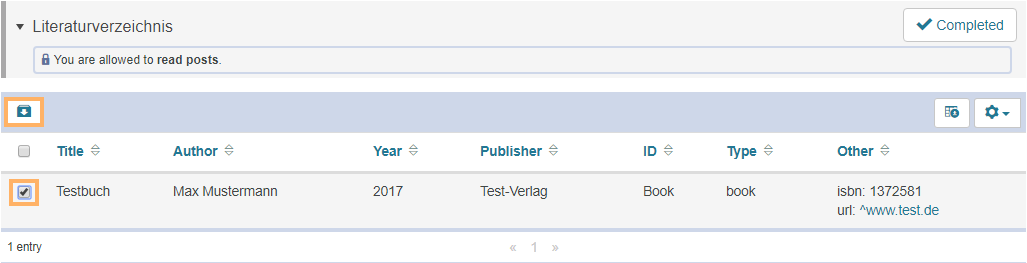
The course element Bibliography provides you with a collection of literature.

With one click, you can export all important information, such as the title, author, and year in BibTeX format (.bib).

In addition, there are several general table functions available to you in the table head, such as the configuration of the displayed columns or the function for downloading the entire table.

Kursrun - Überblick Literaturverzeichnis_en.png

Functions for users

As a user, you have access to the following functions in a course element of the type Bibliography:

Icon_Exportieren.png

Export bibliography

With this option, you can save the data of selected entries as a .bib file to your computer. If there is a link included in the entry, you will be able to navigate directly to the referenced location of the resource.  

How to do that?
  1. Open the course element Bibliography .
  2. Activate the checkbox in front of all entries you want to export.
  3. Then click on Export .
  4. The export of the directory will start automatically.

Kursrun - Literaturverzeichnis exportieren_en.png

Icon_Kursbaustein erledigt_en.png Icon_Kursbaustein erledigt.png

Mark course element as completed


Manual progress

If the course progress indicator is activated for a course, the course element can be marked as done by clicking on Completed. Subsequently, the element gets a corresponding colour marking in the course menu as well as in the details area before the element's title.


You can be assigned extended rights by a course supervisor. These rights will make additional functions, such as creating and editing entries, available to you. For further information about these functions, refer to the help section Functions in the course view.

Configuration: Authors' View

In the course editor

The following functions are available to you in the course editor:

Add a course element bibliography

Click to open instructions on how to add a course element ...

To integrate a course element into your course, proceed as follows:

1

Open the course you want to edit.

Use the pencil icon at the top of the page to open the editing mode.

Kurs-zum Editor wechseln_en.png

2

Select a course element from the menu on the right.

Kurseditor-KB auswählen_en.png

3

In the new window, you can define the position of the new course element within your course structure (left navigation pane). The available positions are marked with an insert icon.

To insert the new course element into an existing substructure, you need to open the substructure by clicking on the small triangle symbol next to its title. The area will open and you will again see insert icons at the positions which are available.

Click on the insert icon at the desired position within the structure. The selected area will be highlighted.

Confirm your choice with Insert course element.

Kurseditor-KB in tree einfügen_en.png

4

The element will be inserted into the course structure at the selected position.

Depending on the course element, you have to make additional configurations or add content in order to complete the configuration.

For these changes to take effect, you must publish the course. The course element will then also become available in the course view.

Kurseditor-KB konfigurieren_en.png


General configuration settings

In the course editor, you will find the following configuration tabs:
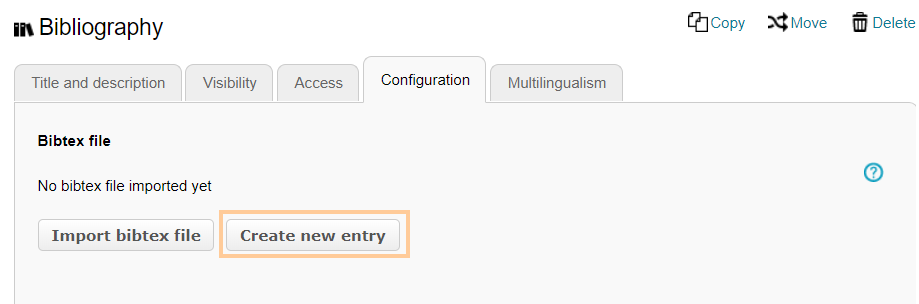
Title and description

Configuration options in the tab title and description ...

Kurseditor - Tab Titel und Beschreibung_en.png

Elements

Description

Title

You need to enter a title for the course element. The title can comprise a maximum of 100 characters. All special characters and numbers are permitted. The title will appear in the navigation menu of the course and also as a heading in the content area.

Changes to the title of the first course element, the so-called main course node ...
 If you change the title of the first course element, the new content will only be applied to the main course node and then displayed in the opened course. If you wish to edit the course title or description, you can do so using the more settings menu of the course.

Subtitle

You can enter a subtitle for the course element with a maximum of 255 characters. All special characters and numbers are permitted. The title will appear as a tooltip in the navigation menu and - if selected and configured accordingly - as a subtitle in the content area.

Description

Here you can describe the course element. The description will appear in the content area below the title.

Depending on the settings configured in the element Display, this additional text is displayed to the user when opening the course element. The user can expand or collapse the view of the text.


Display

Define which information about the course element should be displayed in the course view. In addition to the content, you can optionally display the title and description. All course elements are provided with a reasonable presetting, which mostly includes the setting Title, description and content. You can adjust this setting in accordance with the options available for each course element.

Set link for this course element

Each course element can be accessed via fixed link addresses. Therefore, an internal and an external URL is assigned to each course element. These direct links to concrete elements can be used within courses or provided to learners. The URLs are located below the title and description of the element and will appear upon selecting Set link for this course element.  

  • External link: To refer to this course element from outside of the course or learning platform, you can use the external link and insert it, for example as a href attribute, into the desired HTML page.
  • Internal link: To set a link to another course element within the same course, you can insert the internal link as a href attribute into the desired HTML page.

ID

You will need the ID number of the course element (on the bottom right), for example, if you wish to use the expert mode in the visibility or access tab.

VisibilityIf necessary, restrict the visibility of the course element here. For more information, see the Visibility help page.
Access If necessary, restrict the visibility of the course element here. For more information, see the Access help page.

Configuration

Here you can add, import, or export entries to and from the bibliography. Detailed instructions are given in the following section.

As an author, you can also use all of these functions directly in the course view.

Multilingualism

In this tab, different translations can be added to individual course element areas.

Special configuration settings

To add a bibliographical reference, two options are available:

Import BibTeX file

This option allows you to import files in BibTeX format. You can upload files from your computer or access data stored in your personal folder.

Start import ...
  1. Open the course editor of the course element Bibliography and go to the tab Configuration .
  2. Click on the button Import bibtex file .

Kurseditor - Literaturverzeichnis Bibtex importieren_en.png

3. Now you have the following options:

  • Select folder (option 1) to import a BibTeX file from your  personal folder or
  • Upload file (option 2) to upload a BibTeX file from your computer

Kurseditor - Literaturverzeichnis zwei Optionen_en.png

Option 1:

  1. To use a BibTeX file from the personal folder, click the Select folder button.
  2. Then click on Select file and navigate to the desired resource.
  3. Confirm your choice with Select .

Kurseditor - Literaturverzeichnis Ordner wählen_en.png

Option 2:

  1. To upload a BibTeX file from your computer, click the Select file button.
  2. Navigate to the location of the desired file and select it.
  3. Confirm your choice with Upload .  

Kurseditor - Literaturverzeichnis Datei hochladen_en.png

Create new entry

With this button, new bibliography entries can be created in BibTeX format.

How to do that?
  1. Open the course editor of the course element Bibliography and go to the tab Configuration .
  2. Click on Create  new entry .
     

Kurseditor - Literaturverzeichniseintrag anlegen_en.png

3. A window opens in which you can enter all necessary data (title, author, publisher, ISBN, year of publication, and website).

4. Confirm your entries with Save .

Kurseditor - neuen Literaturverzeichniseintrag speichern_en.png

When you create and import entries, the system automatically checks whether there are similar existing entries. If they have:

  • a similar name,
  • a similar ISBN, or
  • a similar DOI,

you can either replace   the existing file or keep it and create a second entry.

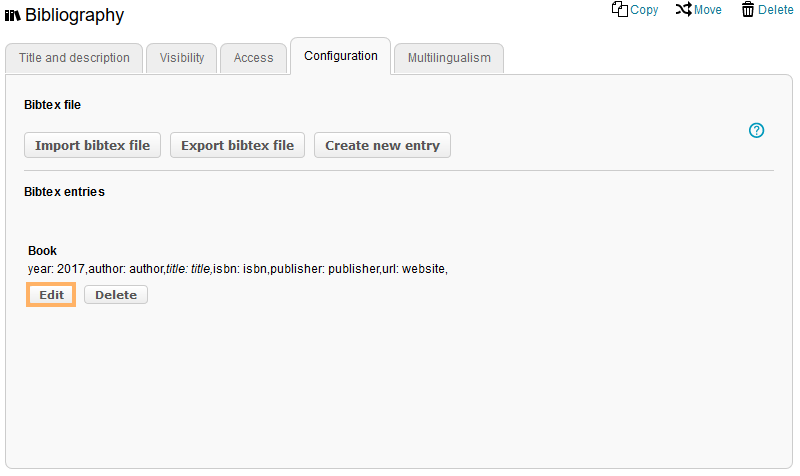
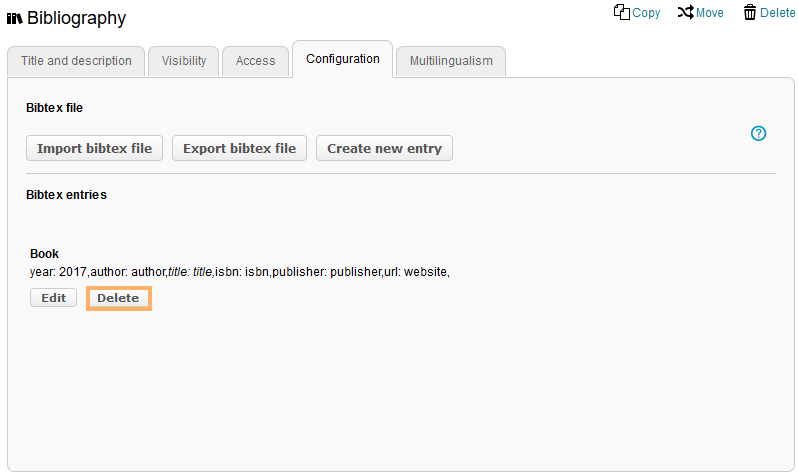
Functions after importing or creating entries

Export BibTeX file

With this option, you can export all entries which have already been collected in this course element to a BibTeX file.

How to do that?
  1. Open the course editor of the course element Bibliography and go to the tab Configuration .
  2. Click on the button Export bibtex file . Then the usual download process will start.

Kurseditor - Literaturverzeichniseintrag exportieren_en.png

Edit or delete entry

Bibliography entries can be edited or deleted at any time.

Edit entry ...
  1. Open the course editor of the course element Bibliography and go to the tab Configuration .
  2. Select the entry you want to edit and click on Edit below the entry.

Kurseditor - Literaturverzeichniseintrag bearbeiten_en.png

3. Make your desired changes.

4. Click on Save to complete the editing process.

Kurseditor - neuen Literaturverzeichniseintrag speichern_en.png

Delete entry ...
  1. Open the course editor of the course element Bibliography and go to the tab Configuration .
  2. Select the entry you want to delete and click on Delete below the entry.

Kurseditor - Literaturverzeichniseintrag löschen_en.png

3. Confirm the deletion process with Yes .

Kurseditor - Löschen bestätigen_en.png

In the course view

The following functions are available to authors in the course view:

Icon_Neuer Eintrag_en.png

Create entries

To create a new   bibliography entry, click the New entry button.

In the new window, fill in all the necessary data for the resource (ID, type, title, author).

When filling in the Other field, be sure to follow BibTeX's syntax. You will not be able to enter plain text in the field, but must insert your content in the form tag: value, e.g. publication: 1. edition.

If you want to add multiple entries, you can separate them by a line break, comma, or semicolon.

Click on Save to publish your entry in the course. It will then appear in the summary table.
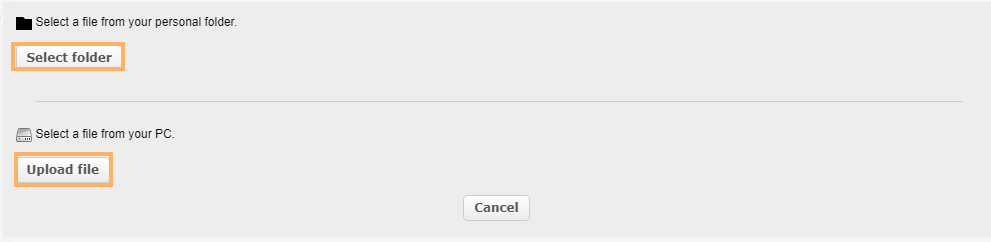
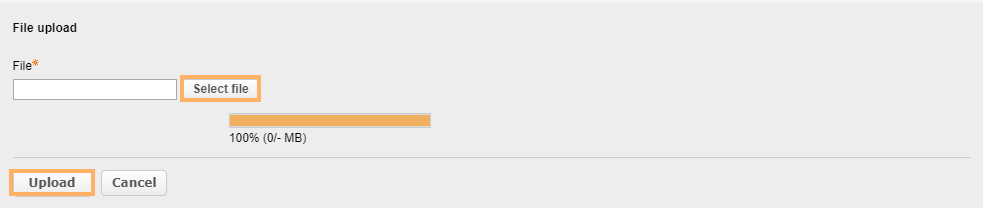
Kursrun - Eintrag erstellen_en.png

Icon_Import Bibtex_en.png

Import entries

To import entries, click the Import bibtex button. Select the desired file(s) and click on Import .

The imported entries will be displayed in BibTeX format. This format determines, among other things, that all content in the columns Type and Other is displayed in lowercase.

Kursrun - Eintrag importieren_en.png

Icon_Löschen.png

Delete entry

Select the entry you want to delete by activating its checkbox. Then click the delete icon and confirm the deletion process with Delete .

Kursrun - Eintrag löschen_en.png

Icon_Bearbeiten.png

Edit entry

To edit an existing entry, click on the pencil icon at the end of the table entry in the Actions column. Make your desired changes and click on Save to complete the editing process.

Kursrun - Eintrag bearbeiten_en.png

As a course supervisor, you can assign extended rights for a course element's additional editing functions to individual or even all course users. These rights can be configured in the tab Access. Further information can be found in the section General configuration settings on this page.