Messages

Last modified by Carina Enke on 16.01.2024

KB_Mitteilung.pngThe Messages course element allows you to create news and important information for your course participants. These will be visible to users in the course as well as in the notifications. The total number of messages displayed can be specified by the course author, as can the time period in which they should be visible to course participants.

Usage: Learners' View

Overview

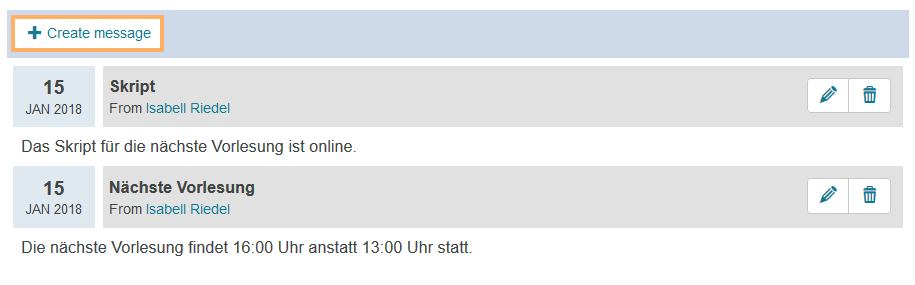
The Messages course element gives you an overview of all existing messages and news. The entries are sorted by date. The most recent ones will be shown first.

Kursrun - Überblick Mitteilungen_en.png

Functions for users

As a user, you have access to the following functions in a Messages course element:

Icon_Abonnieren_en.png

Subscribe to messages

You can subscribe to course elements to get automatically informed about changes.

How to do that?

To subscribe to a course element, proceed as follows:

  1. Open the relevant course and go to the desired course element.
  2. Click the Subscribe button in the upper right corner of the course element view.

Example: Subscribing to a course element File discussion

Kursbaustein Dateidiskussion - Abonnieren_en.png


3. If you have already subscribed to this course element, you will see the button Unsubscribe. Click this button if you want to cancel the subscription.

Kursbaustein Dateidiskussion - Abo beenden_en.png

For further information about the general configuration options for receiving notifications, refer to the page Subscriptions and notifications.

By default, the Messages course element will be subscribed to automatically after opening it. You can cancel the subscription at any time by clicking the Unsubscribe button.

Icon_Ältere Beiträge anzeigen_en.png

Show older messages

Use this button to access older messages. Note that this function is only available if the number of messages to be displayed has been exceeded. The maximum number of displayed messages is set by the course author.

The course author can also enable extended rights. Users with extended rights are allowed to create, edit, and delete messages. Detailed instructions are provided in the Functions in the course view section on this page.

Configuration: Authors' View

In the course editor

The following functions are available to you in the course editor:

Add a messages course element

Click to open instructions on how to add a course element ...

To integrate a course element into your course, proceed as follows:

1

Open the course you want to edit.

Use the pencil icon at the top of the page to open the editing mode.

Kurs-zum Editor wechseln_en.png

2

Select a course element from the menu on the right.

Kurseditor-KB auswählen_en.png

3

In the new window, you can define the position of the new course element within your course structure (left navigation pane). The available positions are marked with an insert icon.

To insert the new course element into an existing substructure, you need to open the substructure by clicking on the small triangle symbol next to its title. The area will open and you will again see insert icons at the positions which are available.

Click on the insert icon at the desired position within the structure. The selected area will be highlighted.

Confirm your choice with Insert course element.

Kurseditor-KB in tree einfügen_en.png

4

The element will be inserted into the course structure at the selected position.

Depending on the course element, you have to make additional configurations or add content in order to complete the configuration.

For these changes to take effect, you must publish the course. The course element will then also become available in the course view.

Kurseditor-KB konfigurieren_en.png


General configuration settings

Title and description

Configuration options in the tab title and description ...

Kurseditor - Tab Titel und Beschreibung_en.png

Elements

Description

Title

You need to enter a title for the course element. The title can comprise a maximum of 100 characters. All special characters and numbers are permitted. The title will appear in the navigation menu of the course and also as a heading in the content area.

Changes to the title of the first course element, the so-called main course node ...
 If you change the title of the first course element, the new content will only be applied to the main course node and then displayed in the opened course. If you wish to edit the course title or description, you can do so using the more settings menu of the course.

Subtitle

You can enter a subtitle for the course element with a maximum of 255 characters. All special characters and numbers are permitted. The title will appear as a tooltip in the navigation menu and - if selected and configured accordingly - as a subtitle in the content area.

Description

Here you can describe the course element. The description will appear in the content area below the title.

Depending on the settings configured in the element Display, this additional text is displayed to the user when opening the course element. The user can expand or collapse the view of the text.


Display

Define which information about the course element should be displayed in the course view. In addition to the content, you can optionally display the title and description. All course elements are provided with a reasonable presetting, which mostly includes the setting Title, description and content. You can adjust this setting in accordance with the options available for each course element.

Set link for this course element

Each course element can be accessed via fixed link addresses. Therefore, an internal and an external URL is assigned to each course element. These direct links to concrete elements can be used within courses or provided to learners. The URLs are located below the title and description of the element and will appear upon selecting Set link for this course element.  

  • External link: To refer to this course element from outside of the course or learning platform, you can use the external link and insert it, for example as a href attribute, into the desired HTML page.
  • Internal link: To set a link to another course element within the same course, you can insert the internal link as a href attribute into the desired HTML page.

ID

You will need the ID number of the course element (on the bottom right), for example, if you wish to use the expert mode in the visibility or access tab.

VisibilityIf necessary, restrict the visibility of the course element here. For more information, see the Visibility help page.
Access If necessary, restrict the visibility of the course element here. For more information, see the Access help page.

Message configuration

In this tab, you can configure different settings for the display of messages and the automatic subscription. Detailed instructions are given in the following section Special configuration settings.

Multilingualism

In this tab, different translations can be added to individual course element areas.

Special configuration settings

The following functions are available to you in the Message configuration tab. To access them, open the course editor of the Messages course element and switch to the Message configuration tab.

Display

Decide how long messages should remain visible and how many messages should be displayed.

To do this, change the number in the respective text fields and click on Save.

Even if the number of messages exceeds the maximum specified in the configuration, users can still access older messages using the Show older messages button. In other words, the messages will be retained.

Kurseditor Mitteilungen - Mitteilungskonfiguration - Anzeige_en.png

Subscribe automatically

This option allows you to decide whether messages will be subscribed to automatically after reading them. Just activate the checkbox. You can undo this setting at any time by deactivating the checkbox. Click on Save to confirm your changes.

Kurseditor Mitteilungen - Mitteilungskonfiguration - automatisch abonnieren_en.png

In the course view

In the course view, you have the following options:
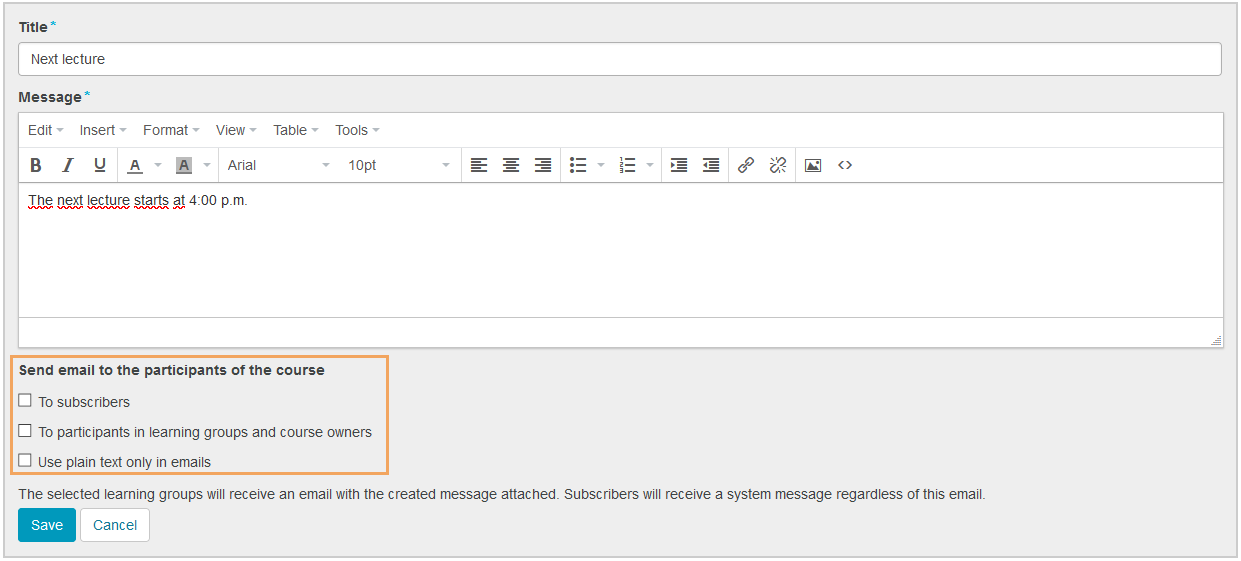
Icon_Mitteilung erstellen_en.png


Create messages

This option allows you to create new messages.  

How to do that?
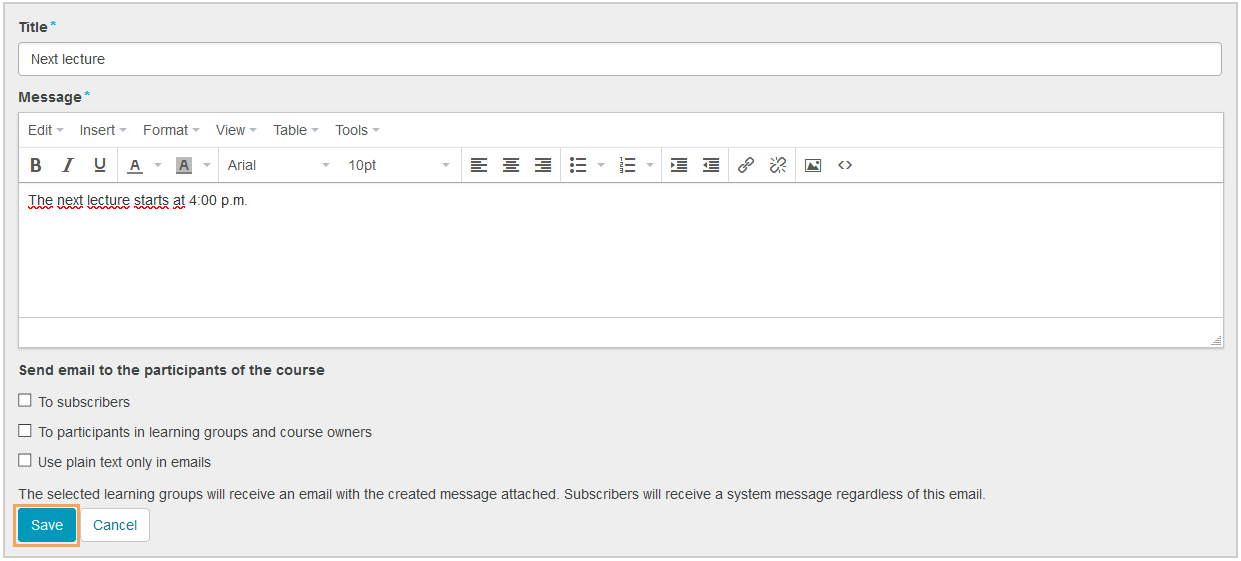
1

Open the Messages course element and click on Create message.

Kursrun Mitteilung erstellen_en.png

2

Enter a title and your message in the appropriate text fields. For the message, there are several formatting options available to you. A detailed description can be found under this link.

Kursrun Mitteilung erstellen - Betreff und Inhalt_en.png

3

Optionally, you can choose to send an email to the participants of the course in order to inform them about the new message. The following three options are available:

  • To subscribers
  • To participants in learning groups and course owners
  • Use plain text only in emails

Select the desired checkbox. 

You will receive a notification if the size of the embedded media exceeds the limit for sending the email. In this case, you can use the Use plain text only in emails option to send the email without the embedded media. But even if you decide to use this option, the media will still be displayed in the course view.

Kursrun Mitteilung erstellen - E-Mail_en.png

4

Click on Save to complete the creation process.

Kursrun Mitteilung erstellen - Speichern_en.png

Icon_Bearbeiten.png

Edit messages

This option allows you to edit an already created message.  

How to do that?
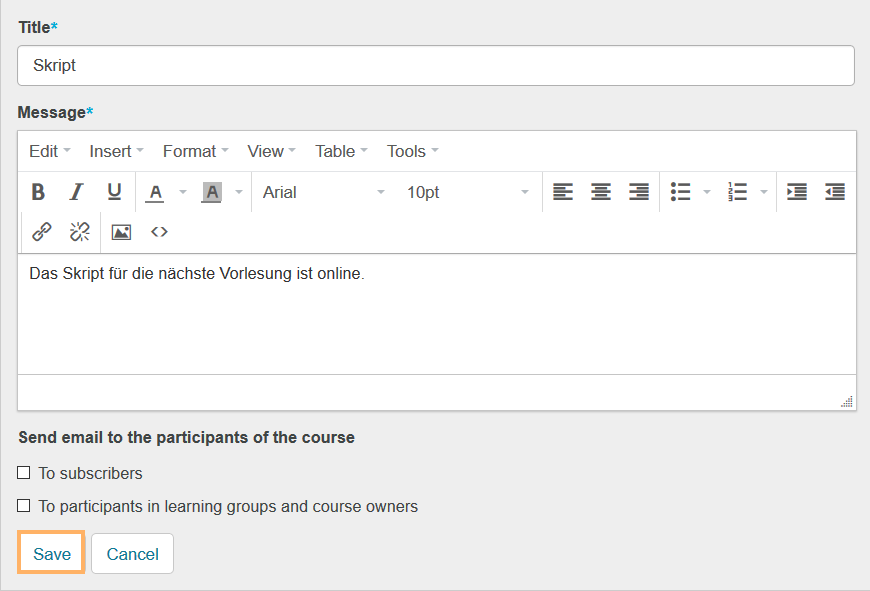
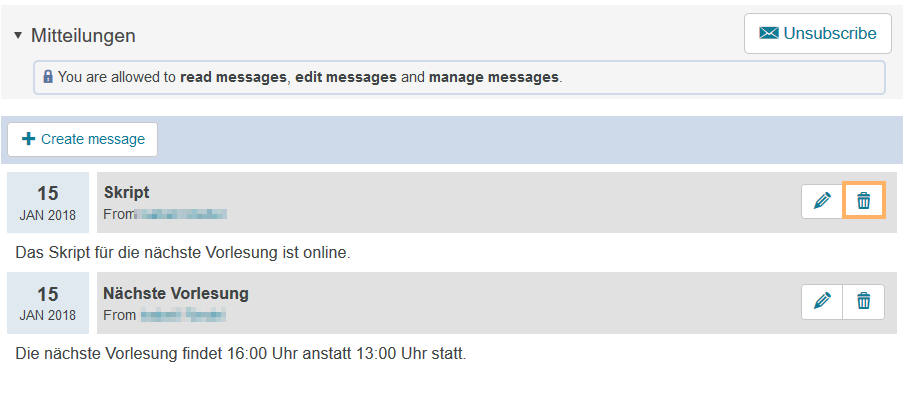
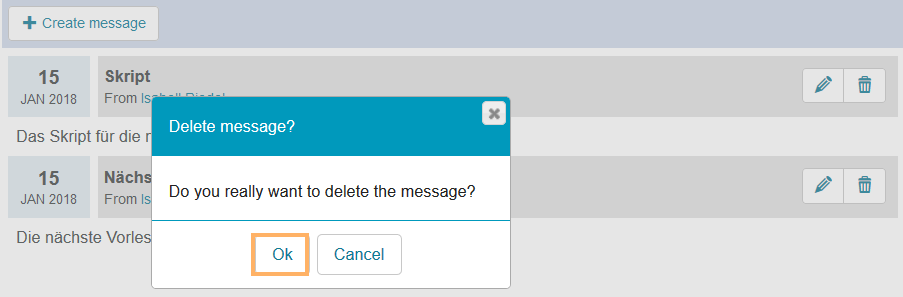
1

Open the Messages course element and select the message you wish to edit. Now click on the pencil icon.

Kursrun Mitteilung bearbeiten_en.png

2

The editor window opens. Make your desired changes and click on Save to complete the editing process.

Kursrun Mitteilung bearbeiten - Editor_en.png

Icon_Löschen.png

Delete messages

An already created message can be deleted at any time.  

How to do that?

1

Open the Messages course element and select the message you wish to delete. Now click on the trash can icon.

Kursrun Mitteilung löschen_en.png

2

Confirm the deletion process with OK.

Kursrun Mitteilung löschen - Löschen bestätigen_en.png