Provide link (blizz)
General information on how to provide a link
The URL to the link of the meeting can be made available in the platform wherever an external link can be embedded.
For example:
- in the description fields of all course element types
- in HTML pages that can be provided as independent course elements (e.g. the course element Single Page ) or displayed when opening course elements.
For different project element types, the link can also be embedded in the course without access to the editing environment, provided that these course elements already exist in the course.
- as a notification
- as a forum entry
- in a folder, within a document
- in the condition of an enrolment
- in a return document to a user, as in the element Topic Assignment , or within a task element.
Depending on the user scenario, you may decide which component is the most suitable.
Check List: Provide link
1 | Laying the foundations:
|
2 | Log on to the platform and open the desired project. |
3 | Switch to the project editor and embed the link in a relevant place. |
4 | Publish your changes to make them available for participants. |
Short digression: How to create a meeting in blizz and copy the URL to the meeting ...
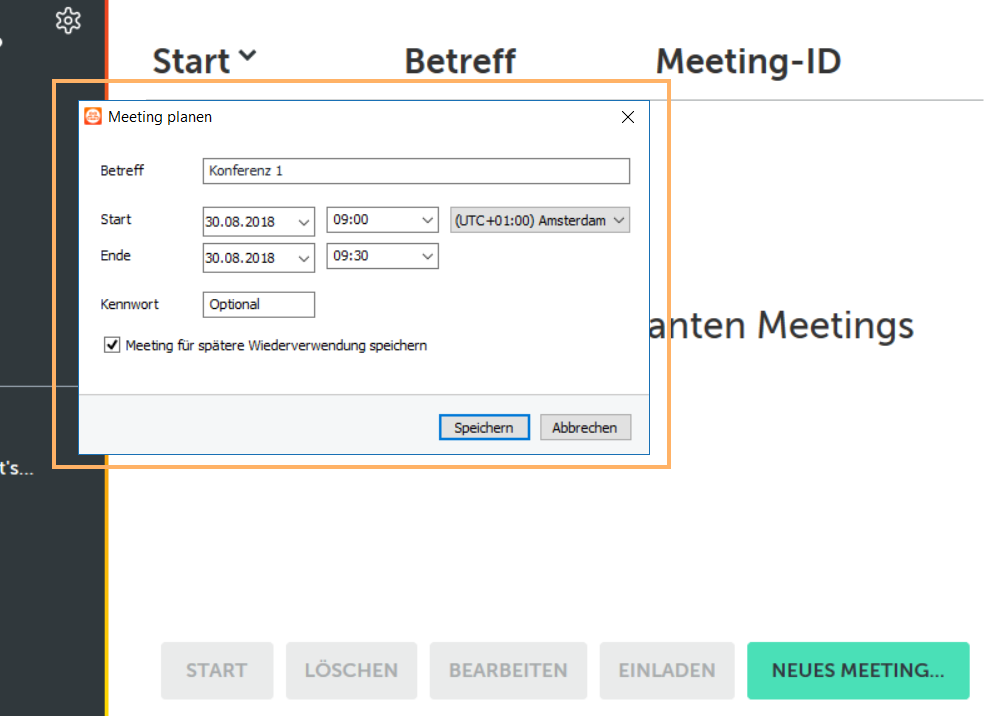
1 | Open blizz and log in with your account. To generate a new meeting, select the entry Calendar from the selection list on the left. |
|
2 | Click on New meeting... to create a conference. | |
3 | Enter the necessary data in the dialogue. Select Save to create the meeting. |
|
4 | A note will automatically appear containing all the necessary dates of the meeting. |
|
5 | Copy the URL or also other information and provide the URL as will be described below. |


Instructions: Provide link in text field
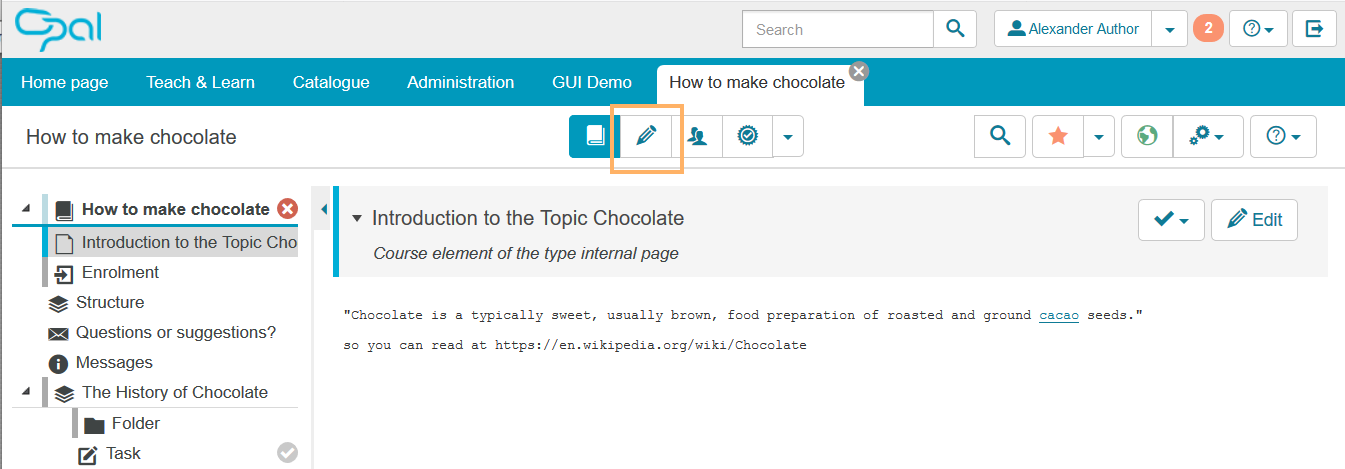
After you have logged in to the platform, open the desired course resource and then the desired element. Now switch to the editor. (Alternatively, you may also create a new course element.) Add course element ...To integrate a course element into your course, proceed as follows:
|
| ||||||||||||
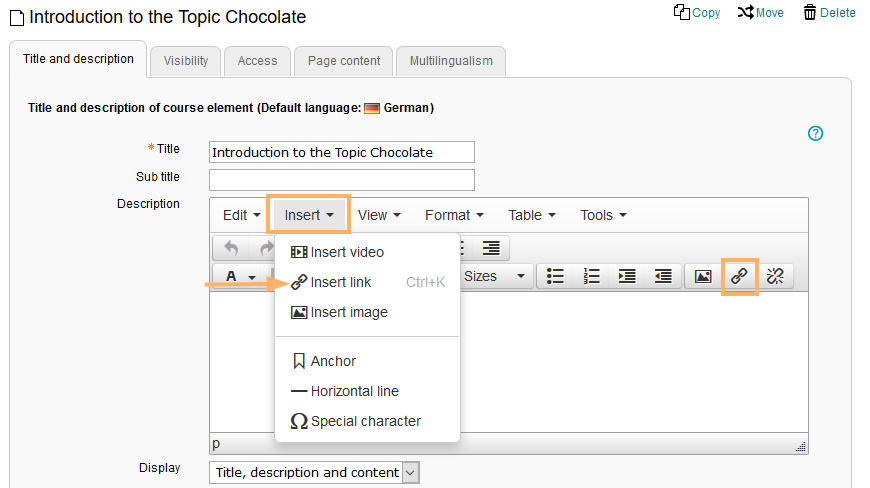
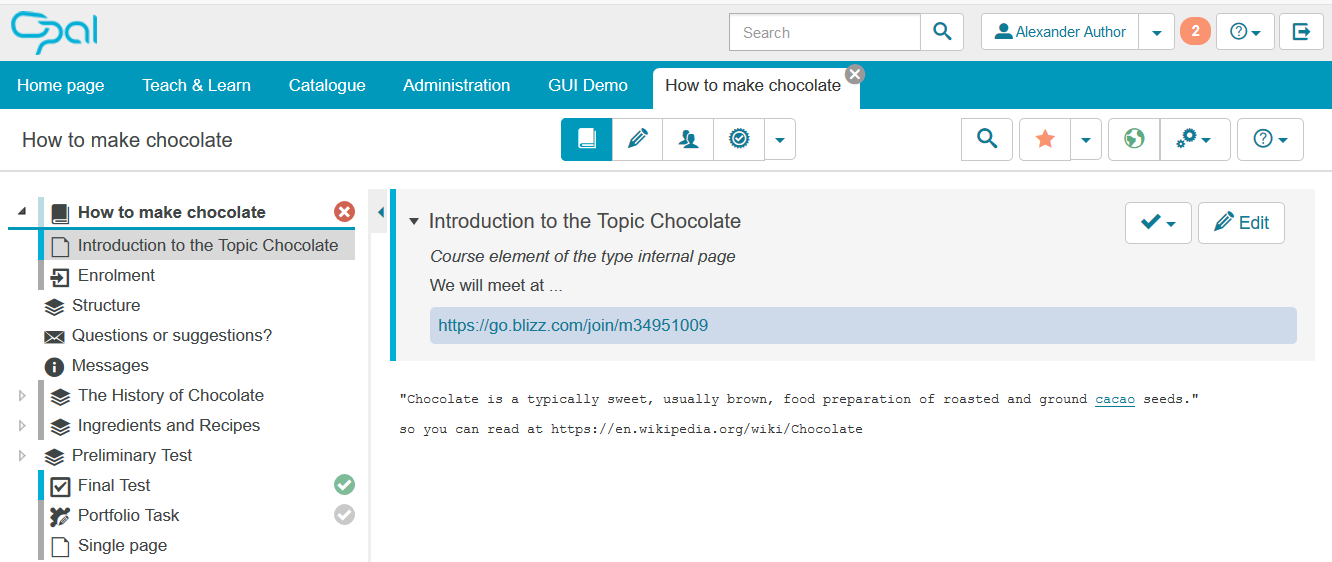
In the middle area of the editor window, you can see all the configuration settings available for the selected course element. In the first tab Title and description , you can enter notes to the course element in the text field. For example, you can share the link to the meeting with the users. To provide the link within the note, proceed as follows: Enter your description in the appropriate text field. At the desired location in the text, select the icon insert/edit link from the header of the text field. A dialogue window opens. (Alternatively, you may also use Insert>Insert link or the key combination Ctrl+K to open the dialogue.) |
| ||||||||||||
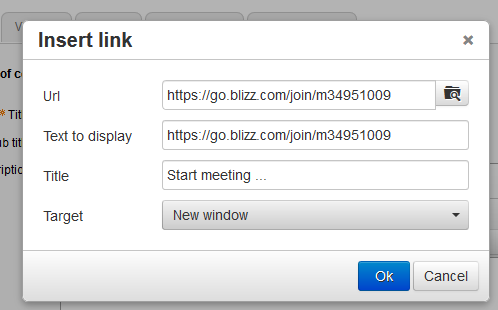
Copy the URL of the link to the meeting to the text field Url and enter the text for the user in the field Text to display (e.g. start meeting). In the last selection field of the dialogue, select the option New window . If this setting is configured, access to the meeting will be provided in a new browser window after clicking on the link in the course. |
| ||||||||||||
To make the link more visually attractive by simple means, you can use text formatting templates. Mark the displayed link text in the text field, select Format from the header area of the text field, and then click on the list entry Formats , which allows you to choose from multiple entries. |
| ||||||||||||
Later in the project, your link will look like this:
|
| ||||||||||||
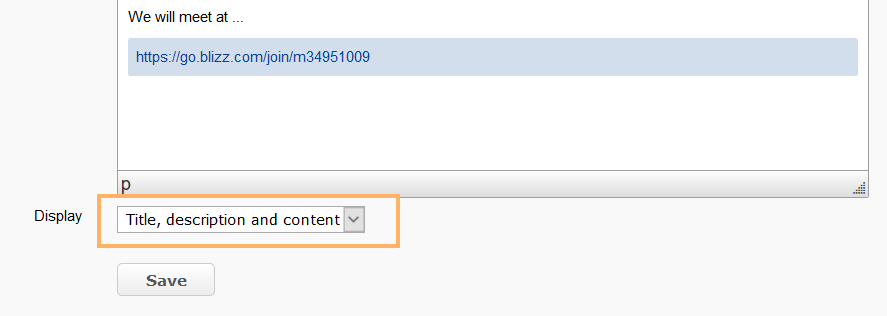
Please pay attention to the setting Display at the end of the text field in the editor: For the description information to be displayed in the project, the entry Title, description and content must be selected.
|
| ||||||||||||
Save your entries in the editor and publish the changes to the course element to make them available for your participants. |
| ||||||||||||
If there will be a need to change the link text to be displayed or the link URL later, select the link text from the text field in the course editor and click again on the insert/edit link icon. The same dialogue as before will open, which allows you to make the necessary changes and publish them afterwards. |
|


If a participant clicks on a link provided like this, the home page of the meeting will open. Depending on the configuration in the blizz tool, the meeting only opens if, for example, the moderator of the meeting is present, or the optional password has been entered. Therefore, you should provide your participant with all the information necessary to ensure a smooth process.
Selection of a suitable course element type
The selection of a course element to provide the link should depend on the scenario in which the conference will be used.
- If more extensive information is required in addition to the link or if you wish to apply a custom CSS design for the link to the meeting, you may use a single HTML page. You can integrate an HTML page, for example, into the course element types Single Page , Structure , and Test .
- If the video conference serves as an introduction to a topic which is to be discussed further and worked on in groups, a course element Forum will be a good choice.
- If you wish to evaluate the participation of a user within the conference, you may want to use the course element Assessment .
- If you wish to offer the conference to a single participant, you may also use an HTML return document for a course element Task or Topic Assignment to provide the link.
For more information about the different types of course elements, refer to the section Course elements.