Ordner mit Inhalten füllen

Last modified by Carina Enke on 12.01.2024


In der Kursansicht können Sie jederzeit Dokumente im Ordner ablegen oder erstellen. Die nachfolgende Tabelle beschreibt die verfügbaren Optionen

Funktionen in der Kursansicht
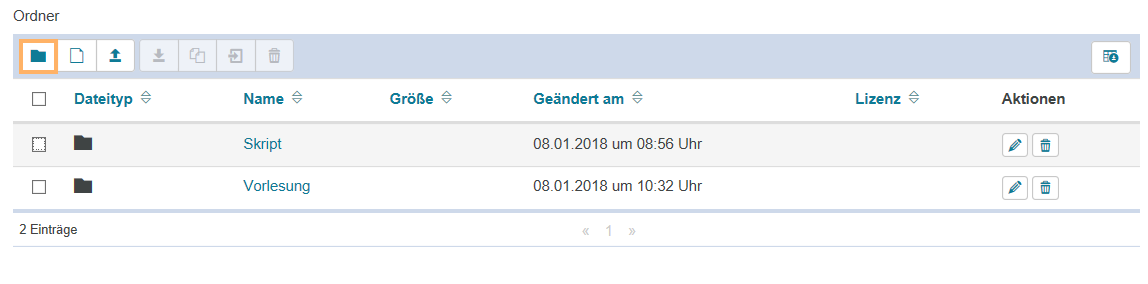
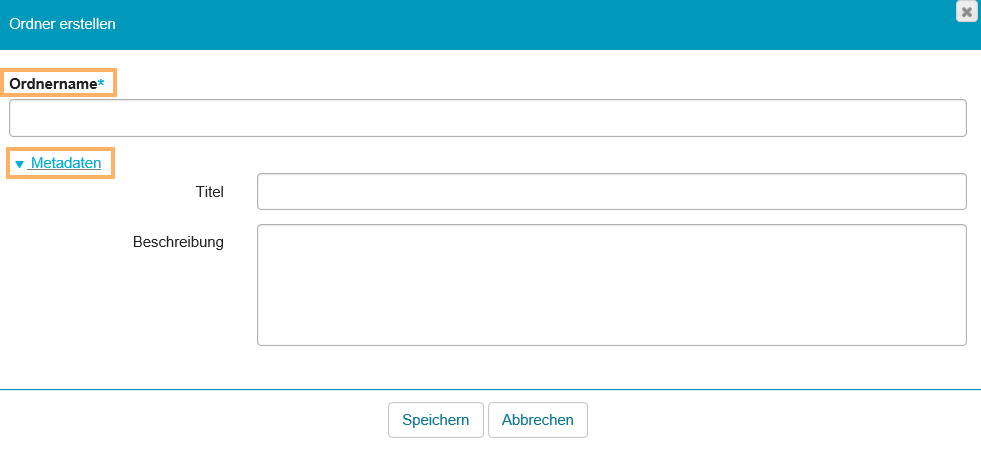
Icon_Ordner erstellen.png

Ordner erstellen

Mit Klick auf diese Schaltfläche haben Sie die Möglichkeit, einen neuen Ordner zu erstellen.

Wie geht das?

1

Open the relevant course element.


Kursrun - Neuen Ordner erstellen_en.png

2

Click on the new folder icon.

3

Enter a folder name and optionally add metadata.

Please make sure that the folder name does not contain any of the following characters: " / ` ; : * < and >.

Kursrun - Neuer Ordner Name und Metadaten_en.png

4

Click on Save.

Kursrun - Neuer Ordner speichern_en.png

Icon_Neue Datei.png

Neue Datei

Mit dieser Option haben Sie die Möglichkeit, eine neue Datei hinzuzufügen.

Wie geht das?
  1. Open the relevant course element.
  2. Click on the new file icon.

Kursrun - Neue Datei_en.png

3. Enter a file name and optionally add content.

Kursrun - Neue Datei - Dateiname und Inhalt_en.png

4. If necessary, assign a licence and add metadata.

Kursrun - Neue Datei - Lizenz und Metadaten_en.png

5. Click on Save to complete the editing process.

Kursrun - Neue Datei - Speichern_en.png

Icon_Hochladen.png

Datei hochladen

An dieser Stelle haben Sie die Möglichkeit, eine bestehende Datei von Ihrem PC hochzuladen.

Wie geht das?
  1. Open the relevant course element.
  2. Click on the upload file icon.

Kursrun - Datei hochladen_en.png

3. Click on Select files to upload files from your computer or drag and drop the desired files into the upload field.

Kursrun - Datei hochladen - Datei auswählen_en.png

4. Confirm the upload by clicking on the Upload button.

Kursrun - Datei hochladen - Upload_en.png

icon_herunterladen.png

Gewählte Dateien als ZIP-Archiv herunterladen

Mit dieser Option haben Sie die Möglichkeit, gewählte Dateien als ZIP-Archiv herunterzuladen.

Wie geht das?

1

Open the relevant course element.

Kursrun - Datei herunterladen - Häkchen setzen_en.png

2

Select the files you wish to download by ticking the checkboxes next to them.

3

Click on the download file icon. The download will start automatically.

If the table contains a large number of entries, it will be displayed over several pages. When downloading selected entries, however, only those entries on the currently displayed page will be downloaded. To download entries from multiple pages at once, first use the Show all function below the table, which will display all existing entries on one page. Then select the desired entries as described above and click on the download file icon.

Kursrun - Datei herunterladen_en.png

Icon_Kopieren.png

Inhalt kopieren

Mit Klick auf diese Schaltfläche haben Sie die Möglichkeit, einen Inhalt zu kopieren.

Wie geht das?
  1. Open the relevant course element.
  2. Select the files you want to copy by ticking the checkboxes next to them.

Kursrun - Datei herunterladen - Häkchen setzen_en.png

3. Click on the copy file icon.

Kursrun - Datei kopieren_en.png

4. Then select the location where you want to copy the files and confirm the process with Copy files.

Kursrun - Datei kopieren - Bestätigen_en.png

Icon_Verschieben.png

Inhalt  verschieben

Mit dieser Funktion haben Sie die Möglichkeit, einen Inhalt innerhalb der vorhandenen Struktur des Ordner-Bausteins zu verschieben.

Wie geht das?

1. Open the relevant course element.

2. Select the files you want to move by ticking the checkboxes next to them.

Kursrun - Datei herunterladen - Häkchen setzen_en.png

3. Click on the move folder icon.

Kursrun - Datei verschieben_en.png

4. Then select the location where you want to move the files and confirm the process with Move files.

Kursrun - Datei verschieben - Bestätigung_en.png

Icon_Löschen.png

Inhalt löschen

Mit Klick auf diese Schaltfläche haben Sie die Möglichkeit, einen Inhalt zu löschen.

Wie geht das?
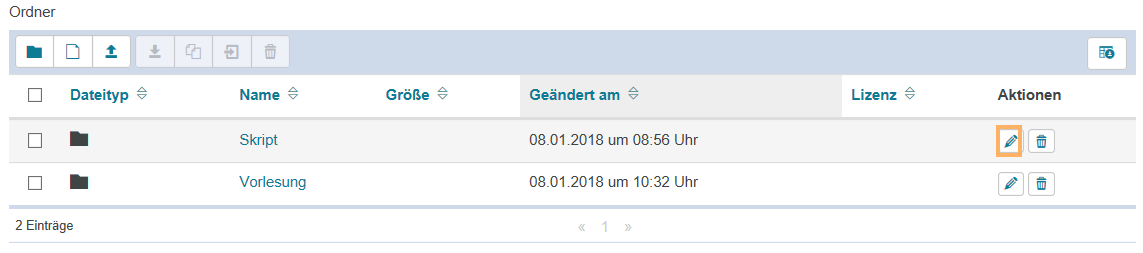
  1. Open the relevant course element.
  2. Select the files you want to delete by ticking the checkboxes next to them.

Kursrun - Datei herunterladen - Häkchen setzen_en-1.png

3. Click on the trash can icon.

Kursrun - Datei löschen_en.png

4. Confirm the dialogue with Delete.

Kursrun - Datei löschen - Bestätigung_en.png

Icon_Bearbeiten.png

Inhalt bearbeiten

Mit dieser Option steht Ihnen die Möglichkeit, Inhalte zu bearbeiten, zur Verfügung.

Wie geht das?

1. Open the relevant course element.

2. Click on the pencil icon next to the content you want to edit.

Kursrun - Datei bearbeiten_en.png

3. Make your desired changes and click on Save.

Kursrun - Bearbeitung abschließen_en.png

Icon_Tabellendownload.png

Tabelle herunterladen

Export table content as a file. The file format you have selected within your System settings will be used as the default format.