Inhalte erstellen oder importieren
Mit dem ONYX Editor können Sie Aufgaben, Tests oder Fragebögen erstellen. Zur einfachen Verwaltung können Sie die Inhalte in Ordnern strukturieren. Alle für Sie sichtbaren Inhalte werden Ihnen im Tab Testressourcen angezeigt. Hier haben Sie auch die Möglichkeit, neue Inhalte zu erstellen.

Inhalt
Inhalte erstellen
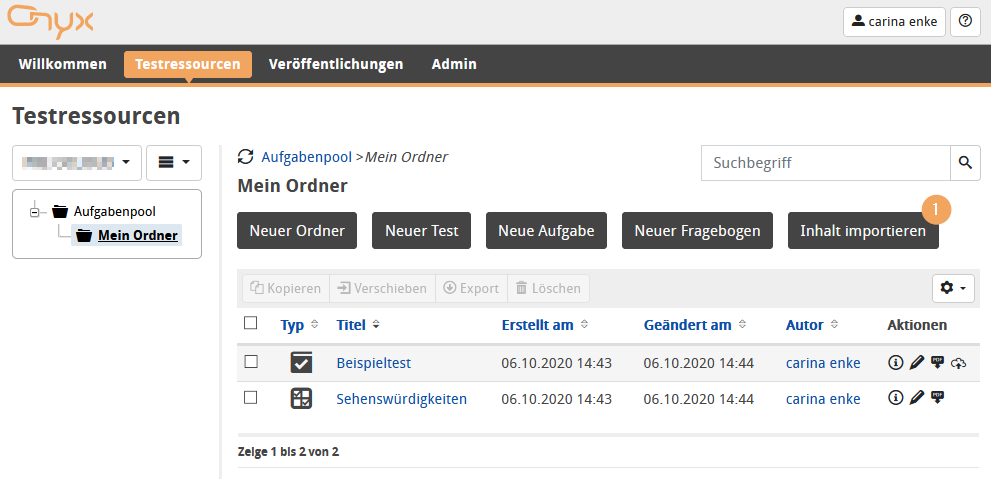
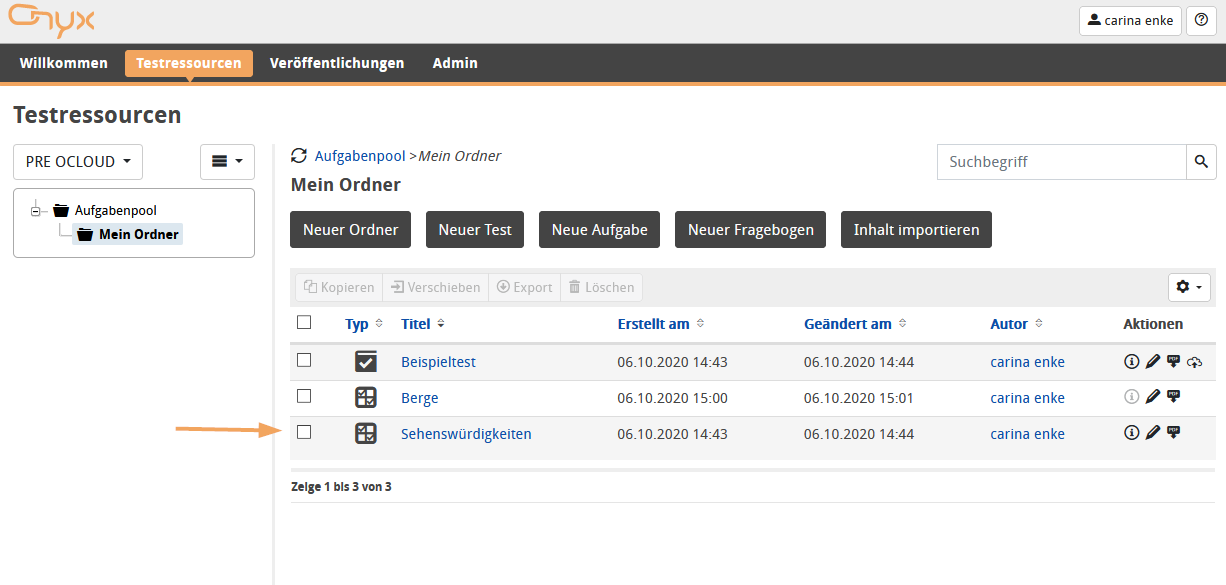
- Gehen Sie in den Tab Testressourcen.
- Klicken Sie im oberen Seitenbereich auf den Button , , oder .
- Vergeben Sie einen Titel, wählen Sie einen Aufgabentyp (nur bei Aufgaben) aus und bestätigen Sie den Dialog mit . Der Inhalt öffnet sich in einem neuen Tab.
Inhalte importieren
Sie können bereits vorhandene Test- und Aufgabendaten in die ONYX-Testsuite importieren.
Unterstützt werden Aufgaben mit dem Format IMS QTI 2.1 (Onyx), 2.0 und verschiedene IMS QTI 1.2 Varianten (u. a. OLAT, Blackboard, WebCT). Zusätzlich können Aufgabeninhalte importiert werden, die als CSV-Datei vorliegen, oder Aufgaben, die in anderen direkt verknüpften ONYX-Repositorien vorhanden sind.
Starten Sie den Import für alle drei Varianten wie folgt:
1 | Öffnen Sie den Tab Testressourcen. Klicken Sie anschließend im oberen Seitenbereich auf den Button . |
|
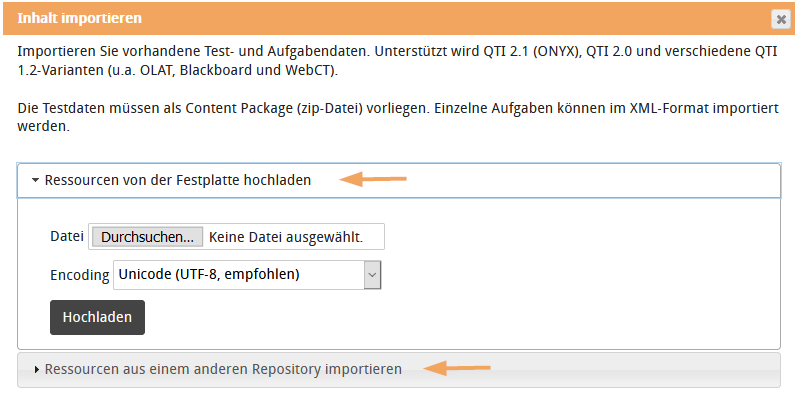
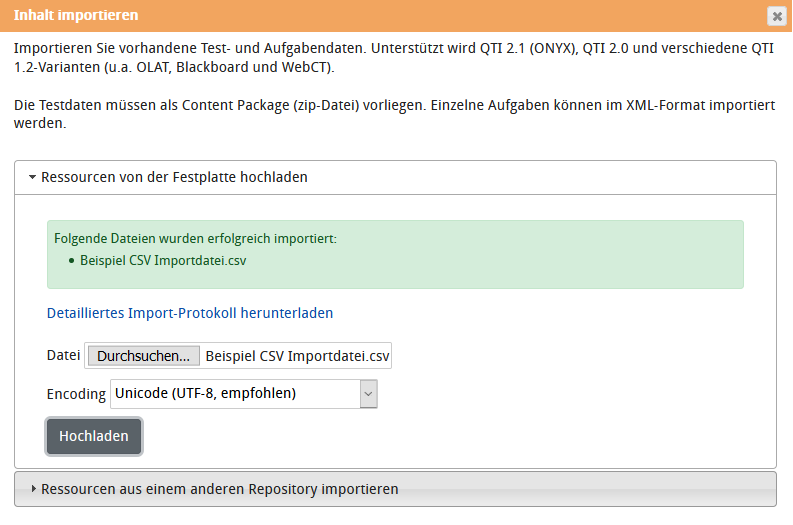
2 | Es öffnet sich der Dialog Inhalt importieren. Hier können Sie auswählen, ob Sie Ressourcen von der Festplatte hochladen oder Ressourcen aus einem anderen Repository importieren möchten.
|
|
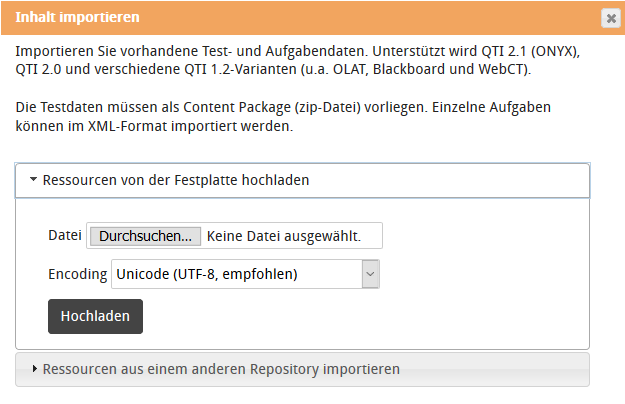
Ressourcen von der Festplatte hochladen
Mit dieser Funktion können Sie Tests, Fragebögen und Aufgaben importieren, die im Dateiformat .zip oder .xml vorliegen oder in einer CSV-Datei erfasst sind.
Wie Sie eine CSV-Tabelle vorbereiten, beschreibt der Abschnitt Aufgaben per CSV-Datei importieren.
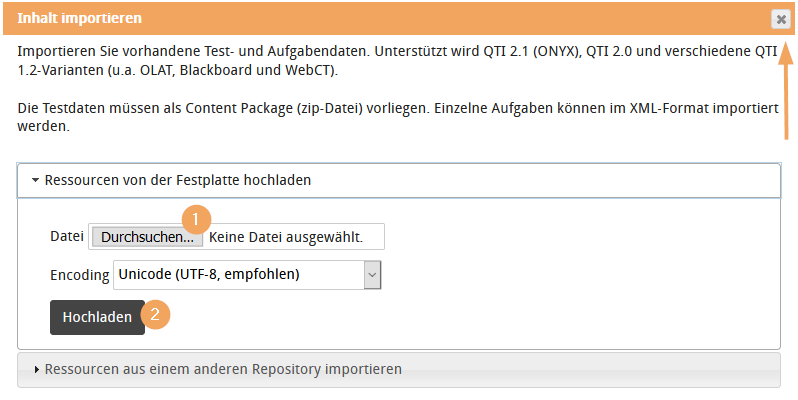
1 | Mit Klick auf Durchsuchen können Sie die gewünschte Datei auf Ihrem Rechner auswählen.
|
|
2 | Mit Klick auf Hochladen startet der Import. Ein erfolgreicher Import wird Ihnen mit einer Erfolgsmeldung bestätigt. Sollten Probleme beim Import aufgetreten sein, erhalten Sie ebenfalls eine entsprechende Hinweismeldung. |
|
3 | Wollen Sie eine weitere Ressource importieren, nutzen Sie erneut den Button Durchsuchen und wiederholen Sie die Schritte. | |
4 | Sind alle gewünschten Importe erfolgt, schließen Sie den Dialog per Klick auf das Schließen X oben rechts. | |
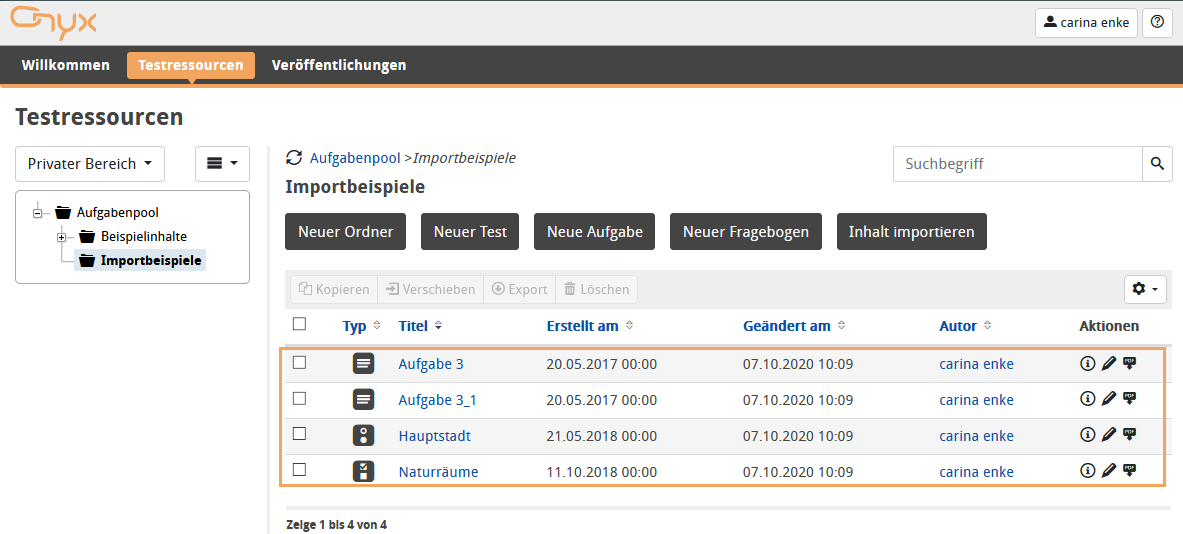
5 | Der Dialog schließt sich und die hinzugefügten Ressourcen werden in der Übersichtstabelle sichtbar. |
|
Ressourcen aus einem anderen Repository importieren
Wenn Sie mehrere Repositorien im ONYX Editor nutzen, können Sie auch Inhalte aus einem anderen Repositorium in Ihr aktuelles importieren.
1 | Unter Repo wählen können Sie das Repository auswählen, aus welchem Sie Inhalte importieren möchten.
|
|
2 | Darunter sehen Sie die Struktur und können Ressourcen per Mehrfachauswahl selektieren. Zur Übersicht werden Ihnen die Metadaten der ausgewählten Ressourcen angezeigt. | |
3 | Nutzen Sie den Button um die Ressourcen Ihrem Repository hinzuzufügen. |

1 | Laden Sie sich die Dateivorlage herunter. Öffnen Sie die Datei auf Ihrem Gerät und füllen Sie diese mit Ihren Aufgabeninhalten. Orientieren Sie sich dabei an den Beispieleinträgen und speichern Sie Ihre Änderungen. |
|
2 | Wechseln Sie in den ONYX-Aufgabenpool. Wählen Sie anschließend im oberen Seitenbereich den Button . |
|
3 | Es öffnet sich der Bereich Ressourcen von der Festplatte hochladen und Sie können mit Klick auf Durchsuchen die gespeicherte CSV-Datei auswählen. |
|
4 | Mit Klick auf Hochladen wird die Datei geprüft und die enthaltenen Aufgaben angelegt. Ein erfolgreicher Import aller Aufgaben wird Ihnen mit einer Erfolgsmeldung bestätigt. Sollten Probleme beim Import aufgetreten sein, erhalten Sie ebenfalls eine entsprechende Hinweismeldung. |
|
5 | Sind alle gewünschten Importe erfolgt, schließen Sie den Dialog per Klick auf das Schließen X oben rechts. |
|
6 | Der Dialog schließt sich und die hinzugefügten Ressourcen werden in der Übersichtstabelle sichtbar. |


Using the ONYX Editor, you can create questions, tests, or surveys. For ease of management, you can also organise your content into folders. All content visible to you will be listed in the Test resources tab, where you can also create new content.
Content
Related topics
Create content
- Go to the Test resources tab.
- Click on New folder, New test, New question, or New survey in the upper part of the page.
- Assign a title, select a question type (only for questions), and confirm the dialogue with OK. The content will then open in a new tab.
Import content
You can import existing test and question data to the ONYX Testsuite.
The question formats supported are IMS QTI 2.1 (ONYX), 2.0 and various IMS QTI 1.2 variants (including OLAT, Blackboard, WebCT). In addition, you can also import question content that is available as a CSV file or questions from other directly linked ONYX repositories.
Start the import for all three variants as follows:
1 | Open the Test resources tab. Then click on Import content in the upper part of the page. |
|
2 | This will open the Import content dialogue. Here you can choose whether to upload resources from your hard disk or import resources from another repository. |
|
Upload resources from your hard disk
This function allows you to import tests, surveys, and questions that are available in the file formats .zip, .xml, or .csv.
For instructions on how to prepare a CSV table, see the section Import questions via CSV fileInhalte erstellen oder importieren.
1 | Click on Browse to select the desired file on your computer. |
|
2 | Then click on Upload to start the import. If the import was successful, a success message will be displayed. If problems occur during the import, you will also receive a corresponding notification. |
|
3 | To import another resource, use the Browse button again and repeat the steps. | |
4 | Once all the desired imports have been completed, close the dialogue by clicking on the Close X button in the top right corner. | |
5 | The dialogue is closed, and the added resources will become visible in the summary table. |
|
Import resources from another repository
If you use multiple repositories in the ONYX Editor, you can also import content from another repository to your current one.
1 | Under Select repo, you can select the repository from which you wish to import content. |
|
2 | Below, you will then see the structure of the selected repository, which allows you to select multiple resources at once. You will also be provided with an overview of the metadata of the selected resources. | |
3 | Use Import to add the resources to your repository. |
1 | Download the file template. Open the file on your device and fill it with your question content. Use the example entries as a guide and save your changes. |
|
2 | Switch to the ONYX question bank. Then click on Import content in the upper part of the page. |
|
3 | This will open the Upload resources from hard disk area, and you can select the saved CSV file by clicking on Browse. |
|
4 | Click on Upload. After, the file will be checked, and the questions contained in it will be created. If the import was successful, a success message will be displayed. If problems occur during the import, you will receive a corresponding notification. |
|
5 | Once all the desired imports have been completed, close the dialogue by clicking on the Close X button in the top right corner. |
|
6 | The dialogue is closed, and the added resources will become visible in the summary table. |