Failed to execute the [display] macro. Cause: [Error number 2 in 0: No wiki with id [ [[Sichtbarkeit und Zugriff>>doc] could be found]. Click on this message for details.
org.xwiki.rendering.macro.MacroExecutionException: Failed to load Document [ [[Sichtbarkeit und Zugriff>>doc:LMS._Include Library.Kursseiten.Kurshauptknoten\: Verfügbare Tabs im Editor.Sichtbarkeit und Zugriff.WebHome]]]
at org.xwiki.rendering.internal.macro.display.DisplayMacro.execute(DisplayMacro.java:92)
at org.xwiki.rendering.internal.macro.display.DisplayMacro.execute(DisplayMacro.java:49)
at org.xwiki.rendering.internal.transformation.macro.MacroTransformation.transform(MacroTransformation.java:441)
at org.xwiki.rendering.internal.transformation.DefaultRenderingContext.transformInContext(DefaultRenderingContext.java:183)
at org.xwiki.rendering.internal.transformation.DefaultTransformationManager.performTransformations(DefaultTransformationManager.java:88)
at org.xwiki.display.internal.DocumentContentAsyncExecutor.executeInCurrentExecutionContext(DocumentContentAsyncExecutor.java:396)
at org.xwiki.display.internal.DocumentContentAsyncExecutor.execute(DocumentContentAsyncExecutor.java:269)
at org.xwiki.display.internal.DocumentContentAsyncRenderer.execute(DocumentContentAsyncRenderer.java:112)
at org.xwiki.rendering.async.internal.block.AbstractBlockAsyncRenderer.render(AbstractBlockAsyncRenderer.java:157)
at org.xwiki.rendering.async.internal.block.AbstractBlockAsyncRenderer.render(AbstractBlockAsyncRenderer.java:54)
at org.xwiki.rendering.async.internal.DefaultAsyncRendererExecutor.syncRender(DefaultAsyncRendererExecutor.java:290)
at org.xwiki.rendering.async.internal.DefaultAsyncRendererExecutor.render(DefaultAsyncRendererExecutor.java:267)
at org.xwiki.rendering.async.internal.block.DefaultBlockAsyncRendererExecutor.execute(DefaultBlockAsyncRendererExecutor.java:125)
at org.xwiki.display.internal.DocumentContentDisplayer.display(DocumentContentDisplayer.java:93)
at org.xwiki.display.internal.DocumentContentDisplayer.display(DocumentContentDisplayer.java:46)
at org.xwiki.display.internal.DefaultDocumentDisplayer.display(DefaultDocumentDisplayer.java:96)
at org.xwiki.display.internal.DefaultDocumentDisplayer.display(DefaultDocumentDisplayer.java:39)
at org.xwiki.sheet.internal.SheetDocumentDisplayer.display(SheetDocumentDisplayer.java:123)
at org.xwiki.sheet.internal.SheetDocumentDisplayer.display(SheetDocumentDisplayer.java:52)
at org.xwiki.display.internal.ConfiguredDocumentDisplayer.display(ConfiguredDocumentDisplayer.java:68)
at org.xwiki.display.internal.ConfiguredDocumentDisplayer.display(ConfiguredDocumentDisplayer.java:42)
at com.xpn.xwiki.doc.XWikiDocument.display(XWikiDocument.java:1431)
at com.xpn.xwiki.doc.XWikiDocument.getRenderedContent(XWikiDocument.java:1567)
at com.xpn.xwiki.doc.XWikiDocument.displayDocument(XWikiDocument.java:1517)
at com.xpn.xwiki.doc.XWikiDocument.displayDocument(XWikiDocument.java:1486)
at com.xpn.xwiki.api.Document.displayDocument(Document.java:821)
at jdk.internal.reflect.GeneratedMethodAccessor754.invoke(Unknown Source)
at java.base/jdk.internal.reflect.DelegatingMethodAccessorImpl.invoke(DelegatingMethodAccessorImpl.java:43)
at java.base/java.lang.reflect.Method.invoke(Method.java:569)
at org.apache.velocity.util.introspection.UberspectImpl$VelMethodImpl.doInvoke(UberspectImpl.java:571)
at org.apache.velocity.util.introspection.UberspectImpl$VelMethodImpl.invoke(UberspectImpl.java:554)
at org.apache.velocity.runtime.parser.node.ASTMethod.execute(ASTMethod.java:221)
at org.apache.velocity.runtime.parser.node.ASTReference.execute(ASTReference.java:368)
at org.apache.velocity.runtime.parser.node.ASTReference.value(ASTReference.java:704)
at org.apache.velocity.runtime.parser.node.ASTExpression.value(ASTExpression.java:75)
at org.apache.velocity.runtime.parser.node.ASTSetDirective.render(ASTSetDirective.java:242)
at org.apache.velocity.runtime.parser.node.ASTBlock.render(ASTBlock.java:147)
at org.apache.velocity.runtime.parser.node.SimpleNode.render(SimpleNode.java:439)
at org.apache.velocity.runtime.parser.node.ASTIfStatement.render(ASTIfStatement.java:190)
at org.apache.velocity.runtime.parser.node.ASTBlock.render(ASTBlock.java:147)
at org.xwiki.velocity.internal.directive.TryCatchDirective.render(TryCatchDirective.java:86)
at org.apache.velocity.runtime.parser.node.ASTDirective.render(ASTDirective.java:304)
at org.apache.velocity.runtime.parser.node.SimpleNode.render(SimpleNode.java:439)
at org.apache.velocity.Template.merge(Template.java:358)
at org.apache.velocity.Template.merge(Template.java:262)
at org.xwiki.velocity.internal.InternalVelocityEngine.evaluate(InternalVelocityEngine.java:233)
at com.xpn.xwiki.internal.template.VelocityTemplateEvaluator.evaluateContent(VelocityTemplateEvaluator.java:107)
at com.xpn.xwiki.internal.template.TemplateAsyncRenderer.evaluateContent(TemplateAsyncRenderer.java:219)
at com.xpn.xwiki.internal.template.TemplateAsyncRenderer.renderVelocity(TemplateAsyncRenderer.java:174)
at com.xpn.xwiki.internal.template.TemplateAsyncRenderer.render(TemplateAsyncRenderer.java:135)
at com.xpn.xwiki.internal.template.TemplateAsyncRenderer.render(TemplateAsyncRenderer.java:54)
at org.xwiki.rendering.async.internal.DefaultAsyncRendererExecutor.lambda$syncRender$0(DefaultAsyncRendererExecutor.java:284)
at com.xpn.xwiki.internal.security.authorization.DefaultAuthorExecutor.call(DefaultAuthorExecutor.java:98)
at org.xwiki.rendering.async.internal.DefaultAsyncRendererExecutor.syncRender(DefaultAsyncRendererExecutor.java:284)
at org.xwiki.rendering.async.internal.DefaultAsyncRendererExecutor.render(DefaultAsyncRendererExecutor.java:267)
at org.xwiki.rendering.async.internal.block.DefaultBlockAsyncRendererExecutor.render(DefaultBlockAsyncRendererExecutor.java:154)
at com.xpn.xwiki.internal.template.InternalTemplateManager.render(InternalTemplateManager.java:907)
at com.xpn.xwiki.internal.template.InternalTemplateManager.renderFromSkin(InternalTemplateManager.java:869)
at com.xpn.xwiki.internal.template.InternalTemplateManager.render(InternalTemplateManager.java:856)
at com.xpn.xwiki.internal.template.InternalTemplateManager.renderNoException(InternalTemplateManager.java:811)
at com.xpn.xwiki.internal.template.InternalTemplateManager.renderNoException(InternalTemplateManager.java:803)
at com.xpn.xwiki.internal.template.DefaultTemplateManager.renderNoException(DefaultTemplateManager.java:79)
at com.xpn.xwiki.internal.template.DefaultTemplateManager.renderNoException(DefaultTemplateManager.java:73)
at org.xwiki.template.script.TemplateScriptService.render(TemplateScriptService.java:54)
at jdk.internal.reflect.GeneratedMethodAccessor265.invoke(Unknown Source)
at java.base/jdk.internal.reflect.DelegatingMethodAccessorImpl.invoke(DelegatingMethodAccessorImpl.java:43)
at java.base/java.lang.reflect.Method.invoke(Method.java:569)
at org.apache.velocity.util.introspection.UberspectImpl$VelMethodImpl.doInvoke(UberspectImpl.java:571)
at org.apache.velocity.util.introspection.UberspectImpl$VelMethodImpl.invoke(UberspectImpl.java:554)
at org.apache.velocity.runtime.parser.node.ASTMethod.execute(ASTMethod.java:221)
at org.apache.velocity.runtime.parser.node.ASTReference.execute(ASTReference.java:368)
at org.apache.velocity.runtime.parser.node.ASTReference.render(ASTReference.java:492)
at org.apache.velocity.runtime.parser.node.ASTBlock.render(ASTBlock.java:147)
at org.apache.velocity.runtime.directive.VelocimacroProxy.render(VelocimacroProxy.java:217)
at org.apache.velocity.runtime.directive.RuntimeMacro.render(RuntimeMacro.java:331)
at org.apache.velocity.runtime.directive.RuntimeMacro.render(RuntimeMacro.java:261)
at org.apache.velocity.runtime.parser.node.ASTDirective.render(ASTDirective.java:304)
at org.apache.velocity.runtime.parser.node.ASTBlock.render(ASTBlock.java:147)
at org.apache.velocity.runtime.parser.node.ASTIfStatement.render(ASTIfStatement.java:171)
at org.apache.velocity.runtime.parser.node.ASTBlock.render(ASTBlock.java:147)
at org.apache.velocity.runtime.parser.node.SimpleNode.render(SimpleNode.java:439)
at org.apache.velocity.runtime.parser.node.ASTIfStatement.render(ASTIfStatement.java:190)
at org.apache.velocity.runtime.parser.node.SimpleNode.render(SimpleNode.java:439)
at org.apache.velocity.Template.merge(Template.java:358)
at org.apache.velocity.Template.merge(Template.java:262)
at org.xwiki.velocity.internal.InternalVelocityEngine.evaluate(InternalVelocityEngine.java:233)
at com.xpn.xwiki.internal.template.VelocityTemplateEvaluator.evaluateContent(VelocityTemplateEvaluator.java:107)
at com.xpn.xwiki.internal.template.TemplateAsyncRenderer.evaluateContent(TemplateAsyncRenderer.java:219)
at com.xpn.xwiki.internal.template.TemplateAsyncRenderer.renderVelocity(TemplateAsyncRenderer.java:174)
at com.xpn.xwiki.internal.template.TemplateAsyncRenderer.render(TemplateAsyncRenderer.java:135)
at com.xpn.xwiki.internal.template.TemplateAsyncRenderer.render(TemplateAsyncRenderer.java:54)
at org.xwiki.rendering.async.internal.DefaultAsyncRendererExecutor.lambda$syncRender$0(DefaultAsyncRendererExecutor.java:284)
at com.xpn.xwiki.internal.security.authorization.DefaultAuthorExecutor.call(DefaultAuthorExecutor.java:98)
at org.xwiki.rendering.async.internal.DefaultAsyncRendererExecutor.syncRender(DefaultAsyncRendererExecutor.java:284)
at org.xwiki.rendering.async.internal.DefaultAsyncRendererExecutor.render(DefaultAsyncRendererExecutor.java:267)
at org.xwiki.rendering.async.internal.block.DefaultBlockAsyncRendererExecutor.render(DefaultBlockAsyncRendererExecutor.java:154)
at com.xpn.xwiki.internal.template.InternalTemplateManager.render(InternalTemplateManager.java:907)
at com.xpn.xwiki.internal.template.InternalTemplateManager.renderFromSkin(InternalTemplateManager.java:869)
at com.xpn.xwiki.internal.template.InternalTemplateManager.renderFromSkin(InternalTemplateManager.java:849)
at com.xpn.xwiki.internal.template.InternalTemplateManager.render(InternalTemplateManager.java:835)
at com.xpn.xwiki.internal.template.DefaultTemplateManager.render(DefaultTemplateManager.java:91)
at com.xpn.xwiki.internal.template.DefaultTemplateManager.render(DefaultTemplateManager.java:85)
at com.xpn.xwiki.XWiki.evaluateTemplate(XWiki.java:2569)
at com.xpn.xwiki.web.Utils.parseTemplate(Utils.java:180)
at com.xpn.xwiki.web.XWikiAction.execute(XWikiAction.java:651)
at com.xpn.xwiki.web.XWikiAction.execute(XWikiAction.java:339)
at com.xpn.xwiki.web.LegacyActionServlet.service(LegacyActionServlet.java:108)
at javax.servlet.http.HttpServlet.service(HttpServlet.java:623)
at org.apache.catalina.core.ApplicationFilterChain.internalDoFilter(ApplicationFilterChain.java:209)
at org.apache.catalina.core.ApplicationFilterChain.doFilter(ApplicationFilterChain.java:153)
at com.xpn.xwiki.web.ActionFilter.doFilter(ActionFilter.java:122)
at org.apache.catalina.core.ApplicationFilterChain.internalDoFilter(ApplicationFilterChain.java:178)
at org.apache.catalina.core.ApplicationFilterChain.doFilter(ApplicationFilterChain.java:153)
at org.xwiki.wysiwyg.filter.ConversionFilter.doFilter(ConversionFilter.java:61)
at org.apache.catalina.core.ApplicationFilterChain.internalDoFilter(ApplicationFilterChain.java:178)
at org.apache.catalina.core.ApplicationFilterChain.doFilter(ApplicationFilterChain.java:153)
at org.apache.tomcat.websocket.server.WsFilter.doFilter(WsFilter.java:51)
at org.apache.catalina.core.ApplicationFilterChain.internalDoFilter(ApplicationFilterChain.java:178)
at org.apache.catalina.core.ApplicationFilterChain.doFilter(ApplicationFilterChain.java:153)
at org.xwiki.container.servlet.filters.internal.SetHTTPHeaderFilter.doFilter(SetHTTPHeaderFilter.java:63)
at org.apache.catalina.core.ApplicationFilterChain.internalDoFilter(ApplicationFilterChain.java:178)
at org.apache.catalina.core.ApplicationFilterChain.doFilter(ApplicationFilterChain.java:153)
at org.xwiki.resource.servlet.RoutingFilter.doFilter(RoutingFilter.java:132)
at org.apache.catalina.core.ApplicationFilterChain.internalDoFilter(ApplicationFilterChain.java:178)
at org.apache.catalina.core.ApplicationFilterChain.doFilter(ApplicationFilterChain.java:153)
at org.xwiki.container.servlet.filters.internal.SavedRequestRestorerFilter.doFilter(SavedRequestRestorerFilter.java:209)
at org.apache.catalina.core.ApplicationFilterChain.internalDoFilter(ApplicationFilterChain.java:178)
at org.apache.catalina.core.ApplicationFilterChain.doFilter(ApplicationFilterChain.java:153)
at org.xwiki.container.servlet.filters.internal.SetCharacterEncodingFilter.doFilter(SetCharacterEncodingFilter.java:117)
at org.apache.catalina.core.ApplicationFilterChain.internalDoFilter(ApplicationFilterChain.java:178)
at org.apache.catalina.core.ApplicationFilterChain.doFilter(ApplicationFilterChain.java:153)
at org.apache.catalina.core.StandardWrapperValve.invoke(StandardWrapperValve.java:168)
at org.apache.catalina.core.StandardContextValve.invoke(StandardContextValve.java:90)
at org.apache.catalina.authenticator.AuthenticatorBase.invoke(AuthenticatorBase.java:481)
at org.apache.catalina.core.StandardHostValve.invoke(StandardHostValve.java:130)
at org.apache.catalina.valves.ErrorReportValve.invoke(ErrorReportValve.java:93)
at org.apache.catalina.valves.AbstractAccessLogValve.invoke(AbstractAccessLogValve.java:670)
at org.apache.catalina.core.StandardEngineValve.invoke(StandardEngineValve.java:74)
at org.apache.catalina.valves.RemoteIpValve.invoke(RemoteIpValve.java:765)
at org.apache.catalina.connector.CoyoteAdapter.service(CoyoteAdapter.java:342)
at org.apache.coyote.http11.Http11Processor.service(Http11Processor.java:390)
at org.apache.coyote.AbstractProcessorLight.process(AbstractProcessorLight.java:63)
at org.apache.coyote.AbstractProtocol$ConnectionHandler.process(AbstractProtocol.java:928)
at org.apache.tomcat.util.net.NioEndpoint$SocketProcessor.doRun(NioEndpoint.java:1794)
at org.apache.tomcat.util.net.SocketProcessorBase.run(SocketProcessorBase.java:52)
at org.apache.tomcat.util.threads.ThreadPoolExecutor.runWorker(ThreadPoolExecutor.java:1191)
at org.apache.tomcat.util.threads.ThreadPoolExecutor$Worker.run(ThreadPoolExecutor.java:659)
at org.apache.tomcat.util.threads.TaskThread$WrappingRunnable.run(TaskThread.java:61)
at java.base/java.lang.Thread.run(Thread.java:840)
Caused by: com.xpn.xwiki.XWikiException: Error number 3202 in 3: Exception while reading document [ [[Sichtbarkeit und Zugriff>>doc:LMS._Include Library.Kursseiten.Kurshauptknoten\: Verfügbare Tabs im Editor.Sichtbarkeit und Zugriff.WebHome]]()]
at com.xpn.xwiki.store.XWikiHibernateStore.loadXWikiDoc(XWikiHibernateStore.java:1219)
at com.xpn.xwiki.store.XWikiCacheStore.lambda$loadXWikiDoc$2(XWikiCacheStore.java:435)
at org.xwiki.cache.internal.CacheLoader$LoaderEntry.lambda$new$0(CacheLoader.java:71)
at java.base/java.util.concurrent.FutureTask.run(FutureTask.java:264)
at org.xwiki.cache.internal.CacheLoader.runLoader(CacheLoader.java:179)
at org.xwiki.cache.internal.CacheLoader.loadAndStoreInCache(CacheLoader.java:118)
at com.xpn.xwiki.store.XWikiCacheStore.loadXWikiDoc(XWikiCacheStore.java:431)
at com.xpn.xwiki.XWiki.getDocument(XWiki.java:2200)
at com.xpn.xwiki.XWiki.getDocument(XWiki.java:2262)
at com.xpn.xwiki.XWiki.getDocument(XWiki.java:2161)
at com.xpn.xwiki.doc.DefaultDocumentAccessBridge.getDocumentInstance(DefaultDocumentAccessBridge.java:151)
at org.xwiki.rendering.internal.macro.display.DisplayMacro.execute(DisplayMacro.java:89)
... 183 more
Caused by: com.xpn.xwiki.XWikiException: Error number 2 in 0: No wiki with id [ [[Sichtbarkeit und Zugriff>>doc] could be found
at com.xpn.xwiki.internal.store.hibernate.HibernateStore.beginTransaction(HibernateStore.java:854)
at com.xpn.xwiki.store.XWikiHibernateBaseStore.beginTransaction(XWikiHibernateBaseStore.java:576)
at com.xpn.xwiki.store.XWikiHibernateStore.loadXWikiDoc(XWikiHibernateStore.java:1068)
... 194 more
{{display reference="
For individual course element types, there are further attributes which can be used to regulate access to editing rights for course participants.
The following editing rights can be restricted or extended using the general configuration attributes (depending on date, group, etc.):
| | - Assignment
- Edit task folder
- Drop box - Delete own solutions
- Drop box
- Return box
- Assessment
- Sample solution
|
| | - Read
- Read and write
- Moderate
|
| | - Only file download / read in the forum
- File up- and download/ read and write in the forum
- Edit or delete files / Moderate in the forum
|
| | - Read
- Read and write
- Moderate
|
| | |
| | - Display
- Display and add
- Display, edit, and delete
|
| | |
| | |
| | |
| | - Read
- Read and write
- Moderate
|
| | |
| | |
| | Configurable in the tab Visibility : - Conduct test
- View assessment
- View results
|
| | - Read
- Add and edit articles
|
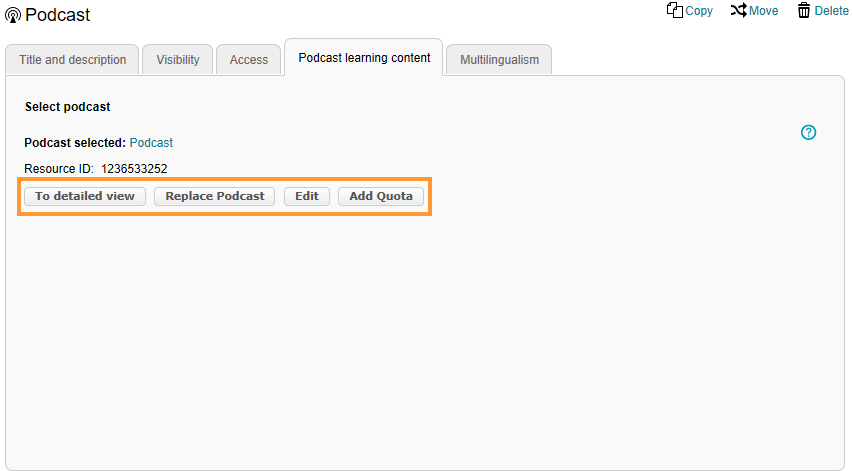
![]() The course element Podcast offers the possibility to provide various audio and video files. The audio or video file can be directly played with the integrated player or downloaded by clicking on
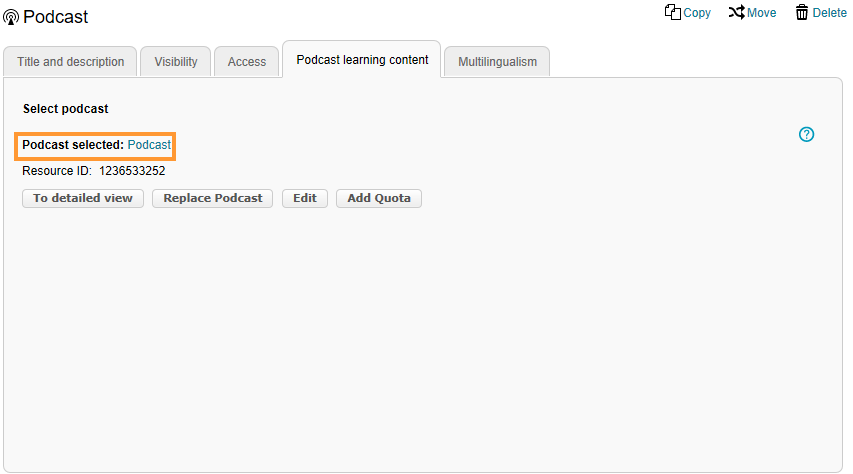
The course element Podcast offers the possibility to provide various audio and video files. The audio or video file can be directly played with the integrated player or downloaded by clicking on ![]() . You can either embed external podcasts or create your own from scratch. Entries will be sorted by date, with he newest message at the top. Changes in the podcast can be subscribed to via RSS feed.
. You can either embed external podcasts or create your own from scratch. Entries will be sorted by date, with he newest message at the top. Changes in the podcast can be subscribed to via RSS feed.


