Survey

Last modified by Carina Enke on 15.02.2024

KB_Fragebogen.png The survey course element offers the possibility to conduct anonymous statistical surveys in the course. This allows you, for example, to obtain direct feedback on your course.

The learning platform supports the ONYX Testsuite and therefore enables convenient survey creation with a wide range of functions.

Usage: Learners' View

Overview

In the survey course element, you can start and run a survey configured by the course author. Please note that a survey can only be carried out once.

However, it is possible to pause the survey, i. e. you will be able to exit the survey early and resume it later where you left off.

Kursrun - Ansicht Fragebogen_en.png

Functions for users

Start and finish survey

Start a survey as follows:

Open the survey course element.

Now click on Start survey.

A survey can only be started if no visibility or access restrictions prevent it. However, in contrast to tests, there is principally only one attempt available. If necessary, you can pause this attempt using Suspend and continue or finish it later. When you close the attempt with Finish survey, the attempt will be completed, and you cannot start another attempt for the survey.

What happens next?

1

The survey will be opened and started immediately unless any release restrictions prevent it. Now you can start answering the questions. To advance to the next question, click on Next. Depending on the author's configuration, you can also select questions from the navigation pane.

Similar to tests, the survey will be carried out on the ONYX web interface. For more information, refer to the Test procedure from the participants' point of view help page in the ONYX help.

2

To close the survey, click on Finish survey.

Please note that no further processing of this attempt will be possible after finishing the survey.

Automatic progress

If the course progress indicator is activated for a course, the course element will automatically be marked as completed upon the first finished attempt of the user. This process is independent of any possible assessment.

For more information on conducting a survey, refer to the Test procedure from the participants' view help page in the ONYX Testsuite help.

Configuration: Authors' View 

In the course editor

The following functions are available to you in the course editor:

Add a survey course element

Click to open instructions on how to add a course element ...

To integrate a course element into your course, proceed as follows:

1

Open the course you want to edit.

Use the pencil icon at the top of the page to open the editing mode.

Kurs-zum Editor wechseln_en.png

2

Select a course element from the menu on the right.

Kurseditor-KB auswählen_en.png

3

In the new window, you can define the position of the new course element within your course structure (left navigation pane). The available positions are marked with an insert icon.

To insert the new course element into an existing substructure, you need to open the substructure by clicking on the small triangle symbol next to its title. The area will open and you will again see insert icons at the positions which are available.

Click on the insert icon at the desired position within the structure. The selected area will be highlighted.

Confirm your choice with Insert course element.

Kurseditor-KB in tree einfügen_en.png

4

The element will be inserted into the course structure at the selected position.

Depending on the course element, you have to make additional configurations or add content in order to complete the configuration.

For these changes to take effect, you must publish the course. The course element will then also become available in the course view.

Kurseditor-KB konfigurieren_en.png


General configuration settings

In the course editor, you will find the following configuration tabs:

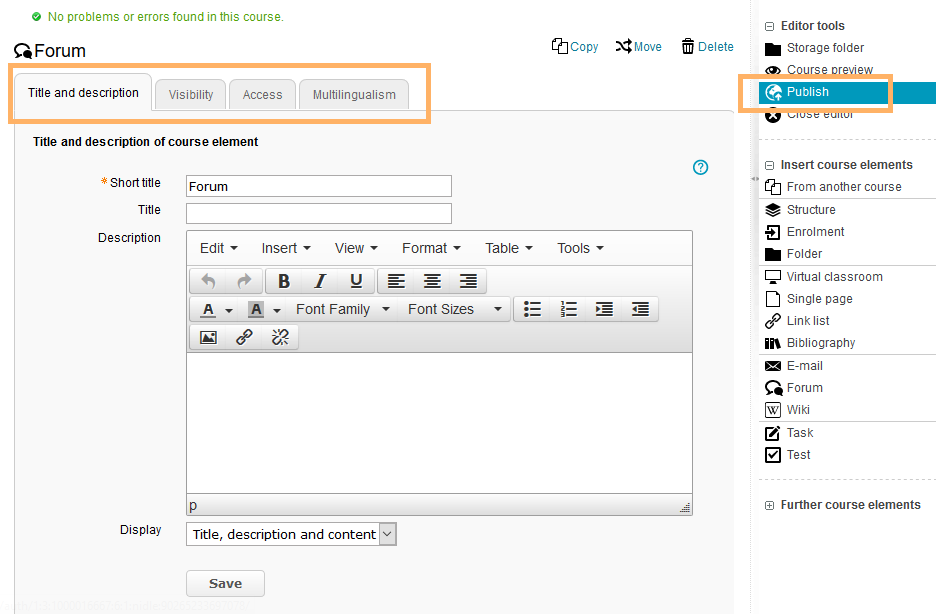
Title and description

Configuration options in the tab title and description ...

Kurseditor - Tab Titel und Beschreibung_en.png

Elements

Description

Title

You need to enter a title for the course element. The title can comprise a maximum of 100 characters. All special characters and numbers are permitted. The title will appear in the navigation menu of the course and also as a heading in the content area.

Changes to the title of the first course element, the so-called main course node ...

  If you change the title of the first course element, the new content will only be applied to the main course node and then displayed in the opened course. If you wish to edit the course title or description, you can do so using the more settings menu of the course.

Subtitle

You can enter a subtitle for the course element with a maximum of 255 characters. All special characters and numbers are permitted. The title will appear as a tooltip in the navigation menu and - if selected and configured accordingly - as a subtitle in the content area.

Description

Here you can describe the course element. The description will appear in the content area below the title.

Depending on the settings configured in the element Display, this additional text is displayed to the user when opening the course element. The user can expand or collapse the view of the text.


Display

Define which information about the course element should be displayed in the course view. In addition to the content, you can optionally display the title and description. All course elements are provided with a reasonable presetting, which mostly includes the setting Title, description and content. You can adjust this setting in accordance with the options available for each course element.

Set link for this course element

Each course element can be accessed via fixed link addresses. Therefore, an internal and an external URL is assigned to each course element. These direct links to concrete elements can be used within courses or provided to learners. The URLs are located below the title and description of the element and will appear upon selecting Set link for this course element.  

  • External link: To refer to this course element from outside of the course or learning platform, you can use the external link and insert it, for example as a href attribute, into the desired HTML page.
  • Internal link: To set a link to another course element within the same course, you can insert the internal link as a href attribute into the desired HTML page.

ID

You will need the ID number of the course element (on the bottom right), for example, if you wish to use the expert mode in the visibility or access tab.

VisibilityIf necessary, restrict the visibility of the course element here. For more information, see the Visibility help page.
Access If necessary, restrict the visibility of the course element here. For more information, see the Access help page.

Survey configuration

In this tab, you can store a learning resource of the type survey and configure survey procedure settings. Detailed instructions are given in the following section Survey configuration.

Multilingualism

In this tab, different translations can be added to individual course element areas.

Survey configuration

Assign survey

Here you can assign a survey resource to your survey course element. To do this, you can choose from the following options:

  • Select survey (option 1)
  • Create survey (option 2)
  • Import survey (option 3)
Platzhalter ...
Start the configuration for all three variants as follows ...

Open the course editor from within the survey course element and switch to the  Survey configuration tab.

Then click on Select, create or import survey.

Kurseditor - Fragebogen auswählen_en.png

A page with functions to select, create and import a survey resource opens.

Decide on one of the following options:

Kurseditor - Fragebogen drei Optionen_en.png

Select an existing survey (option 1)

  • Select an existing survey resource from the overview and click on the Icon_Hinzufügen schwarz.png plus icon in the Actions column.

Kurseditor - Fragebogen zuuordnen_en.png

Create a new survey (option 2)

  • Start by clicking on Create below the heading of the dialogue.
  • The dialogue for creating survey resources opens. Enter a title and optionally a description in the appropriate text fields.
  • Click on Save.
  • If necessary, upload an image for the detailed view of the new resource.
  • Click on Finish to complete the creation process.

Kurseditor - Fragebogen erstellen_en.png

Import survey (option 3)

  • Click on Import. You will find this button located below the heading Search for referenceable learning resources.
  • The dialogue for uploading survey resources opens. Use the Select folder or Upload file button to navigate to the location of the file you wish to import. Confirm your choice with Upload and fill in all necessary data for the new survey resource.

Kurseditor - Fragebogenressource importieren_en.png

The resource will now be displayed in the Survey configuration tab.

Kurseditor - Aktuelle gewählter Fragebogen_en.png

Functions after adding a survey resource ...
  • Replace: Click this button to replace the stored resource with another resource. The same window will open as described above in the Assign survey section. You can now select, create or import a survey resource. If there is a newer survey version available, you can also update the old version using this path. For more information, see the Replace survey versionsection.
  • Edit: Click this button to open the survey resource in the ONYX editor. In this area, you can edit the survey content or create and configure additional questions. For more information on working with the ONYX editor and available question formats, refer to the Creation of test content help page.

If a newer survey version exists, the older version can no longer be edited. The Edit button will then be disabled.

Kurseditor - Funktionen nach dem Hinzufügen einer Fragebogen-Ressource_en.png

A learning resource of the type survey must be integrated into the course element. Further information about independent learning resources as well as tutorials on how to create and manage them can be found on the Learning resources help page.

Add information text

You can provide the learner with an information text about the survey. This text will be displayed in the course view above the Start survey button.

Kursrun- Informationen zum Fragebogen_en.png

Add information text ...

1

Open the course editor of the course element and switch to the Survey configuration tab.

Kurseditor - Informationen zum Fragebogen_en.png

2

Then click on Select or create page.

A window with functions for creating or selecting an HTML page as well as for uploading an HTML file opens. Decide on one of the following options:

Kurseditor - drei Optionen_en.png

Create a new HTML page online (option 1) ...

1

Enter the name of the new file in the appropriate text field, select a different character set if necessary, and then click the Create button.

Kurseditor - Neue HTML Seite_en.png

2

The editor window for creating a new HTML page opens. Alternatively, you can also open the editor window manually by clicking the Open page in editor button.

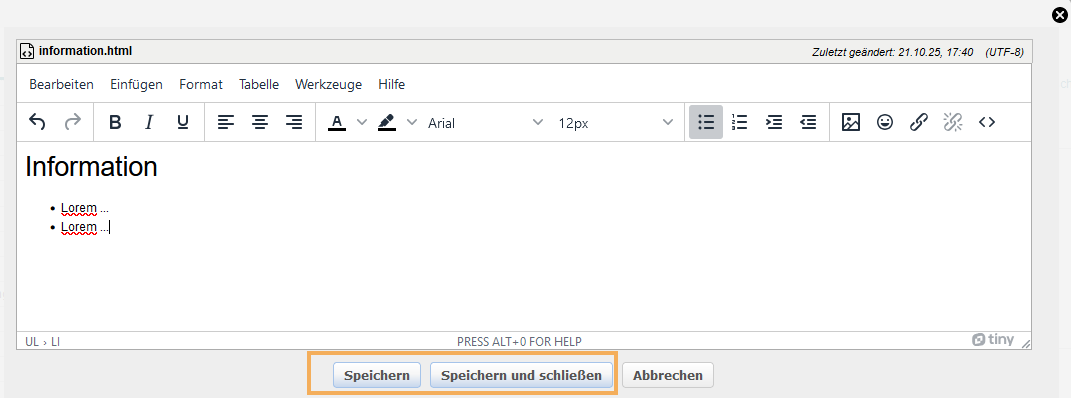
Enter the desired content. You can also use the numerous formatting options in the Text editor.

Then click on Save.

Kurseditor - Neue HTML Seite füllen_en.png

Select an HTML page from the course storage folder or copy an existing template (option 2) ...

1

Click on the button Select page.

Kurseditor - Seite wählen_en.png

2

An overview of all HTML pages available in the storage folder opens. Mark the desired file by clicking on its title and confirm your selection with Select.

Kurseditor - Datei vom Ablageordner auswählen_en.png

Upload one or more HTML files in a ZIP archive to the storage folder (option 3) ...
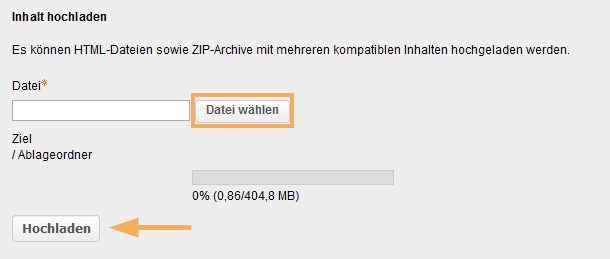
  • Click on the button Select file.
  • Now select a file from your computer and upload it.
  • Confirm the process with Upload.

Kurseditor - Datei hochladen_en.png

The selected file will be uploaded to the storage folder, automatically linked, and displayed under Selected page.

Kurseditor - gewählte Seite_en.png

After adding an HTML page, you have the following options: 

Open page in editor: 

  • Click on this button to make changes to your HTML page.

Delete page:

  • If the HTML page has been added to a course element as an information page, you can remove this assignment completely by using the Delete Page button.

Replace page:

Kurseditor - Nach dem Hinzufügen_en.png

Run survey

After adding a survey, you have the option to configure various settings for running the survey.

Please note:

Survey results will be recorded anonymously, and it must be ensured that each participant can answer the survey only once per course element. For this reason, unlike tests, you cannot configure the number of attempts for a survey course element. Resetting the number of attempts for a user is also not possible. When you close the attempt with Finish survey, the attempt at the survey will be completed and no further attempt can be started.

Surveys can be paused and continued later on. Once submitted, a survey in the same course element cannot be answered again by the same user. In order to have the same user answer the same survey again within the learning platform, you can alternatively copy the course element.

Choose from the following options ...

Kurseditor - Durchführung_en.png

Show navigation tree

This checkbox is enabled by default.

Disable the option to hide the navigation tree including the question titles during the survey.

Show item titles

This checkbox is enabled by default. All question titles will be displayed as stored in the survey resource.

Clear this checkbox if you prefer neutral question titles instead. The original question titles will then be replaced with neutral ones such as "question 1", "question 2" etc. and all displayed questions will be numbered linearly.

Confirm your configuration with Save.

Example images of the individual configuration parameters' effects can be obtained from the Test procedure configuration help page.


After completing the survey

You can influence a user’s navigation after completing a survey and determine the course element to which they should jump.

Kurseditor - Nach Fragebogenabschluss_en.png

To do this, mark the Jump to another course node checkbox. This will open the Select course node selection list. Click on the triangle at the end of the list box to display all available entries. Select the desired course element from the list and confirm your settings with Save.

After the submission and successful storage of the survey attempt, the user will now automatically jump to the selected course element. However, this does not apply to survey attempts that are cancelled or suspended.

Correction mode and new survey version

The integrated survey resource can also be edited or enhanced. However, if user results for the resource are already available in the system, it must be ensured for the assessment that these results match their survey version. 

Both options will be displayed when opening a resource with existing user results for editing. If the correction mode option is used, no further changes or publishing of the course element will be necessary. The modified version will be immediately accessible to users starting the survey. However, if a new survey version is created, the old survey version must be actively replaced so that the new one will be displayed to the user. As long as this has not been done, the user will be shown the old version when opening the resource.


Replace survey version

Replacing a new survey version is done in the same way as replacing any other test resource. Further information is provided on the Test  help page in the "Replace test version" section.

Evaluate survey

In the assessment tool of the course, you can view the statistical evaluation of the survey. More information can also be found on the Statistical evaluation help page in the ONYX help.

Archive survey results

Survey results can be saved through the data archiving process. For more information on this function, see the Data archiving help page.