Course
![]() The course element Course allows the author to integrate more courses into an existing course in order to connect content and to summarise assessments.
The course element Course allows the author to integrate more courses into an existing course in order to connect content and to summarise assessments.
Usage: Learners' view
Overview
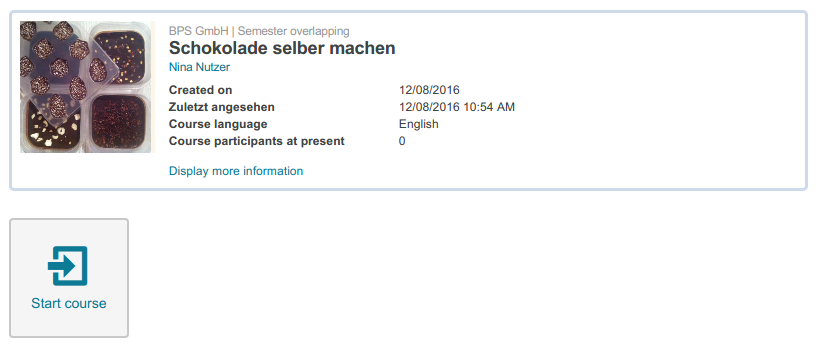
When you open the course element Course, you will see the details about the integrated course that were provided by the author, and you can start the course. If the course is subject to assessment, the assessment status can also be displayed here. |
|
Functions for users
The following functions are available to users in a course element Course:
| Start course | How to do that?
| ||
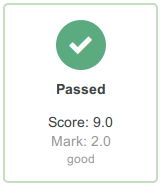
View assessment | If an overall assessment is configured for the course, it can be viewed here, provided that the configuration by the author does not prevent it. How to do that?
| |||
Configuration: Authors' View
In the course editor
The following functions are available to you in the course editor:
Add a course element course | Click to open instructions on how to add a course element ...To integrate a course element into your course, proceed as follows:
| ||||||||||||||||||||||||||
General configuration settings | In the course editor, you will find the following configuration tabs:
| ||||||||||||||||||||||||||
Special configuration settings |
| ||||||||||||||||||||||||||
Functions after adding a course resource | After adding a course resource, you have the following options in the Configuration tab:
|


Functions in the course view
As an author, you have the same options in the course view as users. Detailed information can be found in the section Functions for users.