Media Centre

Last modified by Carina Enke on 15.02.2024

KB_Mediathek.png The course element Media Centre provides learners with a wide range of different media for learning purposes. The learning material will be added by the course author and cannot be altered by learners.

In comparison to the course element Folder, the media centre enables a clearer and more flexible view of the contained data. You can also create and display a personalised menu by assigning metadata to the contained files.


Usage: Learners' View

Overview

After opening the course element Media Centre, all data included in it will be presented on the right. If the author has assigned metadata to the files, you will see the total number of pages as well as the name of the author and the publisher below the file name.

If the author has configured a content menu, it will be displayed on the left. According to the structure specified by the author, you will see various subfolders that organise the files contained in the media centre. If you open a subfolder, only the files contained there will be listed on the right.

Kursrun - Überblick Mediathek_en

Functions for users

Open or download file

To open or download one of the contained files, click on the file name. The file will open in a new window. Usually, the file contents will directly be displayed in the web browser. In all other cases, you will have the option to download the file.

Icon_Kursbaustein erledigt_en.png

Icon_Kursbaustein erledigt.png

Mark course element as completed

Manual progress

If the course progress indicator is activated for a course, the course element can be marked as done by clicking on Completed. Subsequently, the element gets a corresponding colour marking in the course menu as well as in the details area before the element's title.

Configuration: Authors' View

In the course editor

The following functions are available to you in the course editor:

Add a course element media centre

Click to open instructions on how to add a course element ...
 

General configuration settings

In the course editor, you will find the following configuration tabs:
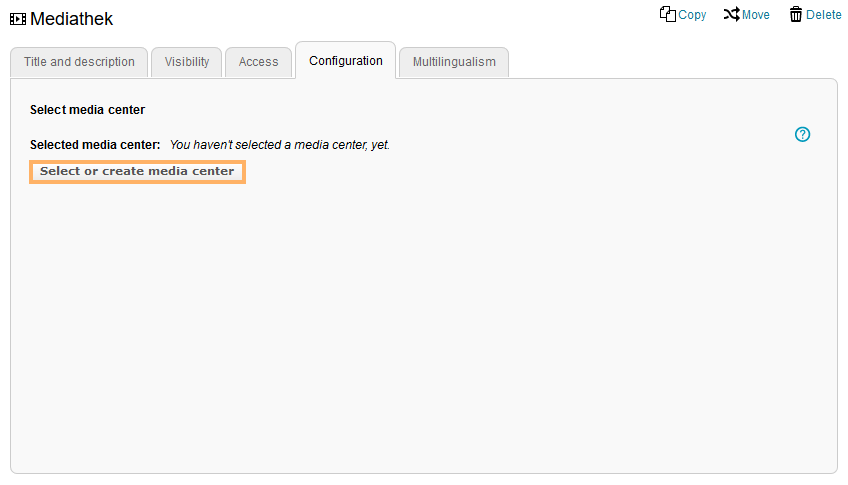
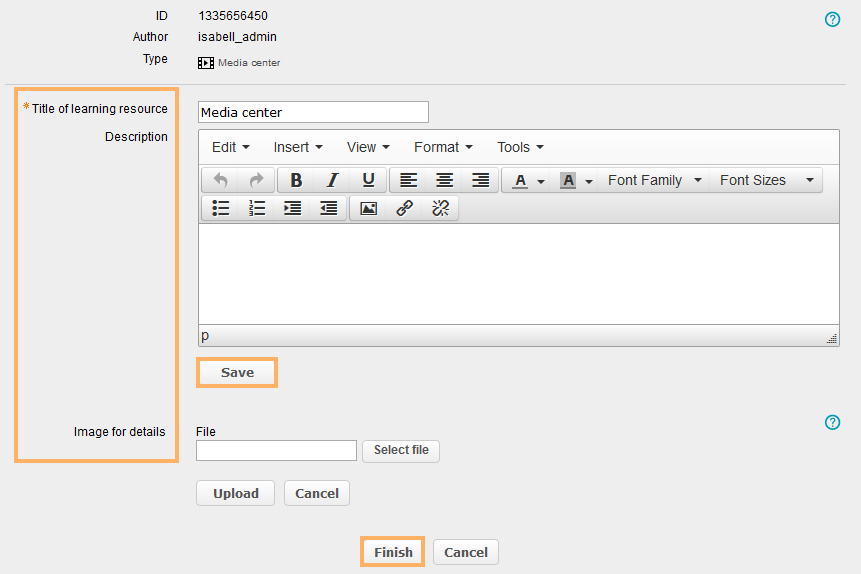
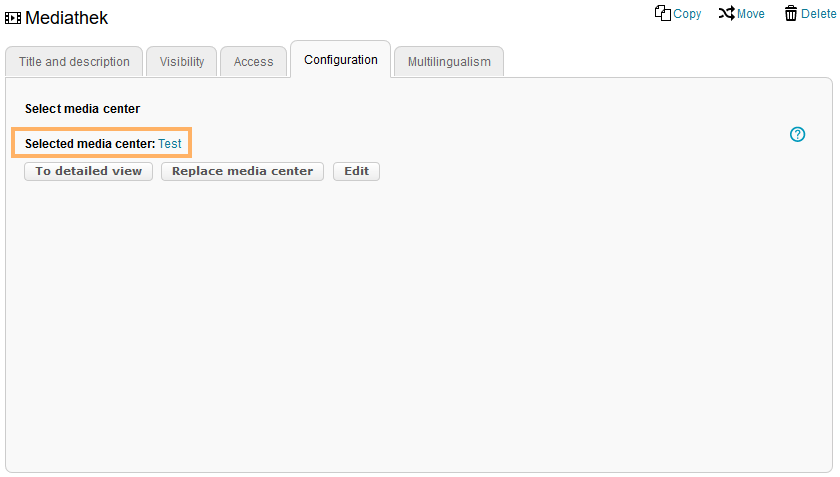
Title and description

Configuration options in the tab title and description ...
VisibilityIf necessary, restrict the visibility of the course element here. For more information, see the Visibility help page.
Access If necessary, restrict the visibility of the course element here. For more information, see the Access help page.

Configuration

Here you can add, import, or export entries to/from the bibliography. Detailed instructions are given in the following section.

As an author, you can also use all of these functions directly in the course view.

The course element must include a learning resource of the type Media Centre. Further information on independent learning resources as well as tutorials on their creation and management are provided in the section Learning resources.

Multilingualism

In this tab, different translations can be added to individual course element areas.

Special configuration settings

In the Configuration tab, you can assign a resource of the type Media Centre to your course element and specify display options.

Select media centre

To assign a resource, you may:

  • use an existing media centre (option 1),
  • create and use a new media centre (option 2)
     
Start the configuration for the two variants as follows ...

1.

Open the course element Media Centre.

Switch to the Configuration tab in the course editor and click on Select or create media centre.

Kurseditor - Schaltfläche Mediathek wählen oder erstellen_en.png

2.

A page with the function to create a new resource and a list of your existing resources will be displayed.Decide on one of the following options:

Kurseditor - zwei Optionen_en.png

3a

(Option 1:) To use an existing media centre, select the desired resource by clicking on the Icon_Hinzufügen schwarz.png plus icon in the Actions column.

Kurseditor - Mediathek wählen_en.png

3b

(Option 2:) To create and use a new media centre resource, click on Create. A page for creating a new learning resource will open

Expand further steps ...
  • Enter a title for the new resource and add a description if necessary.
  • Click on Save.
  • As a next step, you can add an image to the resource using Upload.
  • Click on Finish to complete the creation process.

The newly created resource will now automatically be used as a resource for the media centre course element and displayed under Selected media centre.

Kurseditor - Mediathek erstellen_en.png

4.

5.

The selected resource will be displayed under Selected media centre.Publish your course to complete the configuration and to make the resource available to participants.

Kurseditor - gewählte Mediathek_en.png

Functions after adding a resource

To detailed view

Use this button to switch to the detailed view of the added media centre resource. Among other things, you will find information on the supervisors and access rights in this area. For further information, please refer to the section Functions of the detailed view.

Kurseditor - Funktionen nach dem Hinzufügen einer Ressource_en.png

Replace media centre

Click the button to replace the added media centre resource with another media centre resource. The same window will open as in the upper section Select media centre. Now you have the same two options as described above to add a new media centre resource.

Edit

Click this button to edit the resource. You will be shown an overview of all existing documents, and you will be able to create additional documents and folders or upload files. Other available functions include: delete, move, copy, zip and unzip.

Further information is provided in the chapter Folder functions (simple editor view).

In the course view

In the course view, you have access to all functions available to users. For a detailed overview, see the section Functions for users.