Steckbrief

Last modified by Carina Enke on 17.01.2024

Nutzung aus Lerner-Sicht

Überblick

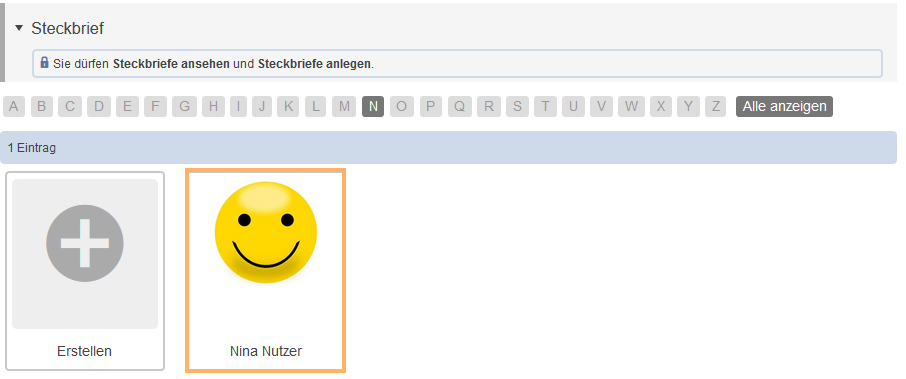
Wenn Sie den Kursbaustein Steckbrief öffnen, sehen Sie eine Übersicht über alle bereits erstellten und freigegebenen Steckbriefe. Die Navigationsleiste in Form des Alphabets erleichtert die Orientierung. Alle Steckbriefe werden nach dem Familienname geordnet.

Ihr eigener Steckbrief wird immer an erster Position angezeigt. Ist noch kein eigener Steckbrief vorhanden, sehen Sie den Eintrag Erstellen.

Kursrun - Überblick_de.png

Verfügbare Funktionen für Nutzer

Als Nutzer haben Sie in einem Kursbaustein Steckbrief folgende Möglichkeiten:

Icon_Steckbrief erstellen_de.png

Steckbrief erstellen

Jeder Teilnehmer kann pro Baustein genau einen Steckbrief anlegen.

Wie geht das?
  1. Öffnen Sie den Kursbaustein Steckbrief.
  2. Klicken Sie auf die Schaltfläche Erstellen.

Kursrun - Schaltfläche Steckbrief erstellen_de.png

3. Ergänzen Sie nun die betreffenden Informationen in den vom Autor vorgegebenen Textfeldern. Bei Freitextfeldern haben Sie die Möglichkeit, verschiedene Formatierungsoptionen für Ihren Text zu nutzen. Hinweise finden Sie auf der Seite Texteditor.

4. Fügen Sie optional ein Profilbild hinzu, wenn dies für Ihren Nutzertyp freigegeben ist.

Beachten Sie, dass die Eingabe der Informationen freiwillig ist. Es gibt kein Feld, bei dem die Eingabe zwingend notwendig ist, um einen eigenen Steckbrief zu erstellen. Es steht Ihnen frei, welche Informationen Sie teilen möchten und welche nicht.

Kursrun - Informationen eintagen_de.png

5. Entscheiden Sie anschließend über die Sichtbarkeit ihres Steckbriefes. Wenn Sie die Checkbox am Ende der Seite aktivieren, ist der Steckbrief nur für andere eingeschriebene Kursteilnehmer sichtbar (also nicht öffentlich).

Entfernen Sie das Häkchen in der Checkbox, stimmen Sie einer Veröffentlichung zu und auch Gäste im Kurs sehen die Inhalte Ihres Steckbriefes.

6. Klicken Sie anschließend auf die Schaltfläche Speichern, um den Erstellvorgang abzuschließen.

Kursrun - Steckbrief speichern_de.png


Steckbrief ansehen

Im Kursbaustein Steckbrief haben Sie die Möglichkeit, bestehende Steckbriefe einzusehen und durchzulesen.

Wie geht das?
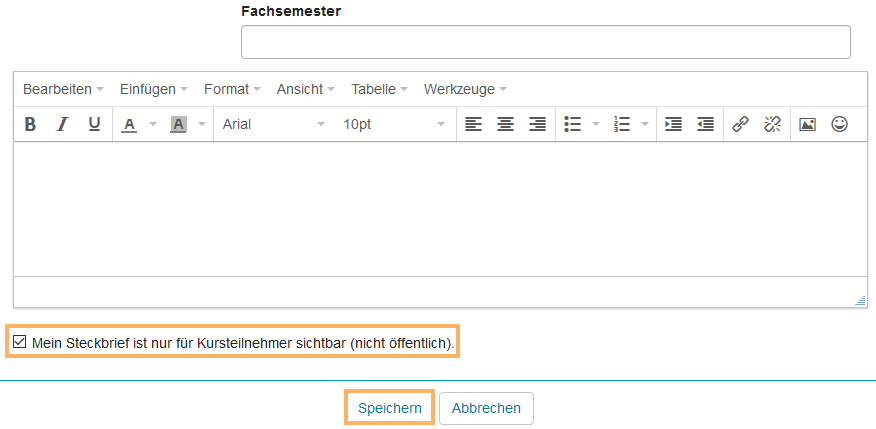
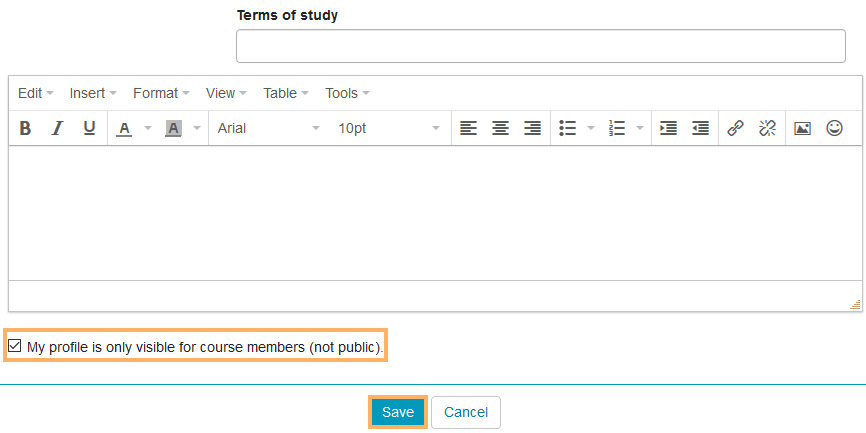
  1. Öffnen Sie den Kursbaustein Steckbrief.
  2. Wenn bereits mindestens ein Steckbrief angelegt wurde, erscheint unter dem Bausteintitel eine alphabetische Navigationsleiste. Jeder Buchstabe, für den bereits mindestens ein Steckbrief angelegt wurde, wird farbig markiert. Die alphabetische Zuordnung erfolgt durch den Nachnamen.
  3. Wählen Sie den Steckbrief, den Sie gern ansehen möchten, mit einem Klick auf den jeweiligen Steckbrief aus.

Kursrun - Klick auf den Name_de.png

4. Nun öffnet sich der betreffende Steckbrief und Sie haben die Möglichkeit, die freigegebenen Informationen über die jeweilige Person einzusehen.

Kursrun - geöffneter Steckbrief_de.png

Icon_Bearbeiten.png

Steckbrief bearbeiten

Im geöffneten eigenen Steckbrief können Sie sowohl die Informationen als auch Ihr Profilbild jederzeit wieder bearbeiten und anpassen.

Wie geht das?
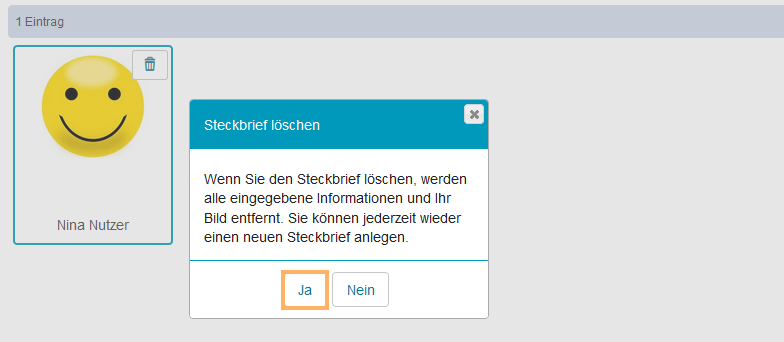
  1. Öffnen Sie den Kursbaustein Steckbrief.
  2. Klicken Sie auf Ihren eigenen Steckbriefeintrag, um ihn zu öffnen.

Kursrun - eigenen Steckbrief öffnen_de.png

3. Klicken Sie nun auf das Symbol Bearbeiten.

Kursrun - Symbol bearbeiten_de.png

4. Es öffnet sich das gleiche Fenster wie beim Erstellen eines Steckbriefes. Nehmen Sie nun die gewünschten Änderungen vor. Sie haben außerdem die Möglichkeit, Ihr Profilbild zu ändern oder zu löschen.

5. Klicken Sie anschließend auf die Schaltfläche Speichern, um den Bearbeitungsvorgang abzuschließen.

Kursrun - Steckbrief bearbeiten_de.png

Icon_Löschen.png

Steckbrief löschen

Mit dieser Option haben Sie die Möglichkeit, Ihren Steckbrief zu löschen. Er wird dann aus dem Kursbaustein Steckbrief entfernt und ist nicht länger einsehbar.

Wie geht das?
  1. Öffnen Sie den Kursbaustein Steckbrief.
  2. Klicken Sie bei Ihrem eigenen Steckbrief auf das Symbol Löschen oben rechts.

Kursrun - Symbol Löschen_de.png

3. Bestätigen Sie die Sicherheitsnachfrage, indem Sie auf die Schaltfläche Ja klicken.

Wenn Sie Ihren Steckbrief löschen, werden alle eingebetteten Informationen sowie das ggf. vorhandene Profilbild entfernt.

Sie können zu jedem Zeitpunkt einen neuen Steckbrief erstellen, sofern der Kursbaustein keinen anderen Beschränkungen unterliegt.

Kursrun - Löschen bestätigen_de.png

Nutzung aus Autoren-Sicht

Im Kurseditor

Im Kurseditor stehen Ihnen folgende Optionen zur Verfügung:

Kursbaustein Steckbrief hinzufügen

Erläuterung zum Hinzufügen eines Kursbausteins aufklappen ...

To integrate a course element into your course, proceed as follows:

1

Open the course you want to edit.

Use the pencil icon at the top of the page to open the editing mode.

Kurs-zum Editor wechseln_en.png

2

Select a course element from the menu on the right.

Kurseditor-KB auswählen_en.png

3

In the new window, you can define the position of the new course element within your course structure (left navigation pane). The available positions are marked with an insert icon.

To insert the new course element into an existing substructure, you need to open the substructure by clicking on the small triangle symbol next to its title. The area will open and you will again see insert icons at the positions which are available.

Click on the insert icon at the desired position within the structure. The selected area will be highlighted.

Confirm your choice with Insert course element.

Kurseditor-KB in tree einfügen_en.png

4

The element will be inserted into the course structure at the selected position.

Depending on the course element, you have to make additional configurations or add content in order to complete the configuration.

For these changes to take effect, you must publish the course. The course element will then also become available in the course view.

Kurseditor-KB konfigurieren_en.png


Allgemeine Konfigurations-Einstellungen

Titel und Beschreibung

Konfigurationsoptionen im Tab Titel und Beschreibung aufklappen...

Kurseditor - Tab Titel und Beschreibung_en.png

Elements

Description

Title

You need to enter a title for the course element. The title can comprise a maximum of 100 characters. All special characters and numbers are permitted. The title will appear in the navigation menu of the course and also as a heading in the content area.

Changes to the title of the first course element, the so-called main course node ...
 If you change the title of the first course element, the new content will only be applied to the main course node and then displayed in the opened course. If you wish to edit the course title or description, you can do so using the more settings menu of the course.

Subtitle

You can enter a subtitle for the course element with a maximum of 255 characters. All special characters and numbers are permitted. The title will appear as a tooltip in the navigation menu and - if selected and configured accordingly - as a subtitle in the content area.

Description

Here you can describe the course element. The description will appear in the content area below the title.

Depending on the settings configured in the element Display, this additional text is displayed to the user when opening the course element. The user can expand or collapse the view of the text.


Display

Define which information about the course element should be displayed in the course view. In addition to the content, you can optionally display the title and description. All course elements are provided with a reasonable presetting, which mostly includes the setting Title, description and content. You can adjust this setting in accordance with the options available for each course element.

Set link for this course element

Each course element can be accessed via fixed link addresses. Therefore, an internal and an external URL is assigned to each course element. These direct links to concrete elements can be used within courses or provided to learners. The URLs are located below the title and description of the element and will appear upon selecting Set link for this course element.  

  • External link: To refer to this course element from outside of the course or learning platform, you can use the external link and insert it, for example as a href attribute, into the desired HTML page.
  • Internal link: To set a link to another course element within the same course, you can insert the internal link as a href attribute into the desired HTML page.

ID

You will need the ID number of the course element (on the bottom right), for example, if you wish to use the expert mode in the visibility or access tab.

SichtbarkeitSchränken Sie hier bei Bedarf die Sichtbarkeit des Kursbausteins ein. Weitere Informationen enthält der Abschnitt Sichtbarkeit und Zugriff.
ZugangSchränken Sie hier bei Bedarf den Zugang  zum Kursbausteins ein. Weitere Informationen enthält der Abschnitt Sichtbarkeit und Zugriff.

Konfiguration

In diesem Tab haben Sie die Möglichkeit, darüber zu entscheiden, welche Benutzereigenschaften in einem Steckbrief angezeigt werden sollen. Dies wird ausführlich im nächsten Abschnitt Spezielle Konfigurations-Einstellungen erläutert.

Mehrsprachigkeit

Zu einzelnen Kursbausteinbereichen können in diesem Tab verschiedene Übersetzungen hinterlegt werden.

Spezielle Konfigurations-Einstellungen

Um Einstellungen vorzunehmen, öffnen Sie den Kursbaustein Steckbrief und wechseln Sie in den Tab Konfiguration.

Hier stehen Ihnen folgende Optionen zur Verfügung:

Auswahl der Benutzereigenschaften:

  • An dieser Stelle können Sie mittels Aktivierung/Deaktivierung von Checkboxen entscheiden, welche Felder der im System gespeicherten Benutzereigenschaften in einem Steckbrief aufgelistet werden sollen.
  • Erstellt ein Nutzer einen eigenen Steckbrief, werden in den gewählten Eigenschaftsfeldern die zu seinem Nutzer gespeicherten Inhalte angezeigt. Der Nutzer kann jedoch selbst bestimmen, welche Inhalte er im Steckbrief veröffentlicht und welche Informationen er für die Anzeige im Steckbrief löscht oder ändert.
  • Wenn Sie die Benutzereigenschaft Nachname deaktivieren, werden alle Steckbriefe in der Übersicht direkt dargestellt, da eine Zuordnung in die alphabetische Navigation nicht mehr möglich ist.

Neue Felder hinzufügen:

  • Mit dieser Option haben Sie die Möglichkeit, weitere Steckbrieffelder vorzugeben. Klicken Sie auf die Schaltfläche Hinzufügen und tragen Sie einen Titel in das entsprechende Textfeld ein. Mithilfe des Plus- und Minus-Symbols können weitere Felder angelegt oder auch wieder entfernt werden.

Klicken Sie auf die Schaltfläche Speichern, um alle vorgenommenen Einstellungen im Tab Konfiguration zu sichern.

Sie können den Baustein Steckbrief auch nutzen, um Meinungen oder Erwartungen Ihrer Kursnutzer einzuholen.

Kurseditor - Tab Konfiguration_de.png

Teilnehmer des Kurses haben die Möglichkeit, den eigenen Steckbrief in der Sichtbarkeit auf "Kursteilnehmer" zu beschränken. Kursteilnehmer sind alle Nutzer, die in einer Lerngruppe des Kurses eingeschrieben sind. Stellen Sie deshalb sicher, dass es mindestens eine Lerngruppe im Kurs gibt und dass alle Nutzer, die solche eingeschränkten Steckbriefe sehen dürfen, in mindestens einer Lerngruppe eingeschrieben sind. 

In der Kursansicht

In der Kursansicht stehen Ihnen alle für Nutzer verfügbaren Funktionen zur Verfügung. Eine detaillierte Anleitung aller Funktionen finden Sie im Abschnitt Verfügbare Funktionen für Nutzer. Zusätzlich zum eigenen Steckbrief können Kursbesitzer jedoch die Steckbriefe aller Kursteilnehmer bearbeiten und löschen.

Usage: Learners' View

Overview

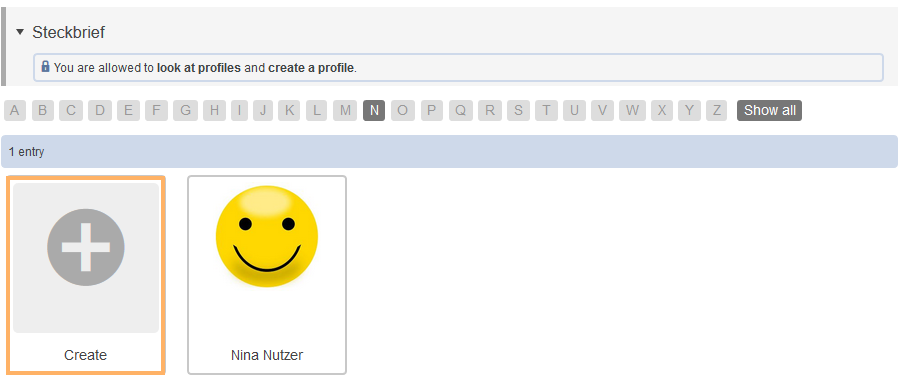
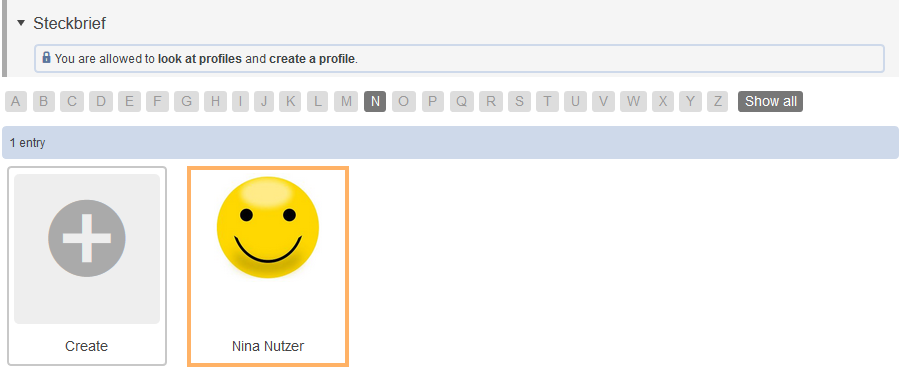
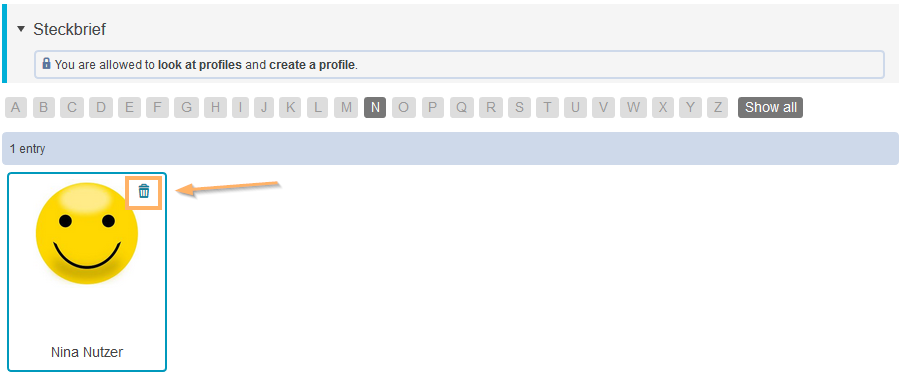
If you open the Profile course element, you will see an overview of all previously created and approved profiles. The navigation bar facilitates orientation by arranging the profiles in alphabetical order. All profiles are sorted by last name.

Your own profile is always the first to be displayed. If you do not yet have a profile, you will see the Create entry.

Kursrun - Schaltfläche Steckbrief erstellen_en.png

Functions for users

As a user, you have access to the following functions in a Profile course element:

Icon_Steckbrief erstellen_en.png

Create profile

Each participant can create exactly one profile per course element. 

How to do that?
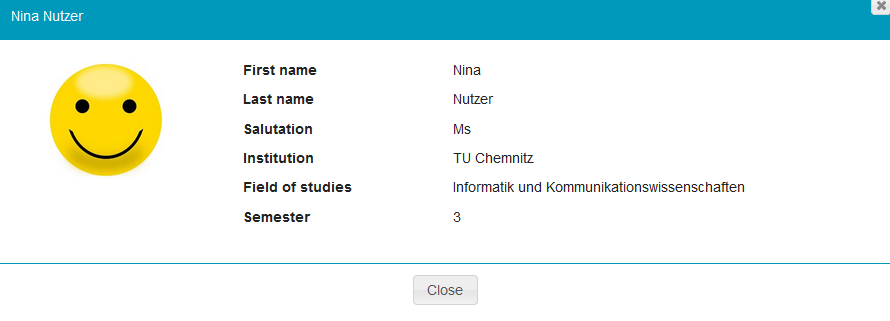
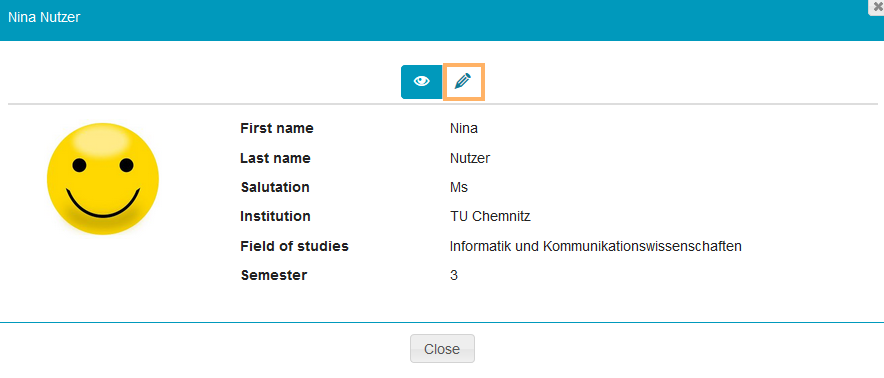
  1. Open the Profile course element.
  2. Click on Create.

Kursrun - Schaltfläche Steckbrief erstellen_en.png

3. Enter the relevant information in the text fields configured by the author. In the case of free text fields, you can choose between different text formatting options. Further information can be found on the Text editor help page.

4. If enabled for your user type, you can optionally add a profile picture.

Please note that typing your personal information is optional. There are no mandatory fields that must be filled in to create a profile. It is up to you to decide which information you would like to share with others.  

Kursrun - Informationen eintagen_en.png

5. Then decide on the visibility of your profile. If you activate the checkbox at the bottom of the page, the profile will only be visible to other enrolled course members (i. e. it will not be public).

If you deactivate the checkbox, you agree to your course being published, which means that your profile content will also be visible to guests.

6. Click on Save to complete the creation process.

Kursrun - Steckbrief speichern_en.png


View profile

In the Profile course element, you can view and read existing profiles.  

How to do that?
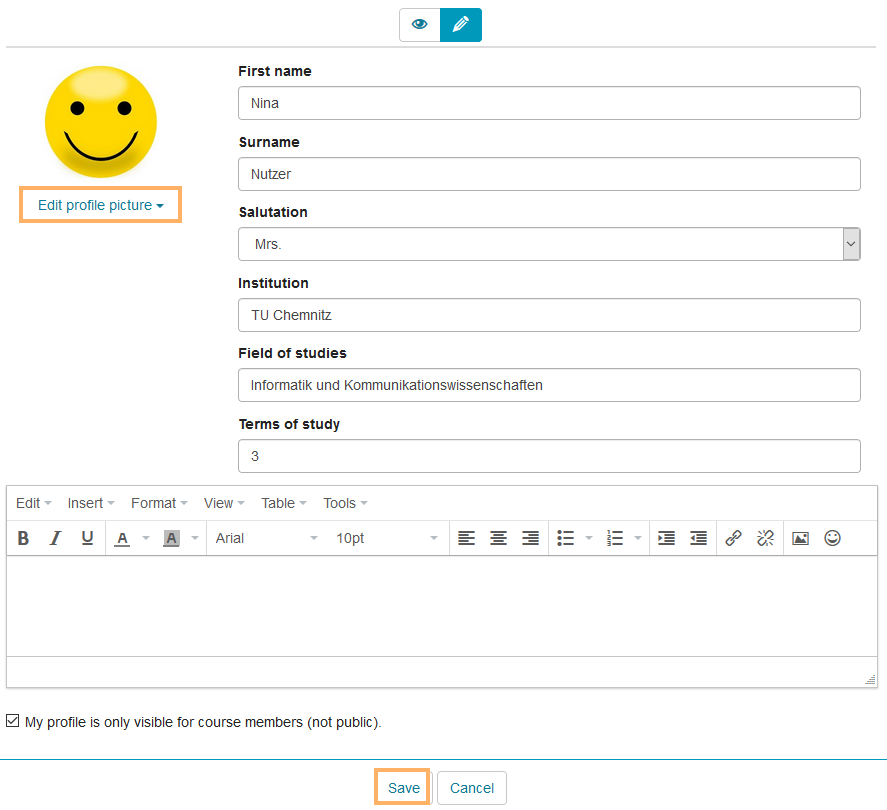
  1. Open the Profile course element.
  2. If at least one profile has already been created, an alphabetical navigation bar will appear below the element title. Each letter for which at least one profile has already been created is highlighted in colour. The alphabetical assignment is done based on the last name.
  3. Select the profile you want to view by clicking on it.

Kursrun - Klick auf den Name_en.png

4. The profile opens, and you can view this person's shared information.

Kursrun - geöffneter Steckbrief_en.png

Icon_Bearbeiten.png

Edit profile

You can edit and adapt your profile information as well as your profile picture at any time.  

How to do that?
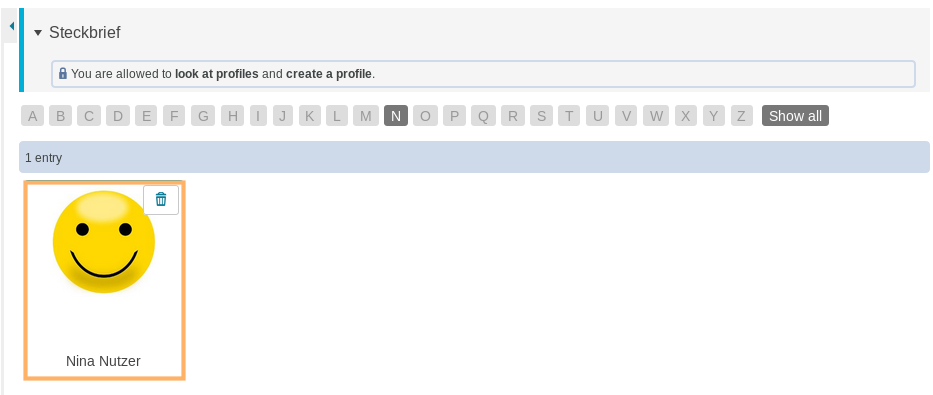
  1. Open the Profile course element.
  2. Click on your profile to open it.

Kursrun - eigenen Steckbrief öffnen_en.png

3. Click on the pencil icon.

Kursrun - Symbol bearbeiten_en.png

4. The same window as for creating a new profile opens. Make your desired changes. You also have the option to change or delete your profile picture.

5. Click on Save to complete the editing process.

Kursrun - Steckbrief bearbeiten_en.png

Icon_Löschen.png

Delete profile

This option allows you to delete your profile. It will then be removed from the profile course element and can no longer be viewed by other users.

How to do that?
  1. Open the Profile course element.
  2. Click on the trash can icon in the upper right corner.

Kursrun - Symbol Löschen_en.png

3. Confirm the deletion process with Yes.

If you delete your profile, all embedded information as well as your profile picture (if any) will be removed.  

You can create a new profile at any time, provided the course element is not subject to any other restrictions preventing it.

Kursrun - Löschen bestätigen_en.png

Configuration: Authors' View

In the course editor

The following functions are available to you in the course editor:

Add a profile course element

Click to open instructions on how to add a course element ...

To integrate a course element into your course, proceed as follows:

1

Open the course you want to edit.

Use the pencil icon at the top of the page to open the editing mode.

Kurs-zum Editor wechseln_en.png

2

Select a course element from the menu on the right.

Kurseditor-KB auswählen_en.png

3

In the new window, you can define the position of the new course element within your course structure (left navigation pane). The available positions are marked with an insert icon.

To insert the new course element into an existing substructure, you need to open the substructure by clicking on the small triangle symbol next to its title. The area will open and you will again see insert icons at the positions which are available.

Click on the insert icon at the desired position within the structure. The selected area will be highlighted.

Confirm your choice with Insert course element.

Kurseditor-KB in tree einfügen_en.png

4

The element will be inserted into the course structure at the selected position.

Depending on the course element, you have to make additional configurations or add content in order to complete the configuration.

For these changes to take effect, you must publish the course. The course element will then also become available in the course view.

Kurseditor-KB konfigurieren_en.png


General configuration settings

Title and description

Configuration options in the tab title and description ...

Kurseditor - Tab Titel und Beschreibung_en.png

Elements

Description

Title

You need to enter a title for the course element. The title can comprise a maximum of 100 characters. All special characters and numbers are permitted. The title will appear in the navigation menu of the course and also as a heading in the content area.

Changes to the title of the first course element, the so-called main course node ...
 If you change the title of the first course element, the new content will only be applied to the main course node and then displayed in the opened course. If you wish to edit the course title or description, you can do so using the more settings menu of the course.

Subtitle

You can enter a subtitle for the course element with a maximum of 255 characters. All special characters and numbers are permitted. The title will appear as a tooltip in the navigation menu and - if selected and configured accordingly - as a subtitle in the content area.

Description

Here you can describe the course element. The description will appear in the content area below the title.

Depending on the settings configured in the element Display, this additional text is displayed to the user when opening the course element. The user can expand or collapse the view of the text.


Display

Define which information about the course element should be displayed in the course view. In addition to the content, you can optionally display the title and description. All course elements are provided with a reasonable presetting, which mostly includes the setting Title, description and content. You can adjust this setting in accordance with the options available for each course element.

Set link for this course element

Each course element can be accessed via fixed link addresses. Therefore, an internal and an external URL is assigned to each course element. These direct links to concrete elements can be used within courses or provided to learners. The URLs are located below the title and description of the element and will appear upon selecting Set link for this course element.  

  • External link: To refer to this course element from outside of the course or learning platform, you can use the external link and insert it, for example as a href attribute, into the desired HTML page.
  • Internal link: To set a link to another course element within the same course, you can insert the internal link as a href attribute into the desired HTML page.

ID

You will need the ID number of the course element (on the bottom right), for example, if you wish to use the expert mode in the visibility or access tab.

VisibilityIf necessary, restrict the visibility of the course element here. For more information, see the Visibility help page.
Access If necessary, restrict the visibility of the course element here. For more information, see the Access help page.

Configuration

This tab allows you to decide which user properties should be displayed in a profile. Detailed instructions are given in the Special configuration settings section below.

Multilingualism

On this tab, different translations can be added to individual course element areas.

Special configuration settings

To configure special settings, open the Profile course element and switch to the Configuration tab.

The following functions are available to you on the Configuration tab:

Selection of user properties:

  • By selecting the desired checkboxes, you can decide which user properties stored in the system should be listed in a profile.
  • If a user creates a profile, their personal data will be displayed in the selected property fields. However, the user can decide for themselves which content they would like to share and which information they would rather want to delete or change.
  • If you disable the Last name user property, all profiles will be displayed together in an overview as they cannot be sorted alphabetically anymore.

Add new fields:

  • This option allows you to add more user properties to a profile. Click the Add button and enter a title in the text field. Using the plus and minus symbols, you can create or remove fields.

Click on Save to confirm your settings.

You can also use the Profile course element to gather opinions or expectations from your course participants.

Kurseditor - Tab Konfiguration_en.png

Participants of the course can optionally limit the visibility of their own profile to "course participants". Course participants are all users who are enrolled in one of the course's learning groups. Therefore, make sure that the course has at least one learning group and that all users who are allowed to see such restricted profiles are enrolled in at least one learning group. 

In the course view

From the course view, you can access all functions available to users. For detailed instructions on all functions, see the Functions for users section. However, in addition to their own profile, course owners can also edit and delete the profiles of all course participants.