Warnung: Aus Sicherheitsgründen wird das Dokument in einem eingeschränkten Modus angezeigt, da es sich nicht um die aktuelle Version handelt. Dadurch kann es zu Abweichungen und Fehlern kommen.
Das Makro [expand] ist ein eigenständiges Makro und kann nicht inline verwendet werden. Klicke auf diese Nachricht, um Details zu erfahren.
Dieses Makro generiert eigenständige Inhalte. Als Konsequenz müssen Sie sicherstellen, dass Sie eine Syntax verwenden, die Ihr Makro von dem Inhalt davor und danach trennt, sodass es in einer eigenen Zeile steht. Zum Beispiel bedeutet dies in XWiki Syntax 2.0+, dass Sie 2 Zeilenumbrüche haben, die Ihr Makro von dem Inhalt davor und danach trennen.
{{/panel}}
{{/layout-cell}}
{{/layout-section}}
Kursbaustein Ordner einfügen ...
Um Ihrem Kurs einen Ordnerbaustein hinzuzufügen, gehen Sie wie folgt vor:
| Öffnen Sie den Kurs, den Sie bearbeiten möchten, in der Editieransicht. Nutzen Sie dazu das Stift-Symbol im oberen Bereich des Kurses. | |
| Wählen Sie aus den angebotenen Kursbausteinen im Menü auf der rechten Seite mit einem Klick den Kursbaustein Ordner aus. | |
| Wenn noch keine Bausteine im Kurs existieren, wird der Baustein direkt eingefügt. Sind bereits andere Bausteine vorhanden, öffnet sich ein neuen Fenster, in dem Sie die Position des neuen Kursbausteins innerhalb der Kursstruktur festlegen können. Die dafür verfügbaren Positionen sind mit einem Einfügesymbol gekennzeichnet. Klicken Sie an der gewünschten Position für den neuen Baustein auf das Einfügesymbol. Der gewählte Bereich wird farbig hinterlegt. Bestätigen Sie Ihre Wahl mit Klick auf die Schaltfläche Kursbaustein einfügen. | |
| Der Baustein wird an die ausgewählte Stelle in die Kursstruktur im linken Bereich eingefügt. Je nach Kursbaustein müssen Sie weitere Konfigurationen vornehmen oder Inhalte des Kursbausteins angeben, um die Konfiguration vollständig abzuschließen. Damit die Änderungen wirksam werden und der Kursbaustein in der Kursansicht für die Teilnehmer verfügbar ist, müssen Sie den Kurs veröffentlichen. Diese beschreibt die Seite Step-by-Step Einen Kurs publizieren. | |
Für das einfache Standardszenario, bei dem Lernende angebotene Dateien nur herunterladen, selbst aber keine Dateien hochladen oder löschen können, brauchen Sie keine weiteren Konfigurationen vornehmen.
Ausführliche Informationen zu zusätzlichen Optionen und Konfigurationsmöglichkeiten finden Sie auf der zentralen Dokumentationsseite zum Kursbaustein Ordner.
Kurs publizieren ...
In der Kursansicht (Kursrun) ...
Um den Kurs für Lernende sichbar zu machen führen Sie bitte folgende Schritte durch:
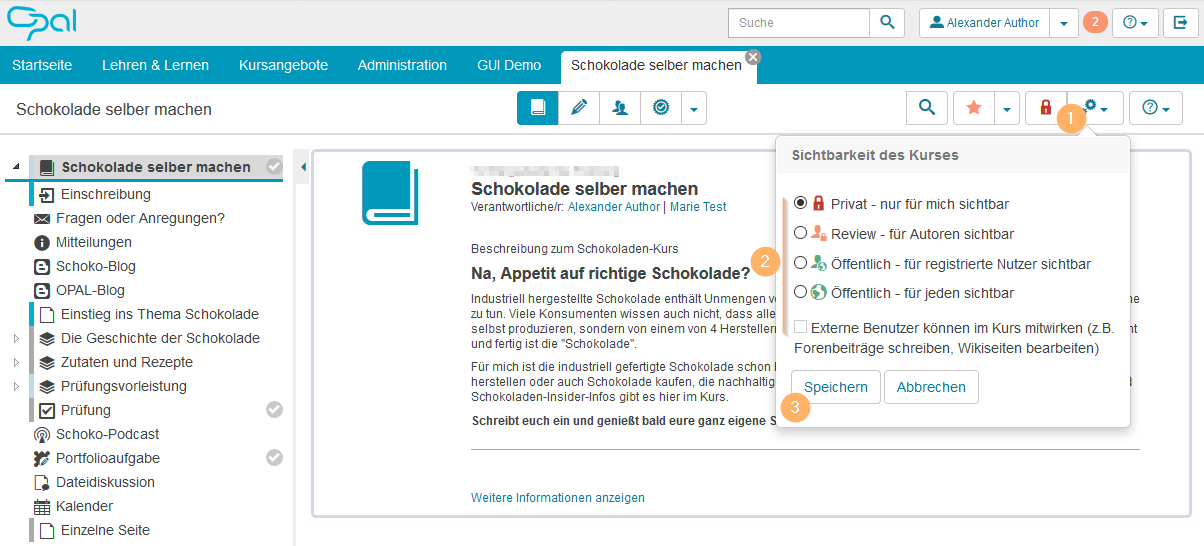
| Klicken Sie auf das Icon zur Sichtbarkeit. Ein neuer, noch nie publizierter Kurs zeigt das rote Schloss-Icon und ist damit für andere Autoren oder Lernende nicht sichtbar. Weitere Icons finden Sie im unteren Abschnitt Übersicht der Icons zum Publikationsstatus. | |
| Wählen Sie die Option Öffentlich - für registierte Nutzer sichtbar aus. |
| Bestätigen Sie Ihre Wahl mit Klick auf die Schaltfläche Speichern. |
| Der Kurs ist nun für alle Nutzer mit einem Nutzerkonto auf dieser Instanz sichtbar und in der Suche auffindbar. Sie können diese Sichtbarkeit jederzeit wieder beschränken oder auch den Zugang individuell einschränken. Ausführliche Informationen bietet der Abschnitt Freigabe von Kursen und Kursinhalten. |
In der Bearbeitungsansicht des Kurses (Kurseditor) ...
Um den Kurs für Lernende sichtbar zu machen, führen Sie bitte folgende Schritte durch:
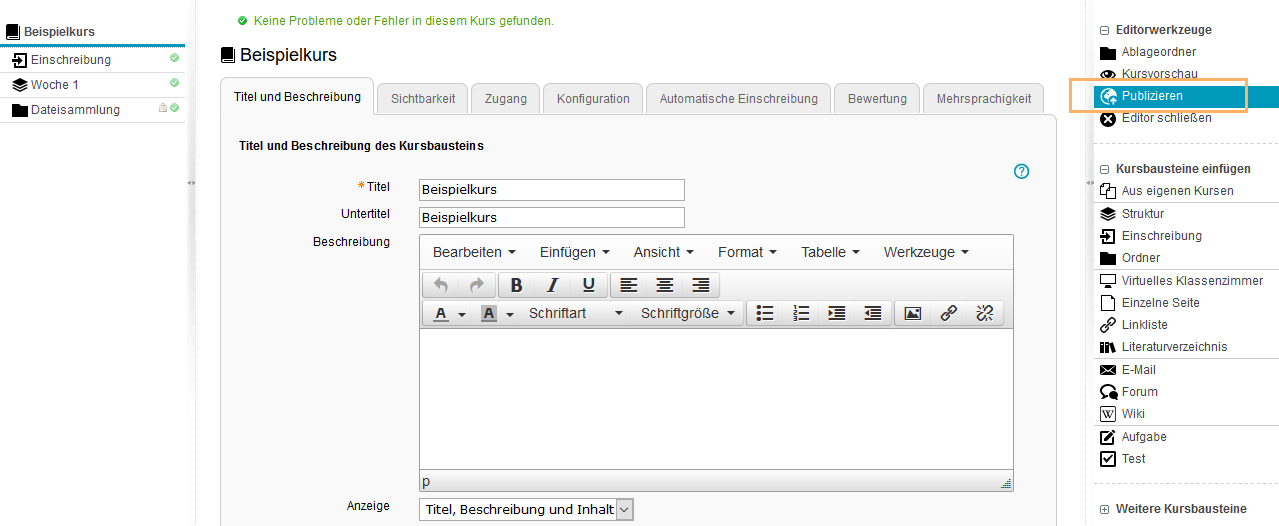
| Mit Klick auf den Eintrag Publizieren im Menü Editorwerkzeuge starten Sie den Assistenten. | |
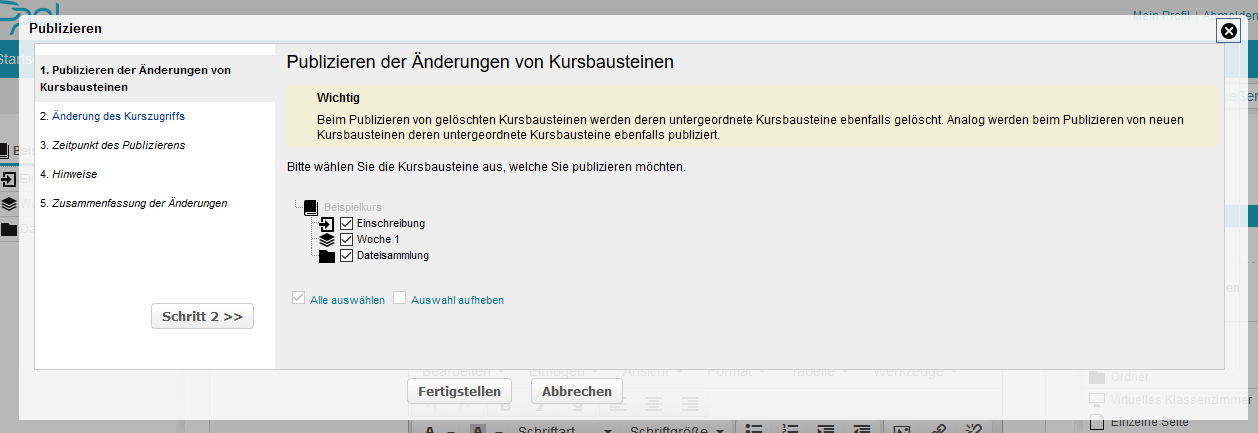
| Der 1. Schritt zeigt eine Übersicht der enthaltenen Kurselemente. Neue oder geänderte Kurselemente sind automatisch mit einem Häkchen markiert und werden in den weiteren Schritten publiziert. Wollen Sie einzelne Kurselemente noch nicht veröffentlichen, so entfernen Sie die Markierung in der entsprechenden Checkbox. Setzen Sie den Assistenten mit Klick auf den Button Schritt 2 >>> fort. | |
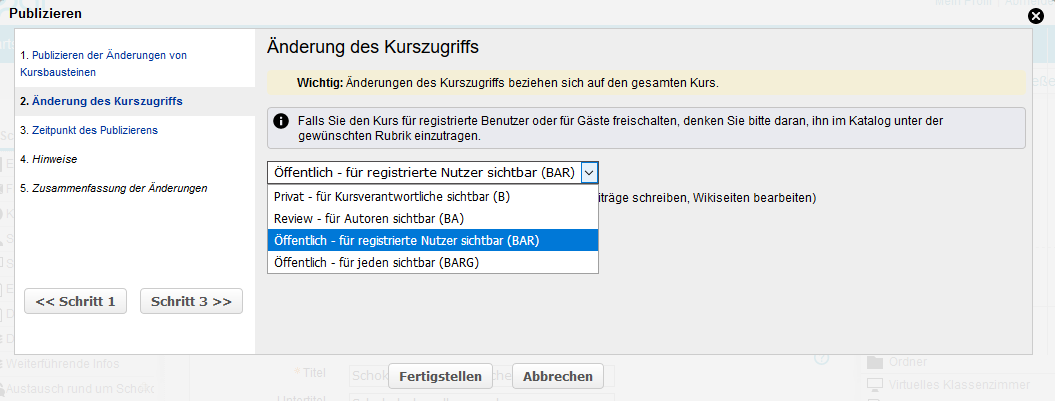
| Im 2. Schritt wählen Sie die Option Öffentlich - für registrierte Nutzer sichtbar aus. | |
| Folgen Sie den weiteren Schritten des Assistenten und schließen Sie Ihre Einstellungen mit Klick auf den Button Fertigstellen ab. | |
Weitere und ausführlicherer Informationen Zur Publikation bietet der Abschnitt Freigabe von Kursen und Kursinhalten.
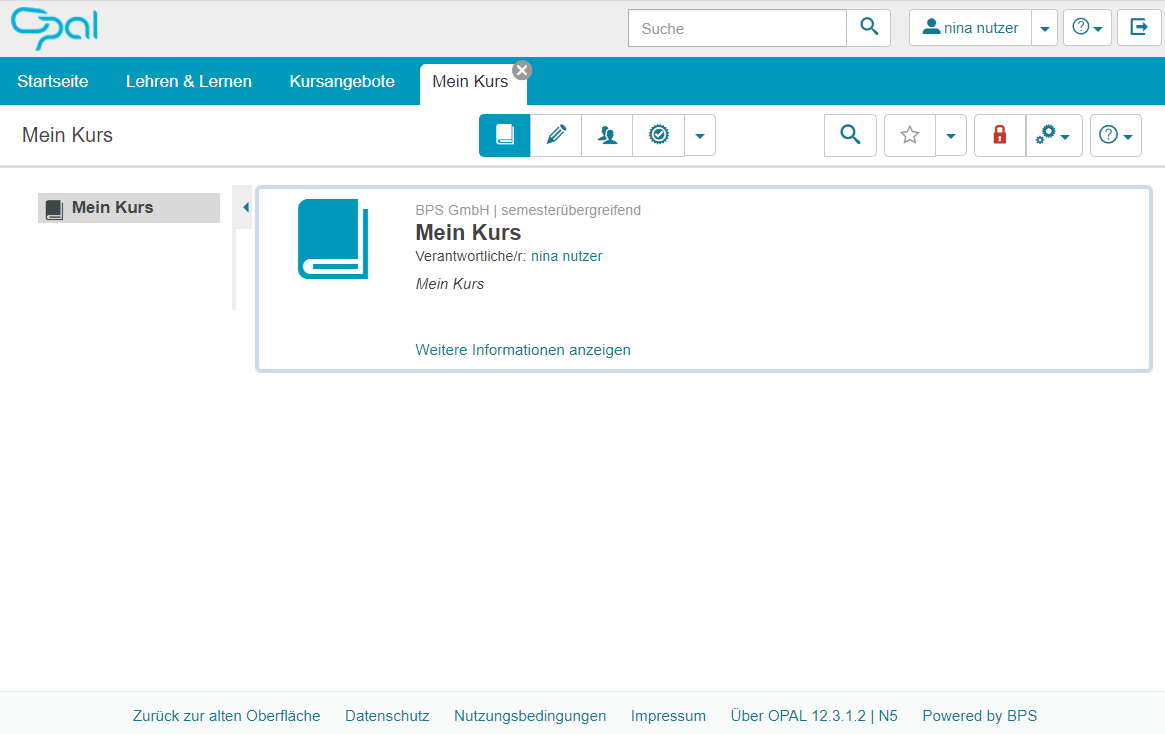
Ich weiß nicht welche Ansicht ich gerade offen habe ...
Entscheiden Sie anhand dieser Beispielansichten:
| Bearbeitungsansicht (Kurseditor) |
|---|
| |
Übersicht der Icons zum Publikationsstatus ...
Der allgemeine Zugriff auf Kurse und Lernressourcen wird über einen Publikationsstatus gesteuert. Dabei werden je nach Freigabe die Inhalte im System für bestimmte Nutzergruppen sichtbar.
Der allgemeine Zugriff kann durch Vergabe nachfolgender Statuskennzeichnungen im Kurseditor und in der Kursansicht angepasst werden:
| | | Zugriff für folgende Nutzergruppe |
|---|
| Privat - nur für mich sichtbar | | Nur Verantwortliche dieser Lernressource |
| Review - für Autoren sichtbar | | Verantwortliche und alle Personen, die im System Autorenrechte haben |
| Öffentlich - für registrierte Nutzer sichtbar | | Jeden der sich beim System anmelden kann |
| Öffentlich - für registrierte und zusätzlich externe Nutzer sichtbar | | Jeden der sich beim System anmelden kann und zusätzlich können externe Nutzer im Kurs arbeiten. |
| Öffentlich - für jeden sichtbar | | Weltweite Freischaltung, auch für den Zugriff durch anonyme Gäste |
| Öffentlich - für jeden und externe Nutzer sichtbar | | Weltweite Freischaltung, auch für den Zugriff durch anonyme Gäste und zusätzlich können externe Nutzer im Kurs arbeiten. |
Initialzugriff
Wird ein Kurs oder Lerninhalt erstellt, so ist der Zugriff zunächst auf den Verantwortlichen der Lernressource beschränkt (  bzw. B) und die Erstpublikation eines Kurses muss über den Kurseditor erfolgen.
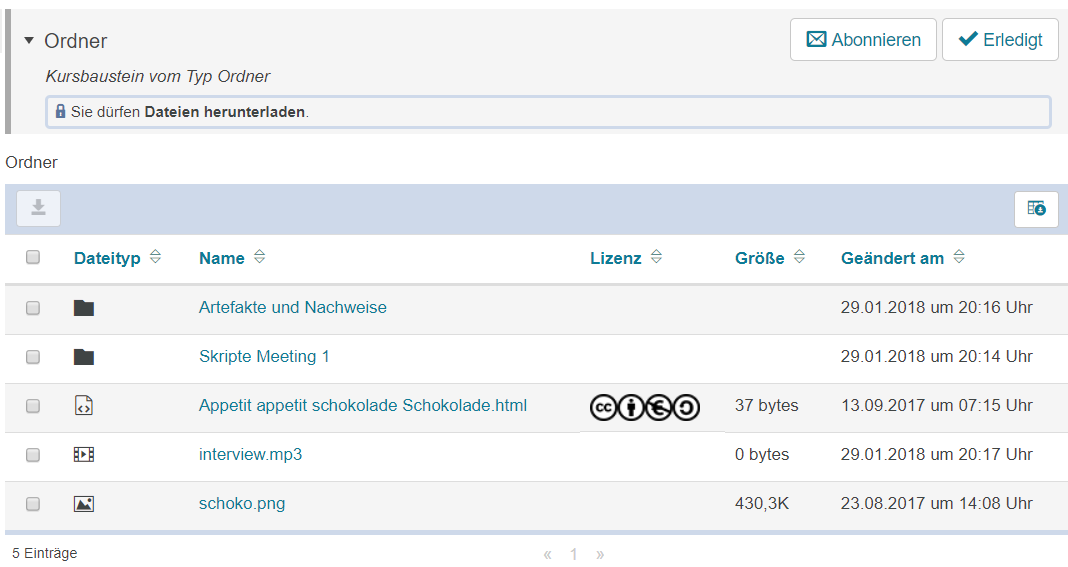
Inhalte im Ordner ablegen ...
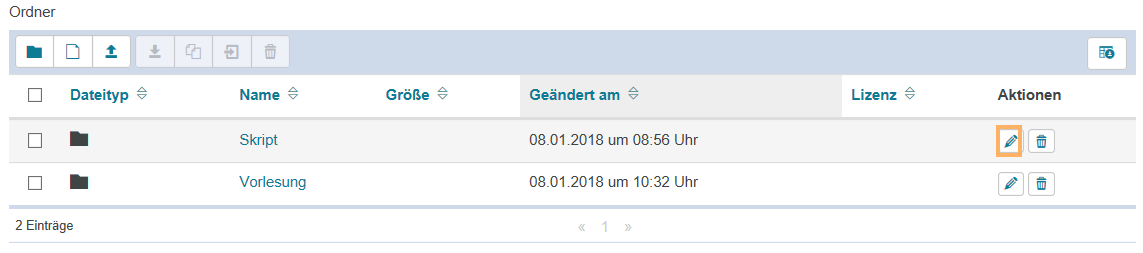
 Der Baustein Ordner erlaubt Anzeige, Download, Upload und Erstellung von Dateien sowie von Unterordnern zur Strukturierung in Kursen oder Gruppen. Die vorhandenen Unterordner und Dateien werden in einer tabellarischen Übersicht dargestellt. Neben dem Dateinamen erhalten Sie Informationen zum Dateityp, der Dateigröße sowie zum Änderungsdatum.
Nach dem Öffnen des Kursbausteins Ordner sehen Sie eine tabellarische Übersicht der in diesem Ordner vorhandenen Dateien und Unterordner. Diese Tabelle beinhaltet verschiedene Informationen zu den abgelegten Inhalten. Dazu zählen beispielsweise: - der Titel der bestehenden Inhalte,
- das Datum, an dem der betreffende Inhalt zuletzt geändert wurde
- die Lizenz (falls vorhanden)
- vorhandene Aktionen, die zum jeweiligen Ordner zur Verfügung stehen (abhängig von den Einstellungen des Kursautors)
InformationDer Kursverantwortliche kann für einen Ordner verschiedene Berechtigungen vergeben. Die verfügbaren Funktionen sind von diesen Einstellungen abhängig. | |
Als Nutzer stehen Ihnen in einem Kursbaustein Ordner folgende Funktionen zur Verfügung:
| | Sie können diesen Kursbaustein abonnieren, um über Änderungen automatisch informiert zu werden. "Wie geht das?"
Um einen Kursbaustein zu abonnieren, gehen Sie wie folgt vor: - Öffnen Sie den betreffenden Kurs und dann den Kursbaustein.
- Klicken Sie in der rechten oberen Ecke der Kursbausteinansicht auf den Button Abonnieren.
| Beispiel zu einem Kursbaustein Dateidiskussion: 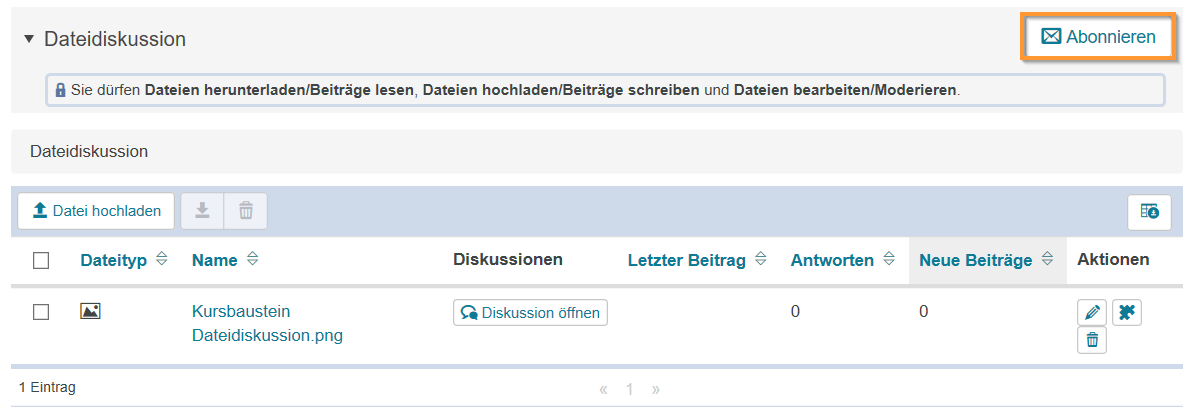
| 3. Haben Sie den Kursbaustein bereits abonniert, sehen Sie den Button Abo beenden. Klicken Sie auf diesen Button, wenn Sie das bestehende Abonnement aufheben wollen. | |
Weitere Informationen zu den allgemeinen Konfigurationsmöglichkeiten zum Empfang dieser Benachrichtigungen enthält die Seite Abonnements und Benachrichtigungen. |
| | InformationManueller Fortschritt Wurde für einen Kurs die Fortschrittsanzeige aktiviert, kann dieser Bausteintyp mit der Bestätigung durch Klick auf den Button Erledigt als abgeschlossen gekennzeichnet werden. Er erhält dann eine entsprechende Farbmarkierung im Kursmenü und im Detailbereich vor dem Titel des Bausteins. |
| | Eine einzelne Datei können Sie mit Klick auf den Dateititel herunterladen.
Download mehrerer Dateien
Für den Download mehrere Dateien markieren Sie die gewünschten Inhalte in dem Sie die Checkbox vor dem Inhalt markieren. Wählen Sie anschließend diesen Button. Es startet der automatische Download und legt die gewählten Inhalte als .zip Archiv auf Ihrem Rechner ab. Öffnen Sie den betreffenden Kursbaustein. | | Wählen Sie die herunterzuladenden Dateien aus, indem Sie ein Häkchen vor die jeweiligen Dateien oder Ordner setzen. | Klicken Sie nun auf das Symbol Datei herunterladen. Der Download startet nun automatisch. InformationBeinhaltet die Tabelle sehr viele Einträge, werden diese auf mehreren Seiten angezeigt. Beim Download von markierten Einträgen werden jedoch nur Einträge der aktuell angezeigten Seite heruntergeladen. Um Einträge von mehreren Seiten gemeinsam herunterzuladen, wählen Sie zunächst die Funktion alle anzeigen unter der Tabelle, um alle vorhandenen Einträge auf einer Seite anzeigen zu lassen. Markieren Sie anschließend wie beschrieben die gewünschten Einträge und klicken auf das Symbol Datei herunterladen. | |
|
| | Dies ist eine optionale Funktion. Sie ist abhängig vom Dateityp und steht nur zur Verfügung, wenn sie für Ihre Institution konfiguriert wurde. Mit Klick auf das Icon startet ein Assistent, der einen Druckauftrag bei einer Druckerei erzeugt. Weitere Informationen enthalten die Dialogseiten des Assistenten. |
InformationEin Kursverantwortlicher kann Ihnen erweiterte Berechtigungen vergeben. Dann sind zusätzliche Funktionen wie beispielsweise das Erstellen und Bearbeiten von Ordnern oder Inhalten möglich. Informationen zu diesen Funktionen finden Sie im Abschnitt Funktionen in der Kursansicht.
Im Kurseditor stehen Ihnen folgende Funktionen zur Verfügung:
|
Erläuterung zum Hinzufügen eines Kursbausteins hinzufügen ...
Um einen Kursbaustein in Ihren Kurs einzubinden, gehen Sie wie folgt vor: | Schritte | Screenshot |
|---|
Öffnen Sie den Kurs, den Sie bearbeiten möchten. Nutzen Sie das Stift-Symbol im oberen Bereich des Kurses, um in die Editor-Ansicht zu gelangen. | | Wählen Sie aus den angebotenen Kursbausteinen im Menü auf der rechten Seite mit einem Klick den gewünschten Kursbaustein aus. | | Im Dialog bestimmen Sie die Position des neuen Kursbausteins in der Kursstruktur (linkes Navigationsfeld). Alle verfügbaren Einfügepositionen sind dabei mit einem Einfügesymbol gekennzeichnet. Damit der neue Baustein in eine bestehende Unterstruktur eingefügt werden kann, muss diese zuvor geöffnet werden. Klicken Sie dazu auf das Dreiecksymbol vor dem Titel der Struktur. Der Bereich öffnet sich und gibt auch dort Einfügesymbole an den verfügbaren Stellen aus. Klicken Sie an der gewünschten Position für den neuen Baustein auf das Einfügesymbol. Der gewählte Bereich wird farbig hinterlegt. Bestätigen Sie Ihre Wahl mit Klick auf die Schaltfläche Kursbaustein einfügen. | | Der Baustein wird an die ausgewählte Stelle in die Kursstruktur im linken Bereich eingefügt. Je nach Kursbaustein müssen Sie weitere Konfigurationen vornehmen oder Inhalte des Kursbausteins hinzufügen, um die Konfiguration vollständig abzuschließen. Damit Ihre Änderungen wirksam werden und der Kursbaustein in der Kursansicht für die Teilnehmer verfügbar ist, müssen Sie den Kurs publizieren. | |
|
| Im Kurseditor sehen Sie folgende Konfigurationstabs: |
Konfigurationsoptionen im Tab Titel und Beschreibung aufklappen...

| |
|---|
| Sie müssen dem Kursbaustein einen Titel geben. Dieser darf maximal 100 Zeichen enthalten. Alle Sonderzeichen und Ziffern sind erlaubt. Der Titel erscheint im Navigationsmenü des Kurses sowie als Überschrift im Inhaltsbereich.
Änderungen zum Titel des ersten Kurselements, dem sogenannten Kurshauptknoten ......
Ändern Sie den Titel des ersten Kurselements, wird der neue Inhalt nur für den Kurshauptknoten übernommen und anschließend im geöffneten Kurs angezeigt. Wollen Sie stattdessen den Kurstitel selbst oder die Kursbeschreibung anpassen, ändern Sie dies über den Bereich Weitere Einstellungen zum Kurs. | | Sie können dem Kursbaustein einen Untertitel mit maximal 255 Zeichen geben. Alle Sonderzeichen und Ziffern sind erlaubt. Der Titel erscheint als Tooltip im Navigationsmenü sowie - wenn ausgewählt und entsprechend konfiguriert - als Untertitel im Inhaltsbereich. | | Sie können hier den Kursbaustein näher beschreiben. Die Beschreibung erscheint unter dem Titel im Inhaltsbereich. InformationDieser Zusatztext wird beim Öffnen des Kursbausteins abhängig von der Einstellung im Element Anzeige beim Nutzer dargestellt. Sieht der Nutzer den Zusatztext kann er ihn selbst auf- und zuklappen und damit direkt sehen oder ausblenden. | | Wählen Sie welche Informationen zum Kursbaustein in der Kursansicht angezeigt werden sollen: nur der Inhalt oder zum Beispiel auch der Titel und die Beschreibung. Alle Kursbausteine sind mit einer sinnvollen Voreinstellung belegt, meist mit der Einstellung Titel, Beschreibung und Inhalt. Diese können Sie entsprechend der Auswahlmöglichkeiten zu jedem Kursbaustein anpassen. | Link auf diesen Kursbaustein setzen | Jeder Kursbaustein ist über feste Link-Adressen erreichbar. Dazu wird jedem Kursbaustein jeweils eine interne sowie eine externe URL zugeordnet. Diese Direktlinks zu konkreten Bausteinen können Sie innerhalb von Kursen verwenden oder beispielsweise an Lernende weitergeben. Die URLs befinden sich unterhalb von Titel und Beschreibung des Bausteins und erscheinen, wenn Sie Link auf dieses Kursbaustein setzen wählen. - Externer Link: Um von einem anderen Kurs oder von außerhalb der Lernplattform auf diesen Kursbaustein zu verlinken, können Sie den externen Link verwenden und beispielsweise als href-Attribut in der gewünschten HTML-Seite einsetzen.
- Interner Link: Um von einem Kursbaustein innerhalb eines Kurses auf einen anderen zu verlinken, können Sie den internen Link als href-Attribut in der gewünschten HTML-Seite einsetzen.
| | Die ID-Nummer des Kursbausteins (unten rechts) benötigen Sie z. B. wenn Sie den Expertenmodus im Tab Sichtbarkeit oder Zugang nutzen möchten. |
|
|---|
| Sichtbarkeit | Schränken Sie hier bei Bedarf die Sichtbarkeit des Kursbausteins ein. Weitere Informationen enthält der Abschnitt Sichtbarkeit und Zugriff. |
|---|
| Zugang | Schränken Sie hier bei Bedarf den Zugang zum Kursbausteins ein. Weitere Informationen enthält der Abschnitt Sichtbarkeit und Zugriff. |
|---|
| In diesem Tab haben Sie die Möglichkeit Dateien hochzuladen und die Quota eines Ordners anzupassen. Dies wird ausführlich im nachfolgenden Abschnitt Spezielle Konfigurations-Einstellungen erläutert. |
|---|
| Zu einzelnen Kursbausteinbereichen können in diesem Tab verschiedene Übersetzungen hinterlegt werden. |
|---|
|
| Im Tab Ordnerkonfiguration haben Sie folgende Möglichkeiten: | An dieser Stelle können Sie Inhalte dem Kursbaustein zuordnen. Mit Klick auf den Button öffnet sich eine einfache Editoransicht des Ordners. Die dort verfügbaren Funktionen können Sie alternativ auch direkt in der Kursansicht nutzen. Weitere Informationen zur Nutzung der einfachen Editoransicht enthält die Seite Folder Functions (Simple Editor View). | |
InformationPersonen mit erweiterten Rechten können an dieser Stelle die verfügbare Speicherplatzgröße des Ordners (Quota) anpassen. |
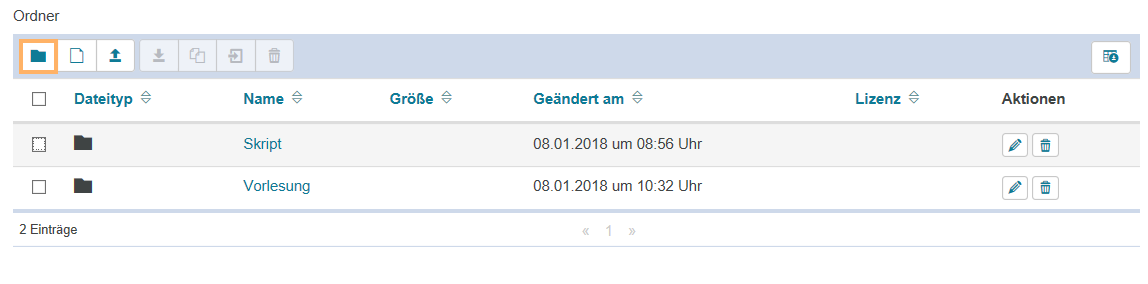
In der Kursansicht stehen Ihnen alle für Nutzer verfügbaren Bearbeitungsoptionen offen. Zusätzlich stehen Ihnen alle Funktionen zur Verfügung, die Sie für das Hinzufügen und Verwalten der Inhalte im Ordner benötigen. | |
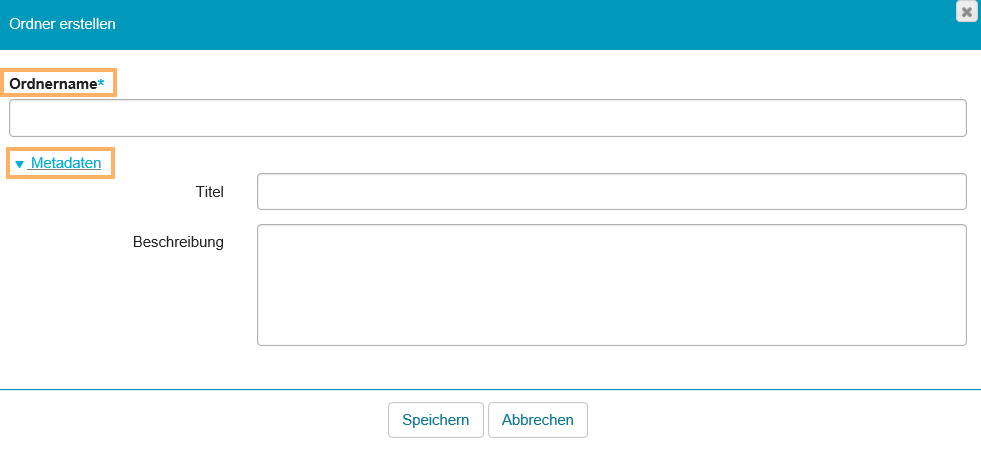
| | Mit Klick auf diese Schaltfläche haben Sie die Möglichkeit, einen neuen Ordner zu erstellen.
Wie geht das?
Öffnen Sie den betreffenden Kursbaustein. | | Klicken Sie auf das Symbol Neuer Ordner. | Geben Sie einen validen Ordnernamen an und fügen Sie bei Bedarf Metadaten hinzu. Nicht erlaubte Zeichen beim Anlegen eines Ordners sind beispielsweise: " / ? ` ; : * < und >. | | Klicken Sie auf die Schaltfläche Speichern. | |
|
| | Mit dieser Option haben Sie die Möglichkeit, eine neue Datei hinzuzufügen.
Wie geht das?
Öffnen Sie den betreffenden Kursbaustein. Klicken Sie auf das Symbol Neue Datei. | | Fügen Sie einen Dateinamen hinzu und geben Sie optional Inhalt ein. | | Ordnen Sie bei Bedarf eine Lizenz zu und fügen Sie Metadaten ein. | | Klicken Sie anschließend auf Speichern, um den Erstellvorgang abzuschließen. | |
|
| | An dieser Stelle haben Sie die Möglichkeit, eine bestehende Datei von Ihrem PC hochzuladen.
Wie geht das?
Öffnen Sie den betreffenden Kursbaustein. Klicken Sie auf das Symbol Datei hochladen. | | Klicken Sie auf die Schaltfläche Dateien auswählen, um eine bestehende Datei von ihrem PC hochzuladen oder ziehen Sie per Drag-and-Drop die gewünschten Dateien in das Uploadfeld. | | Bestätigen Sie das Hochladen mit der Schaltfläche Upload. | |
|
| Gewählte Dateien als ZIP-Archiv herunterladen | Mit dieser Option haben Sie die Möglichkeit, gewählte Dateien als ZIP-Archiv herunterzuladen.
Wie geht das?
Öffnen Sie den betreffenden Kursbaustein. | | Wählen Sie die herunterzuladenden Dateien aus, indem Sie ein Häkchen vor die jeweiligen Dateien oder Ordner setzen. | Klicken Sie nun auf das Symbol Datei herunterladen. Der Download startet nun automatisch. InformationBeinhaltet die Tabelle sehr viele Einträge, werden diese auf mehreren Seiten angezeigt. Beim Download von markierten Einträgen werden jedoch nur Einträge der aktuell angezeigten Seite heruntergeladen. Um Einträge von mehreren Seiten gemeinsam herunterzuladen, wählen Sie zunächst die Funktion alle anzeigen unter der Tabelle, um alle vorhandenen Einträge auf einer Seite anzeigen zu lassen. Markieren Sie anschließend wie beschrieben die gewünschten Einträge und klicken auf das Symbol Datei herunterladen. | |
|
| | Mit Klick auf diese Schaltfläche haben Sie die Möglichkeit, einen Inhalt zu kopieren.
Wie geht das?
Öffnen Sie den betreffenden Kursbaustein. Wählen Sie die zu kopierenden Dateien oder Ordner aus, indem Sie ein Häkchen vor die jeweiligen Einträge setzen. | | Klicken Sie nun auf das Symbol Kopieren. | | Wählen Sie anschließend aus, wohin die Datei kopiert werden soll und bestätigen Sie den Vorgang mit der Schaltfläche Dateien kopieren. | |
|
| | Mit dieser Funktion haben Sie die Möglichkeit, einen Inhalt innerhalb der vorhandenen Struktur des Ordner-Bausteins zu verschieben.
Wie geht das?
Öffnen Sie den betreffenden Kursbaustein. Wählen Sie die zu verschiebenden Dateien oder Ordner aus, indem Sie ein Häkchen vor die jeweilige Eintrag setzen. | | Klicken Sie nun auf das Symbol Verschieben. | | Wählen Sie anschließend aus, wohin die Elemente verschoben werden sollen und bestätigen Sie den Vorgang mit der Schaltfläche Dateien verschieben. | |
|
| | Mit Klick auf diese Schaltfläche haben Sie die Möglichkeit, einen Inhalt zu löschen.
Wie geht das?
Öffnen Sie den betreffenden Kursbaustein. Wählen Sie die zu löschenden Dateien oder Ordner aus, indem Sie ein Häkchen vor die jeweiligen Elemente setzen. | | Klicken Sie auf das Symbol Löschen. | | Bestätigen Sie die Sicherheitsnachfrage durch Klick auf den Button Löschen. | |
|
| | Mit dieser Funktion können Sie Inhalte bearbeiten. Abhängig von der ausgewählten Ressource stehen Ihnen unterschiedliche Bearbeitungsfunktionen zur Verfügung. Dazu gehört beispielsweise die Vergabe und Zuordnung von Metadaten. Weitere Informationen zum Thema Metadaten in OPAL finden Sie auf der Seite Metadaten.
Wie geht das?
Öffnen Sie den betreffenden Kursbaustein. Klicken Sie auf das Symbol Bearbeiten hinter dem betreffenden Inhalt. | | Nehmen Sie nun Ihre gewünschten Änderungen vor und klicken Sie anschließend auf die Schaltfläche Speichern. | |
|
| | Laden Sie den Tabelleninhalt als Datei herunter. Es wird das Dateiformat verwendet, welches sie als Standardformat in den Systemeinstellungen hinterlegt haben. |
InformationDie Berechtigung zum Hinzufügen und Verwalten der Inhalte im Ordner können Sie über die Zugangsrechte zum Kursbaustein auch an andere Nutzer freigeben.
Das Makro [layout-section] ist ein eigenständiges Makro und kann nicht inline verwendet werden. Klicke auf diese Nachricht, um Details zu erfahren.
Dieses Makro generiert eigenständige Inhalte. Als Konsequenz müssen Sie sicherstellen, dass Sie eine Syntax verwenden, die Ihr Makro von dem Inhalt davor und danach trennt, sodass es in einer eigenen Zeile steht. Zum Beispiel bedeutet dies in XWiki Syntax 2.0+, dass Sie 2 Zeilenumbrüche haben, die Ihr Makro von dem Inhalt davor und danach trennen.
{{/layout}}