Course Elements
Overview of course element types
Different types of course elements are provided within the learning platform. By using these elements, you can create individual courses according to your desired scenario.


Test and evaluate knowledge


Add course element
To integrate a course element into your course, proceed as follows:
1 | Open the course you want to edit. Use the pencil icon at the top of the page to open the editing mode. |
|
2 | Select the course element you require by clicking on it from the list of available course elements in the menu on the right-hand side. |
|
3 | In the dialog box, you can define the position of the new course element within your course structure (left navigation pane). The available positions are marked with an insert icon. To insert the new course element into an existing sub-structure, you must first open it by clicking on the small triangle icon next to the structure's title. The area will open, and you will again see insert icons at the available positions. Click on the insert icon at the desired position within the structure. The selected area will be highlighted. Confirm your choice with Insert course element. |
|
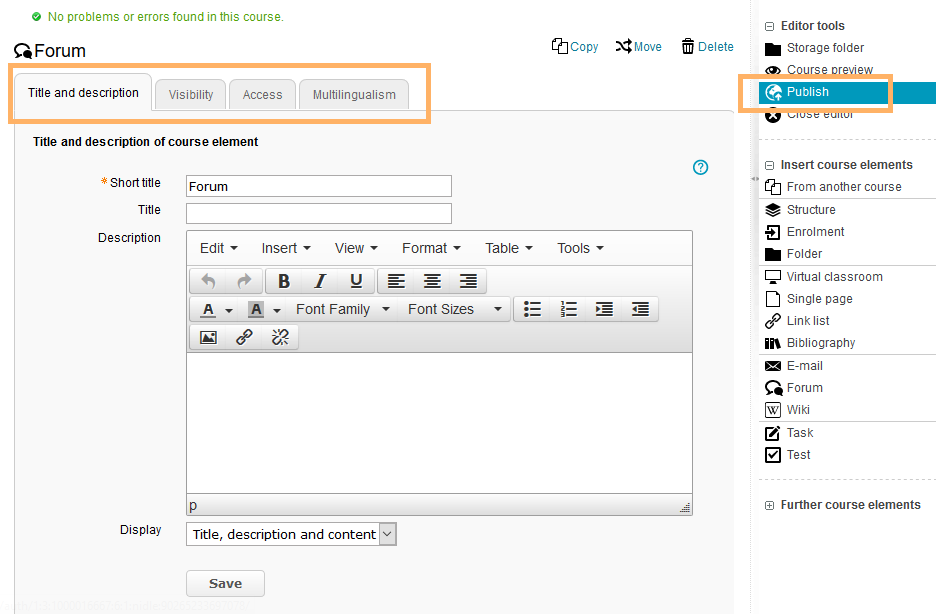
4 | The element will be inserted into the course structure at the selected position. Depending on the course element, you have to make additional configurations or add content in order to complete the configuration. For these changes to take effect, you must publish the course. The course element will then also become available in the course view. |
|


Edit course element
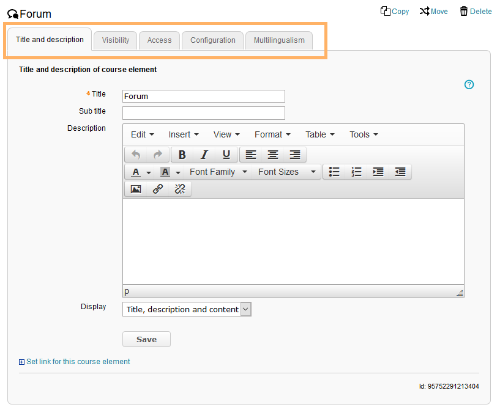
In the course editor, the different setting options of each course element are structured with tabs. The first three tabs are the same for each course element: Title and description, Visibility, and Access. All other tabs contain specific configuration options of the respective elements, e. g. Configuration, Overview, or Assessment.
Title and description
Visibility and access
In the tab Visibility, you can define under which conditions the course element will appear in the navigation menu of the course. If you do not make any changes, the link of the course element will be visible to all course participants at any time. Note that the visibility settings may overwrite the access settings.
The tab Access defines under which conditions the content of a course element will be displayed in the course area. If you do not make any changes, the course element as well as its functions and content will be accessible for course participants. For some course elements, however, not all functions are enabled for all users, e. g. users are not allowed to moderate in a forum. Further information is provided in the documentation for the individual course elements.
If the course element is visible but access is restricted, the user will receive a general note. Further information for users can be provided in the text field. Via the two checkboxes below the text field, you can further define whether or not this note or information on the course supervisor will be displayed to the user.
Further information can be found in the chapter Visibility and access: Access rights in the expert mode.
Copy and move course element
To copy or move a course element, proceed as follows:
1 | Open the element you wish to edit. |
|
2 | Select Copy or Move from the top right corner of the page. | |
3 | In the dialogue window, you can define the position to which the course element is supposed to be copied or moved. The option Copy allows for the definition of more than only one position so that the element can be copied multiple times. | |
4 | Click on Insert course element to complete the process. | |
5 | To implement the changes and make the course element accessible for the participants, publish the course. |

Delete course element
Course element status
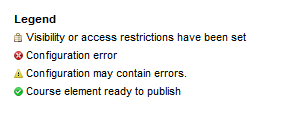
Next to each course element, symbols may point to the status of the element.
Course element status examples: Course element Enrolment: The red x-symbol indicates that a configuration error has occurred, i. e. certain pieces of information or content are missing and need to be added. In most cases, these errors can be traced to the configuration of the related learning group. Course element Bibliography: The lock-symbol points to restrictions concerning the access and/or visibility of this course element. The green check mark symbolises that a course element is ready to be published. After the element is published, the symbol disappears. Thus, you will always have an additional overview of course elements that contain changes which have not yet been published. Course element Single Page: In the case of this course element, some information is still missing. Additionally, the element is subject to restrictions for visibility and access. The course element cannot be published and is thus not visible to any user in the course view. Course element Folder: This element has already been published and contains both visibility and access restrictions. |
|